


Chocolate Toasted Hazelnut Cheesecake
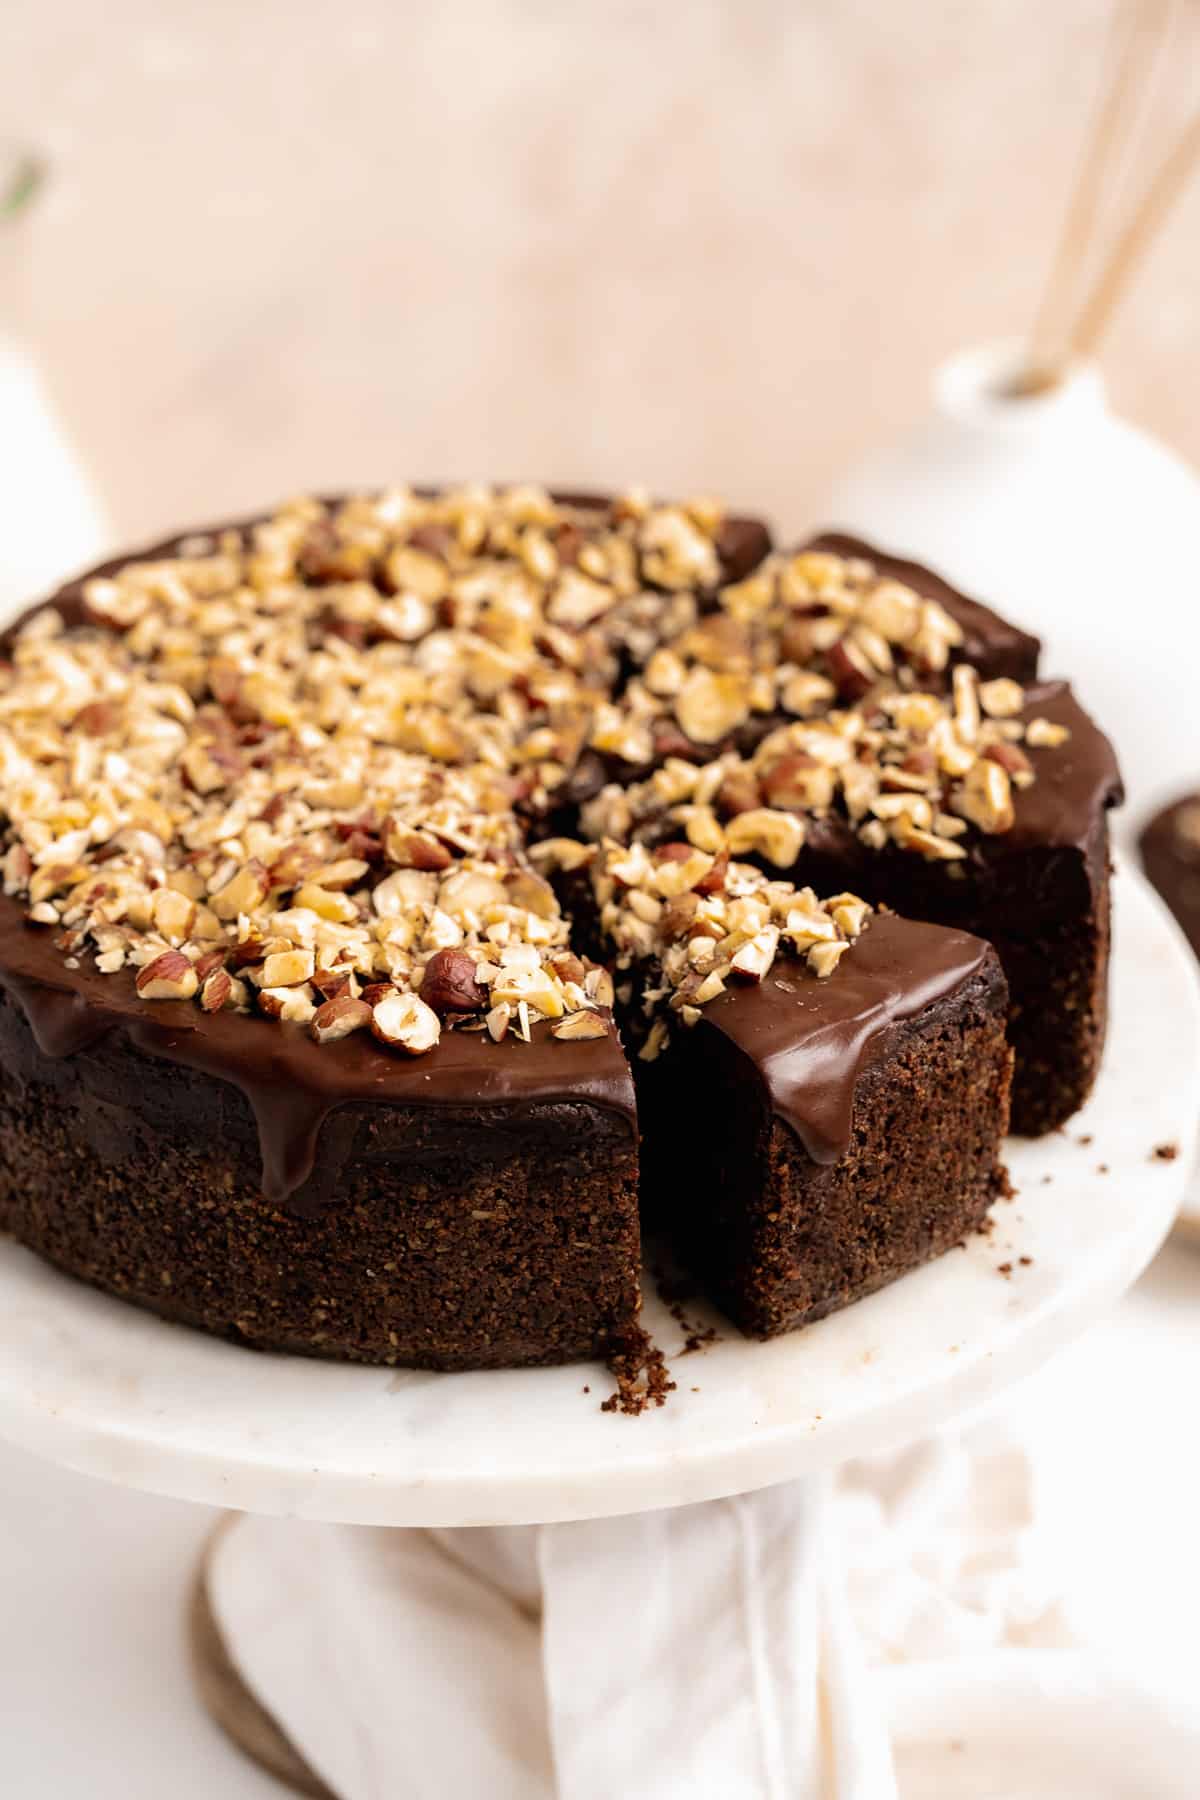
This vegan chocolate cheesecake has some serious nutella vibes with a creamy chocolate filling and a crispy toasted hazelnut cocoa crust. With every bite you'll be sent off into chocolate heaven! It's baked to perfection using natural ingredients but without tofu or cashews. Topped off with a deep chocolate ganache layer, this cheesecake is sure to be a chocolate lovers dream!
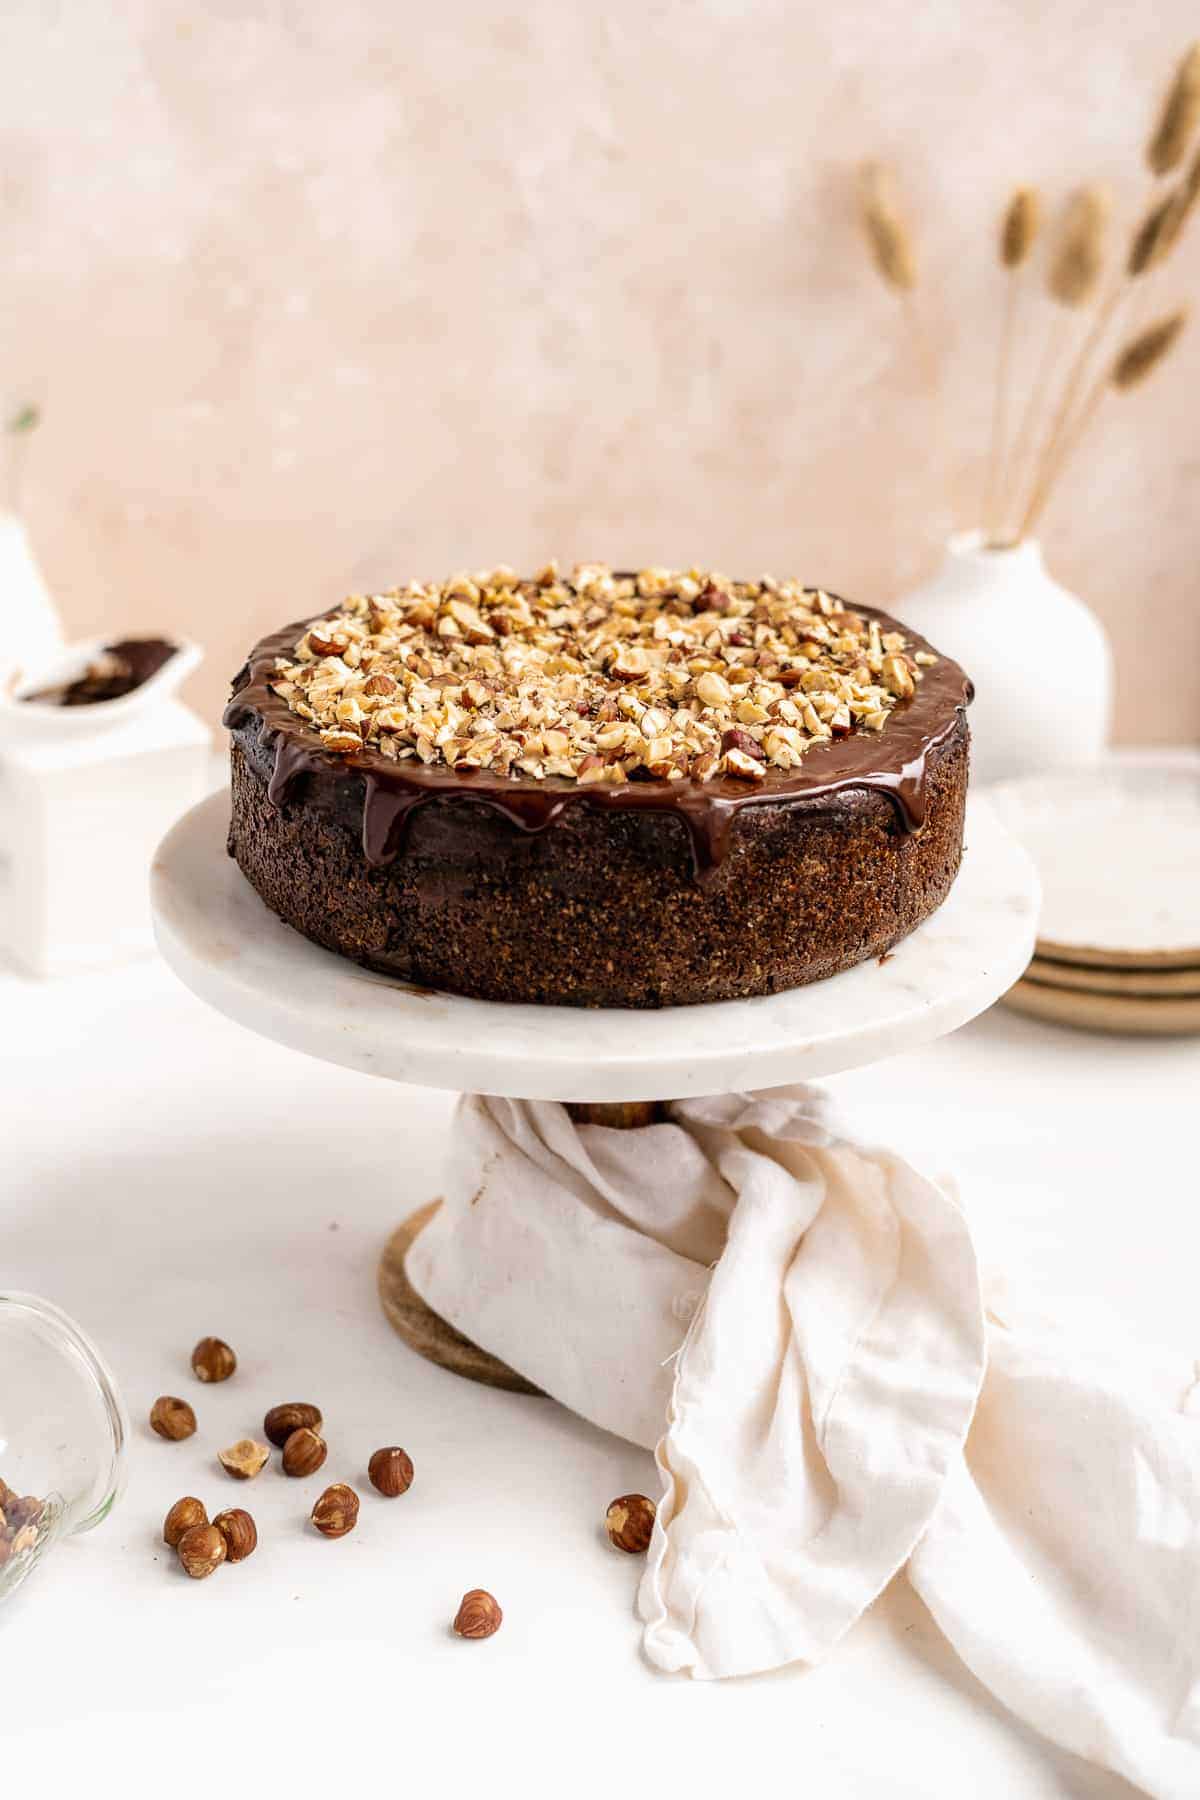
Chocolate Vegan Cheesecake with Hazelnut Crust
As a huge chocolate fan myself, this cheesecake is right up my ally. It's decadent and dreamy with a swoon-worthy silky texture. If you're into nutella, aka chocolate and hazelnuts, this cheesecake is calling your name.
Best part about it though, it's quite easy to make (for a cheesecake). You won't find any tofu or soaked cashews in here. We like to keep it easy peezy and simple!
Preparing to make a homemade cheesecake
I know it sounds weird to say that you need to prepare to bake something but trust me, you need be fully prepared to make a cheesecake. Here's how to best set yourself up to bake a FAB gluten-free and dairy-free chocolate cheesecake:
- First, set your cream cheese out so that it comes to room temperature. This is key to making a cheesecake. You want your cream cheese to be soft to the touch so that it creates a luscious creamy texture when mixed.
- Similar to above, make sure your coconut milk is also at room temperature. This means pulling it out of the cabinet because sometimes if the can gets too warm, the cream will melt and the proportion of coconut cream to water will be a little off. Leave the can on the counter for a bit so it comes back to room temperature.
- Prepare a water bath. If you don't know what a water bath is, check out this post where I do into more detail. You'll want to do this step after you roast the hazelnuts. To make the bath, place a large baking dish in the bottom rack of the oven as it preheats. Then bring about 6 cups of water to a boil. Once it's boiling, pull the bottom rack of the oven out and pour the water into the dish. Shut the oven door quickly so as to not let most of the heat out.
How to make this chocolate vegan cheesecake
After you bring your ingredients to room temperature and have what you need to prepare the water bath, we're ready to bake a cheesecake!
Step 1 : Roast the hazelnuts
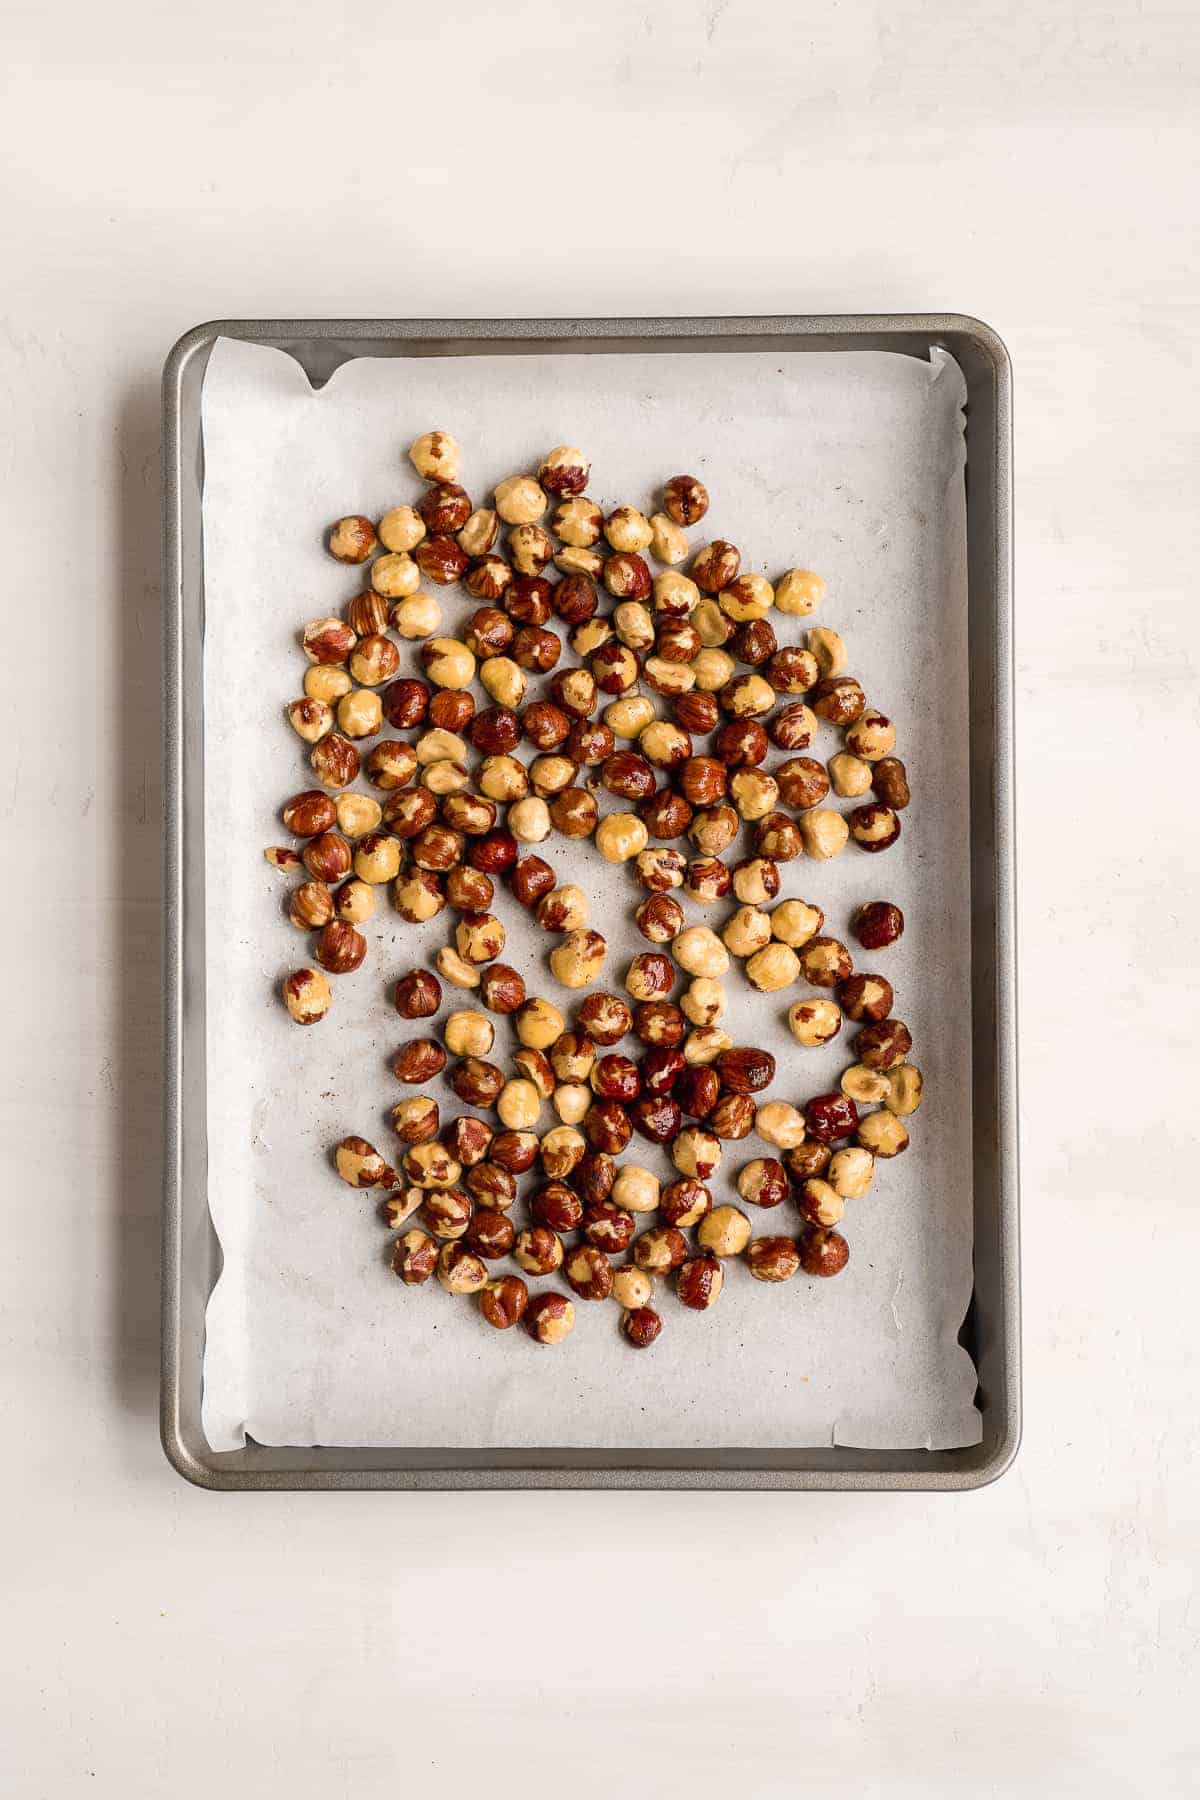
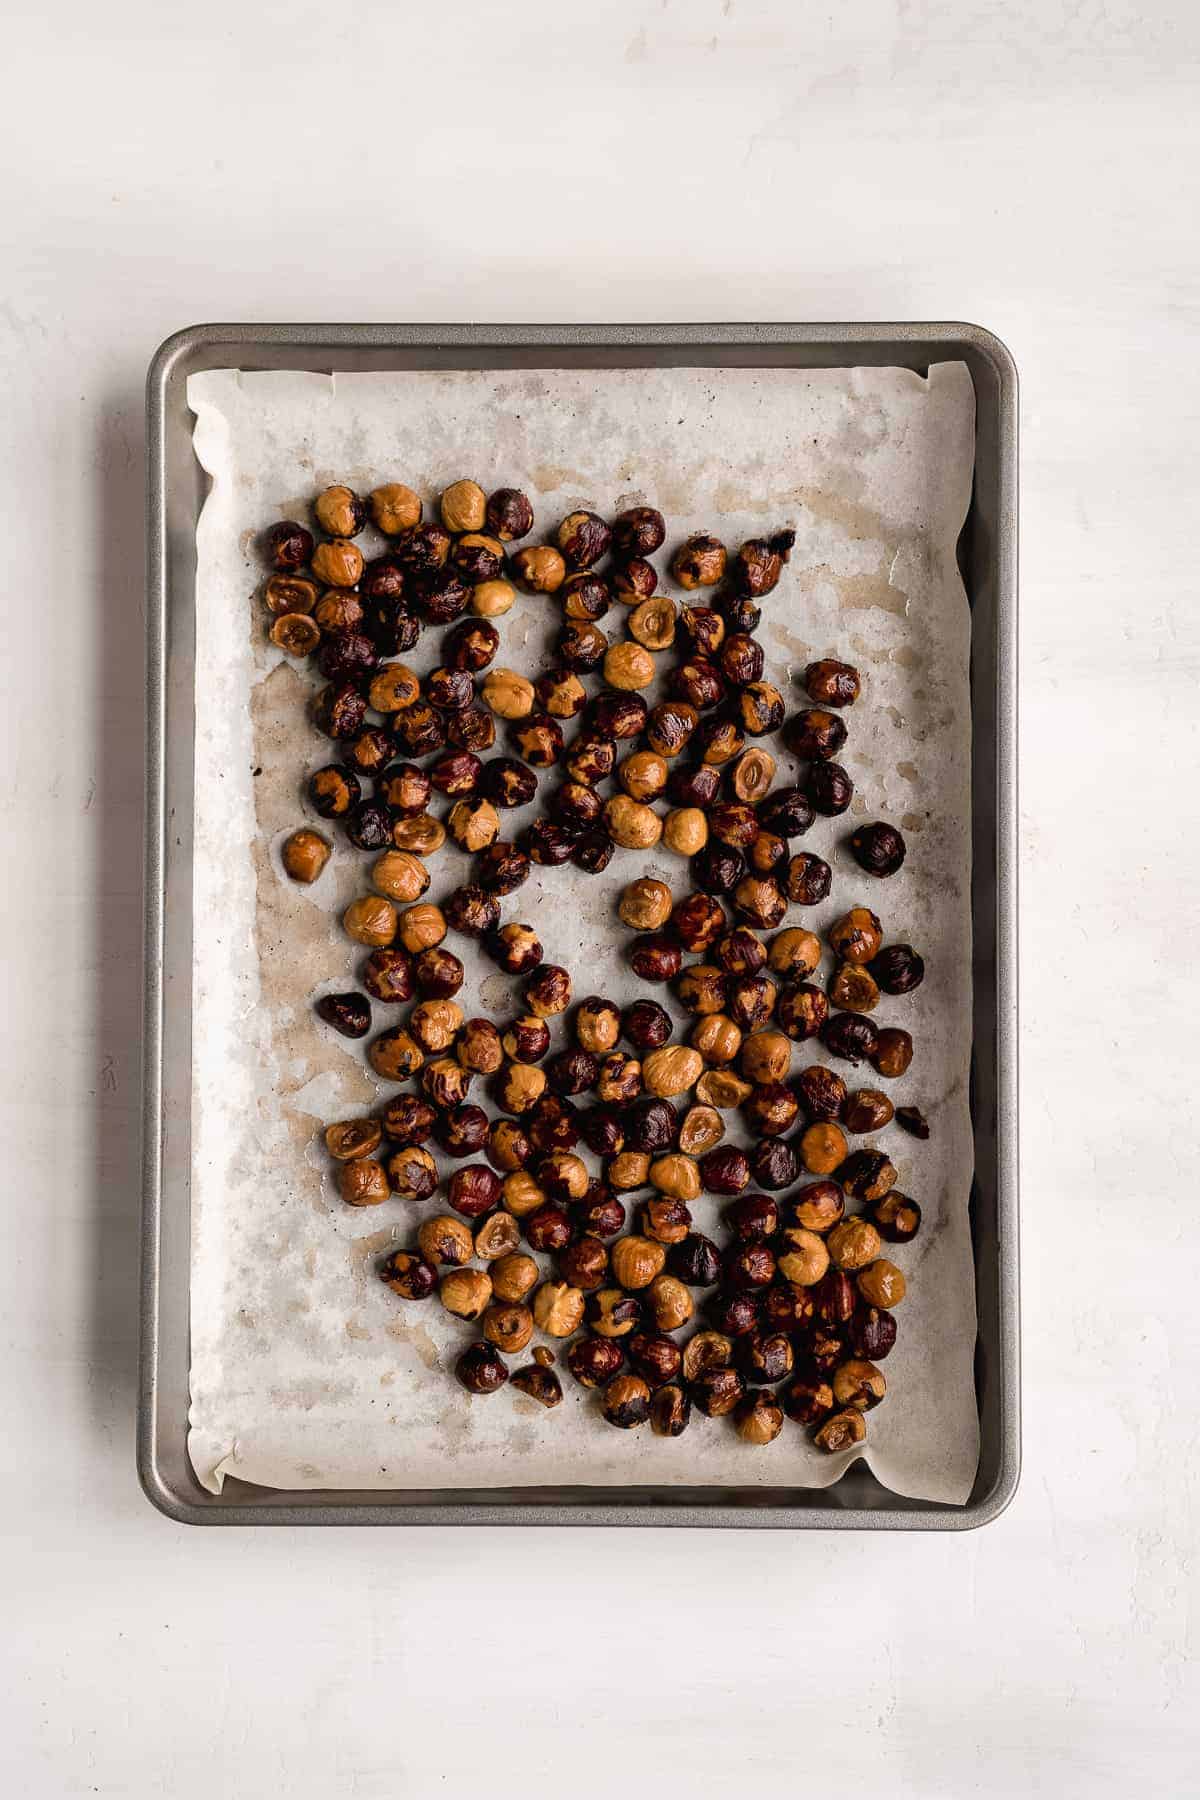
First thing is first, roast those delicious hazelnuts! Simply toss the nuts in a little coconut oil and roast them in the oven until they turn a golden/darker brown. You'll want to watch the oven carefully as they can burn quickly if not attended. I typically to roast mine for anywhere from 10 - 14 minutes.
Prepare the water bath
Once the hazelnuts are out of the oven, you'll want to begin the water bath process. Start by boiling 6 cups of water in a pot and placing the baking dish in bottom rack of the oven. Once the water starts to boil, pour it into the baking dish in the oven.
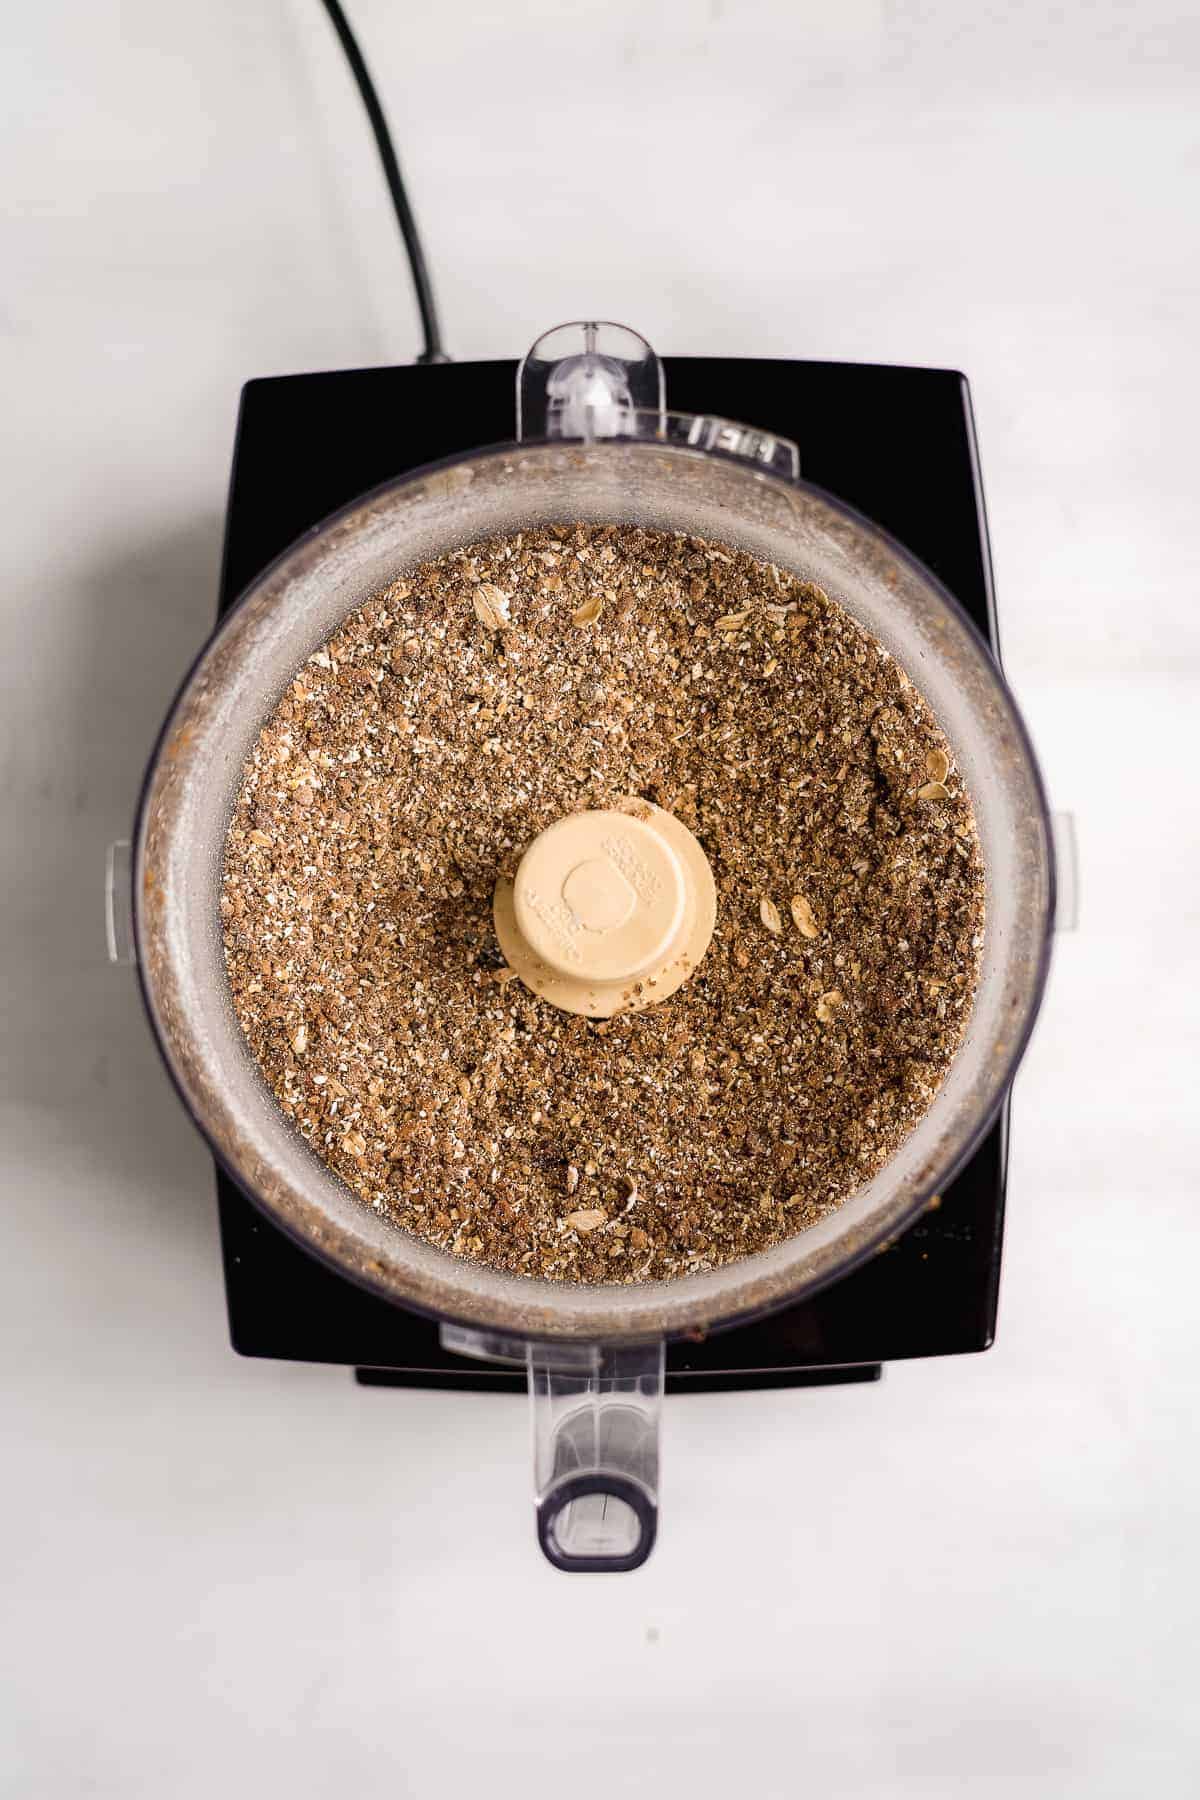
Step 2 : Pulse the nuts in a food processor
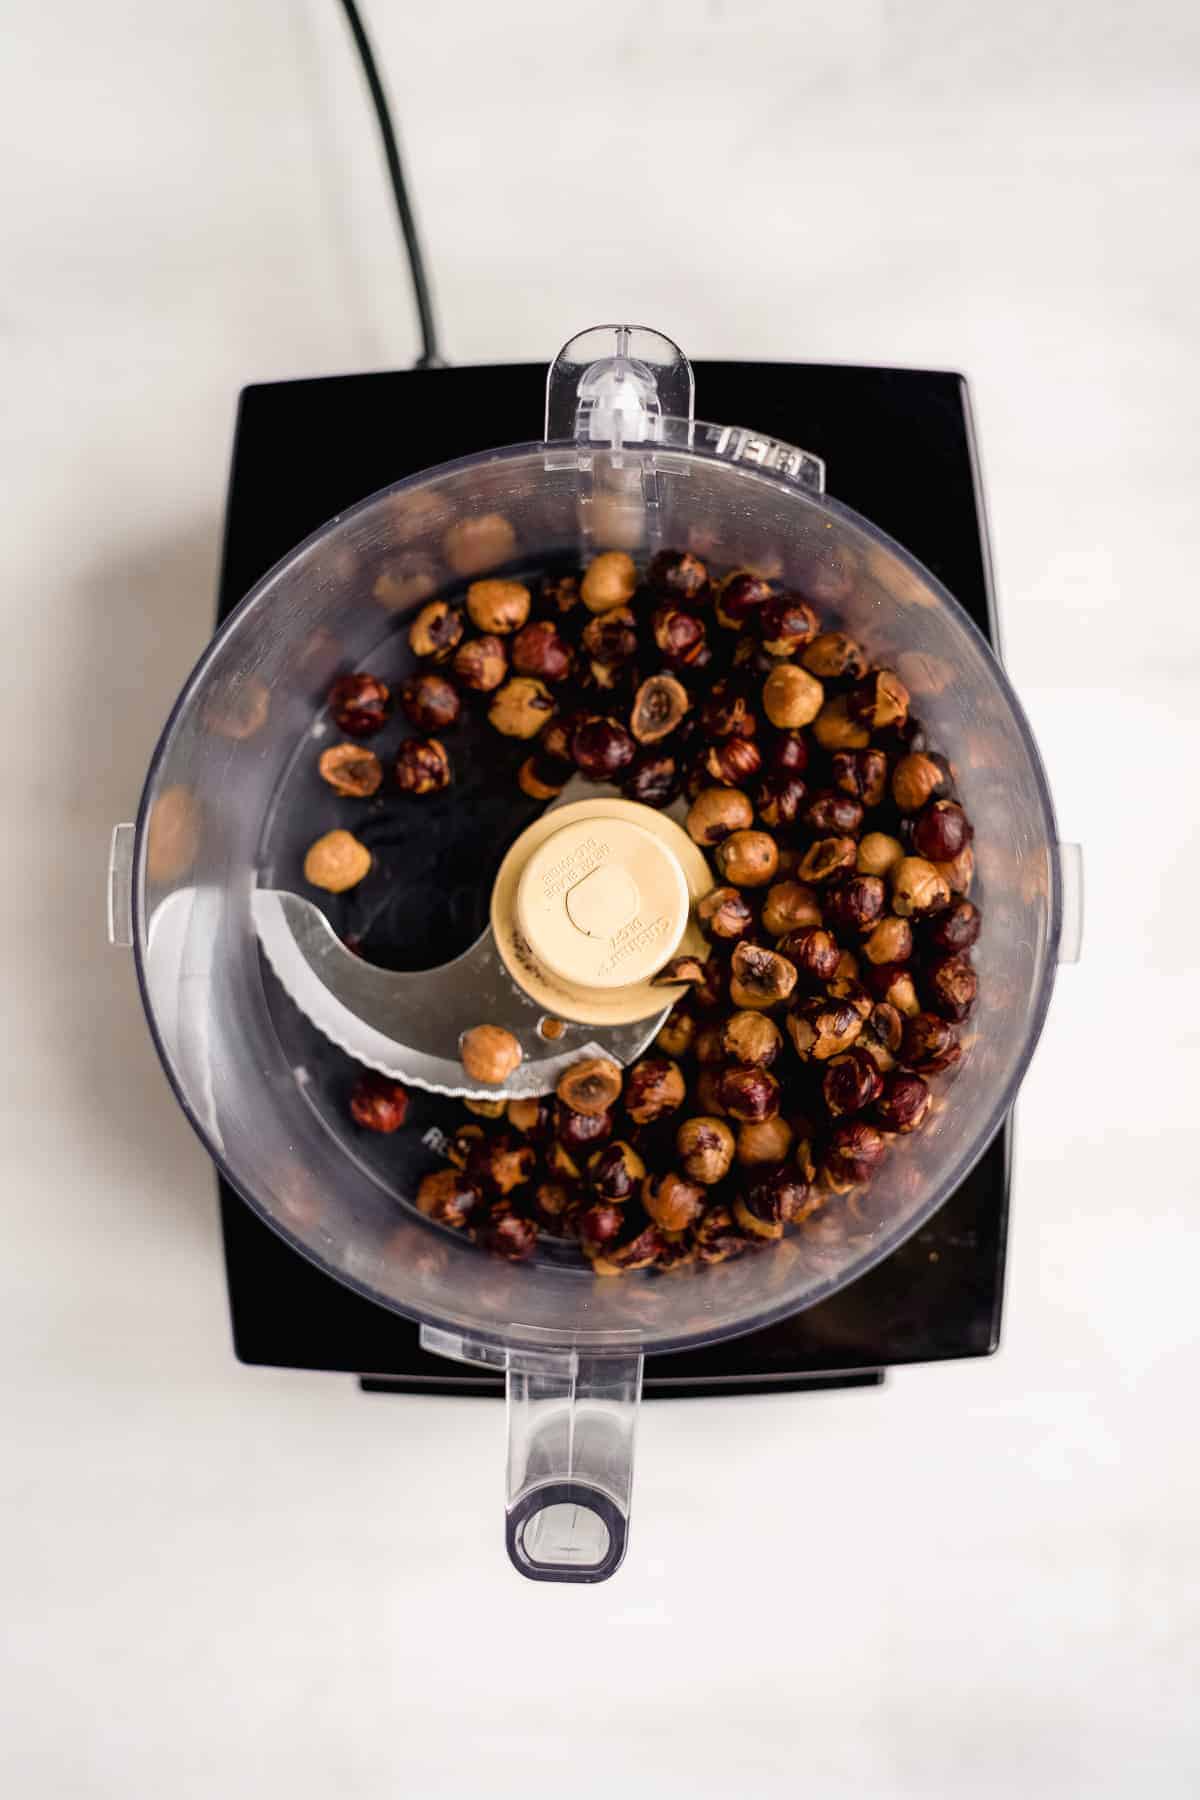
Once the nuts are toasted, transfer them to a food processor and pulse a few times. You are looking for a "chunky sand" texture. Don't pulse for too long as the hazelnuts will turn into a nut butter consistency - delicious, but not where we're going for here.
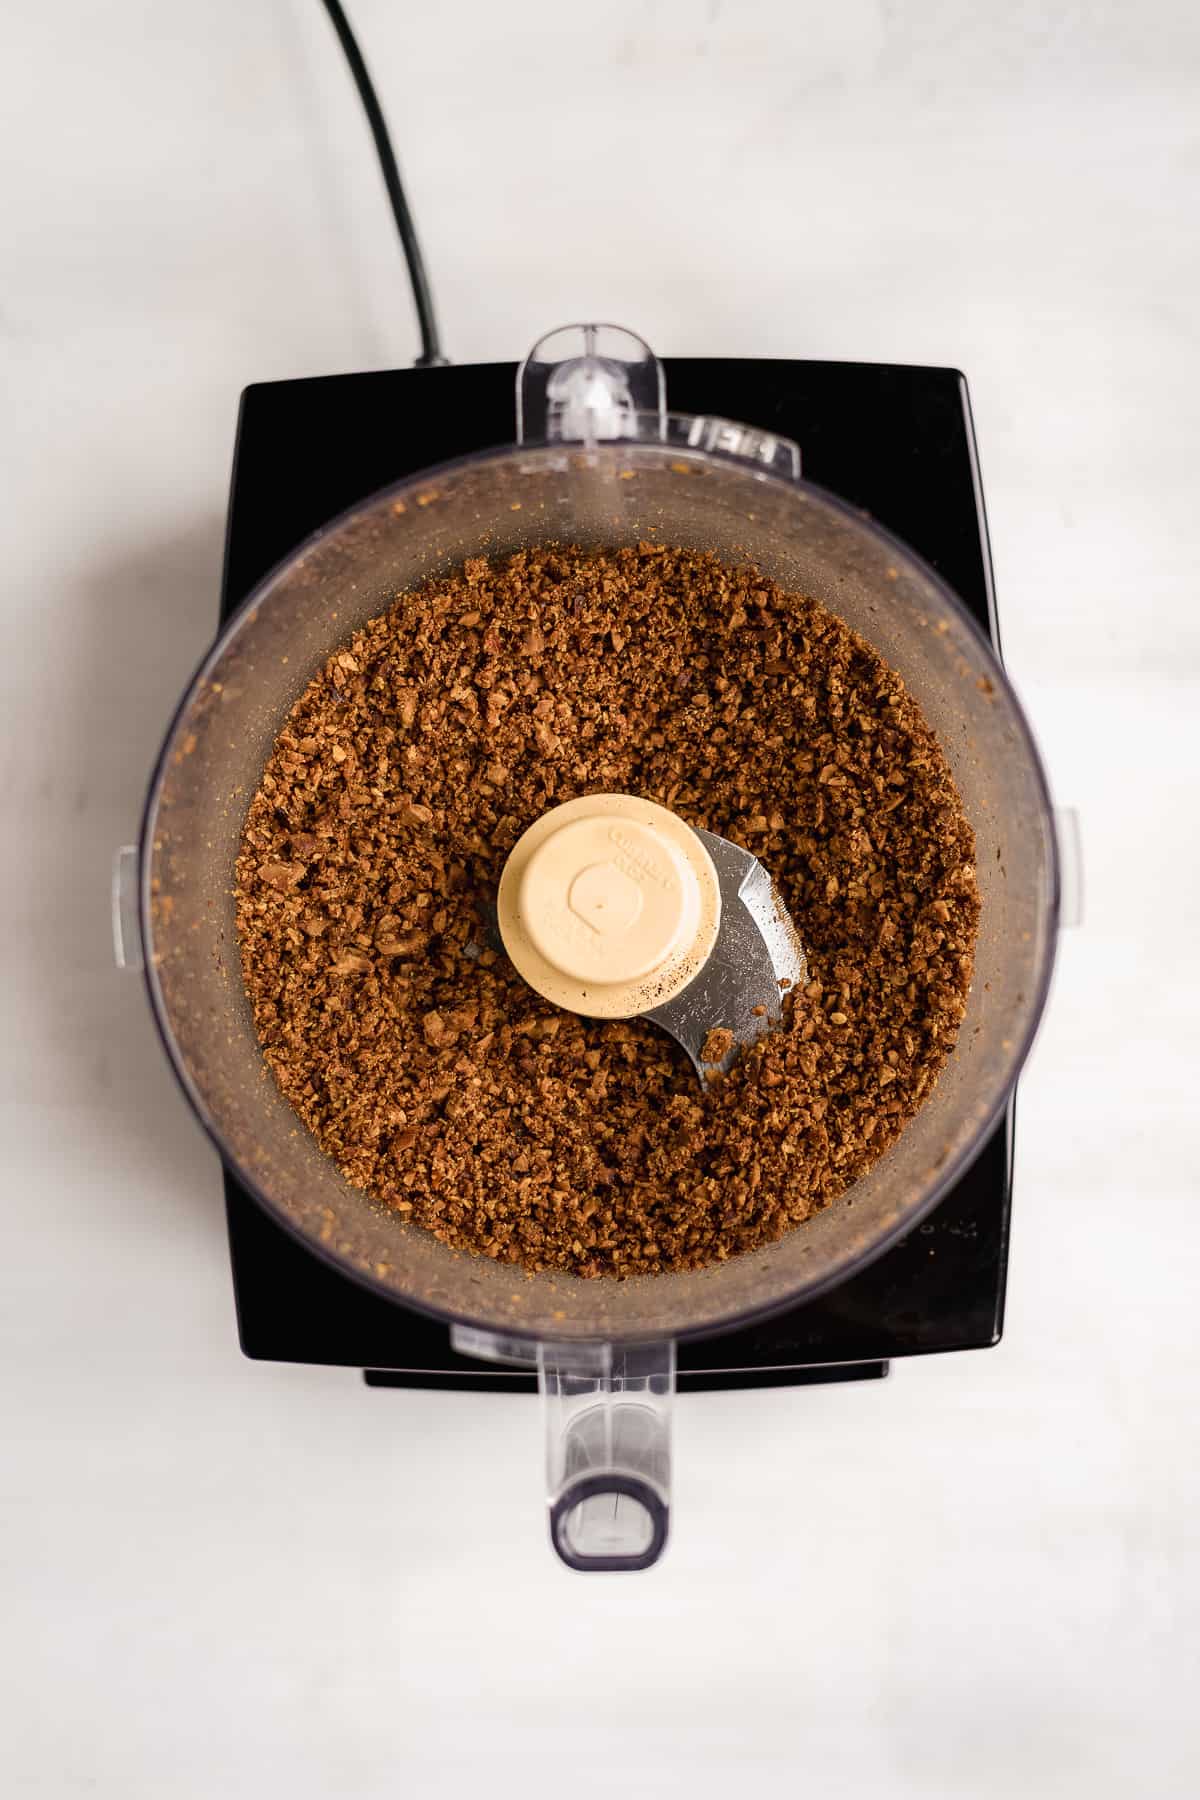
Step 3 : Prepare the rest of the crust
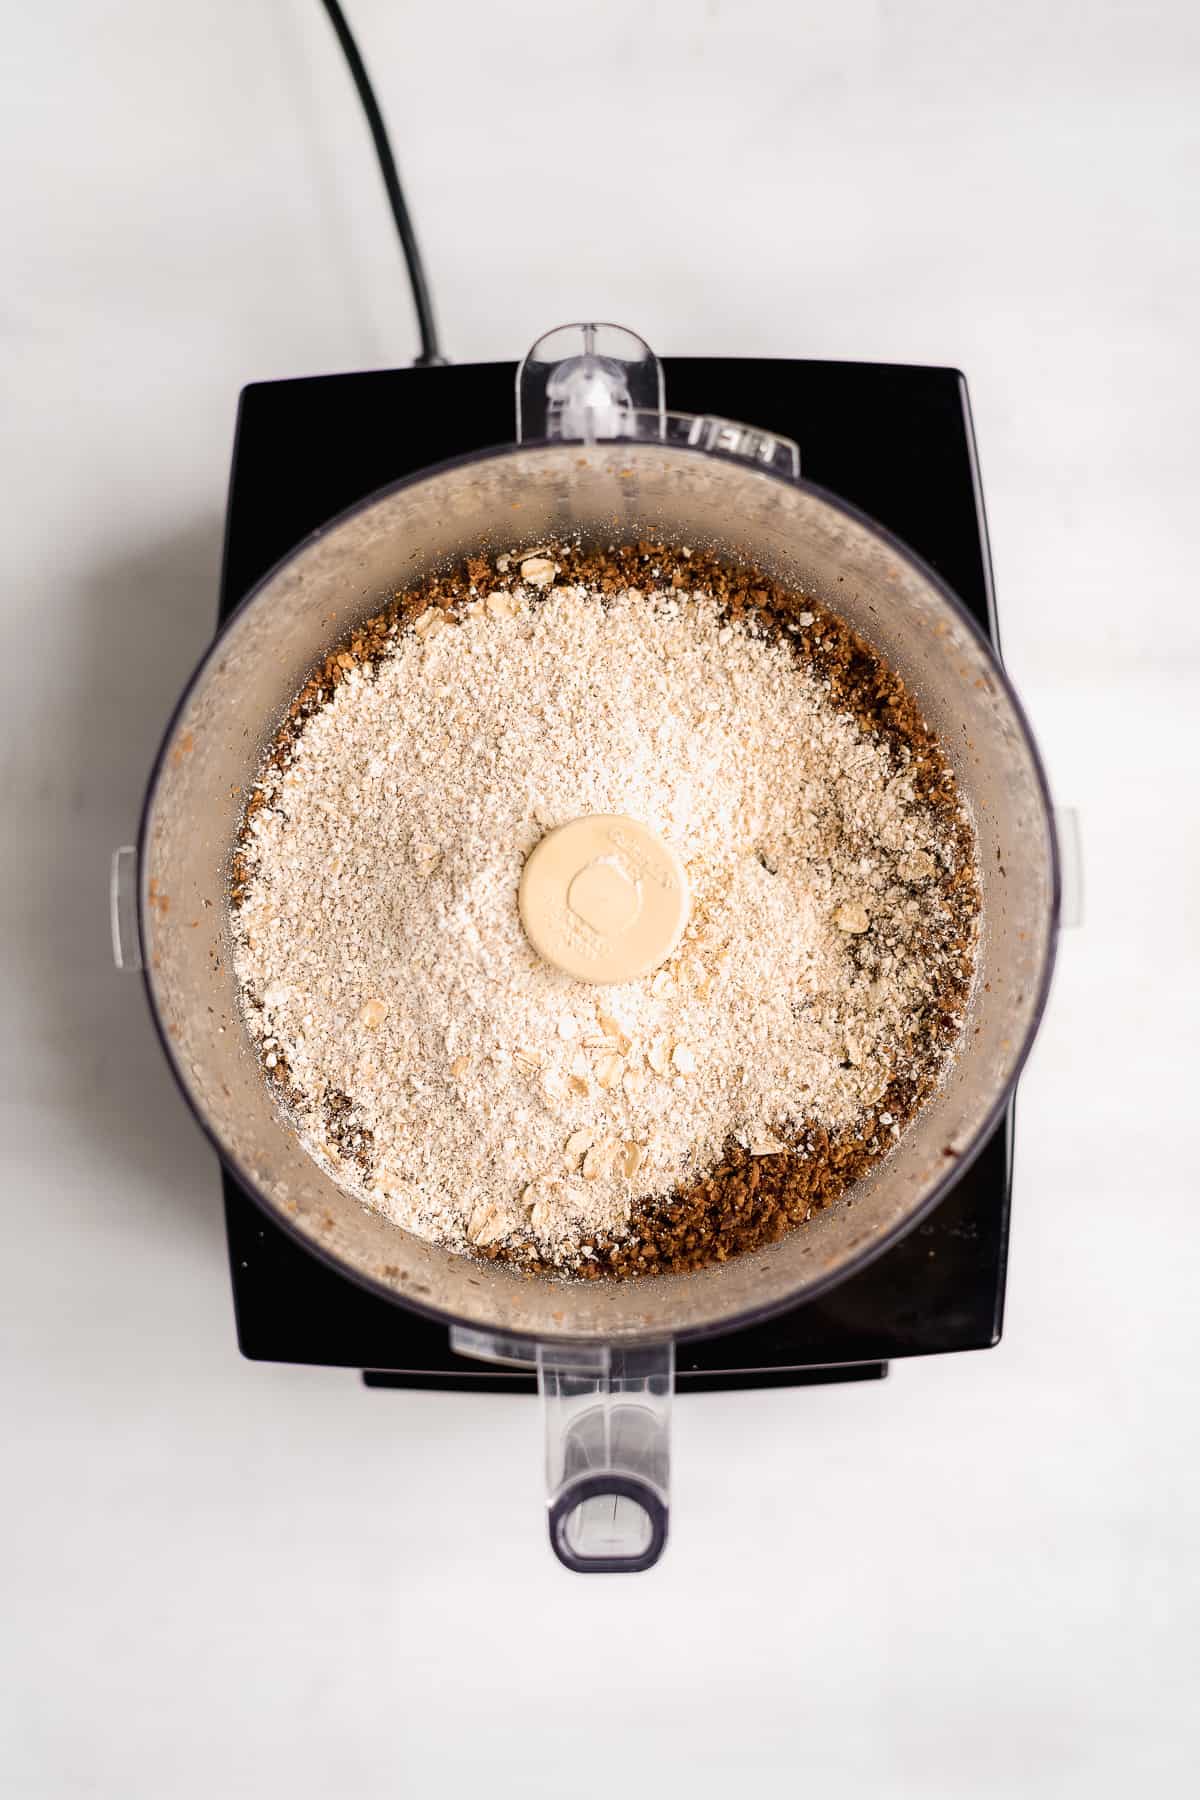
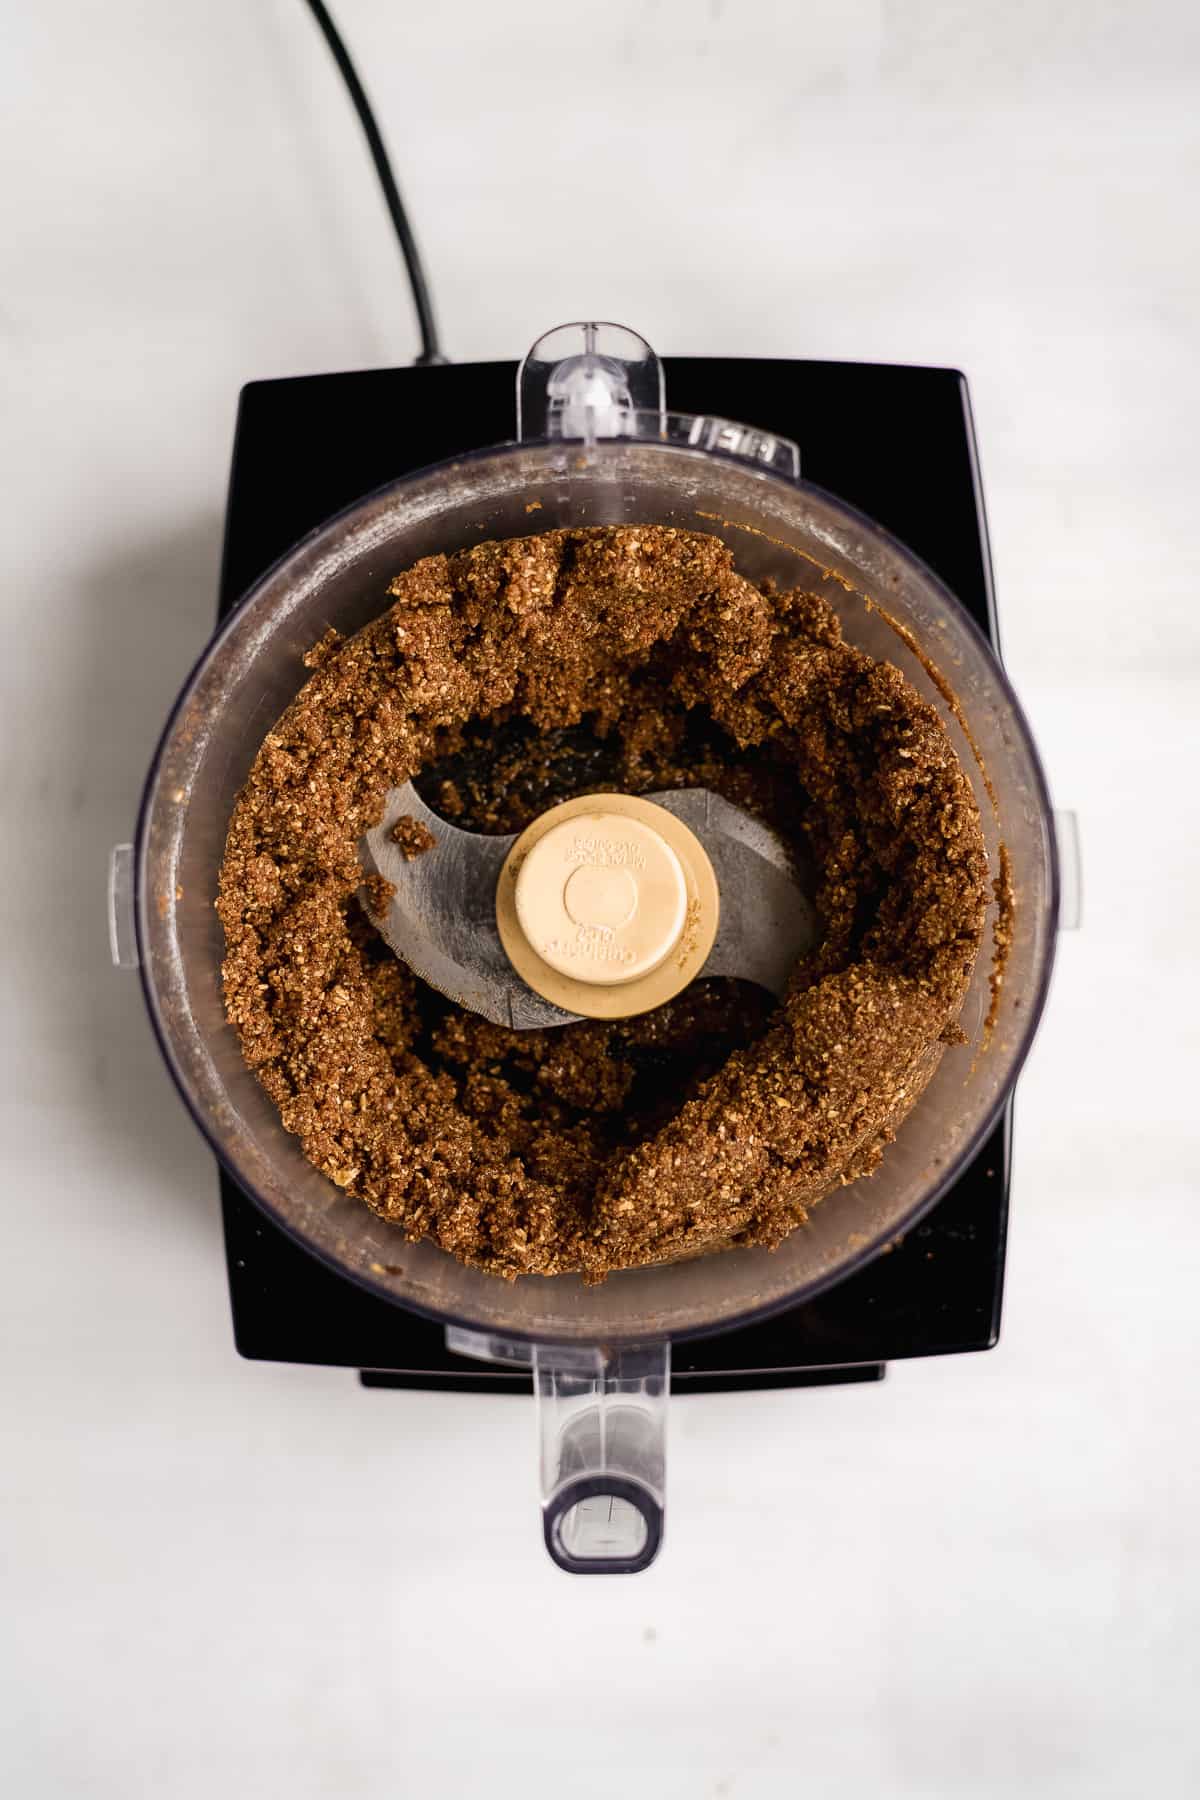
Now we can add the remaining crust ingredients and pulse until the mixture is thick and a tad sticky. You should be able to press it up against the walls of the food processor and it stays. If it's too dry, add another tablespoon of coconut oil. If it's too wet, try mixing in a little more oat flour until it starts to stick together.
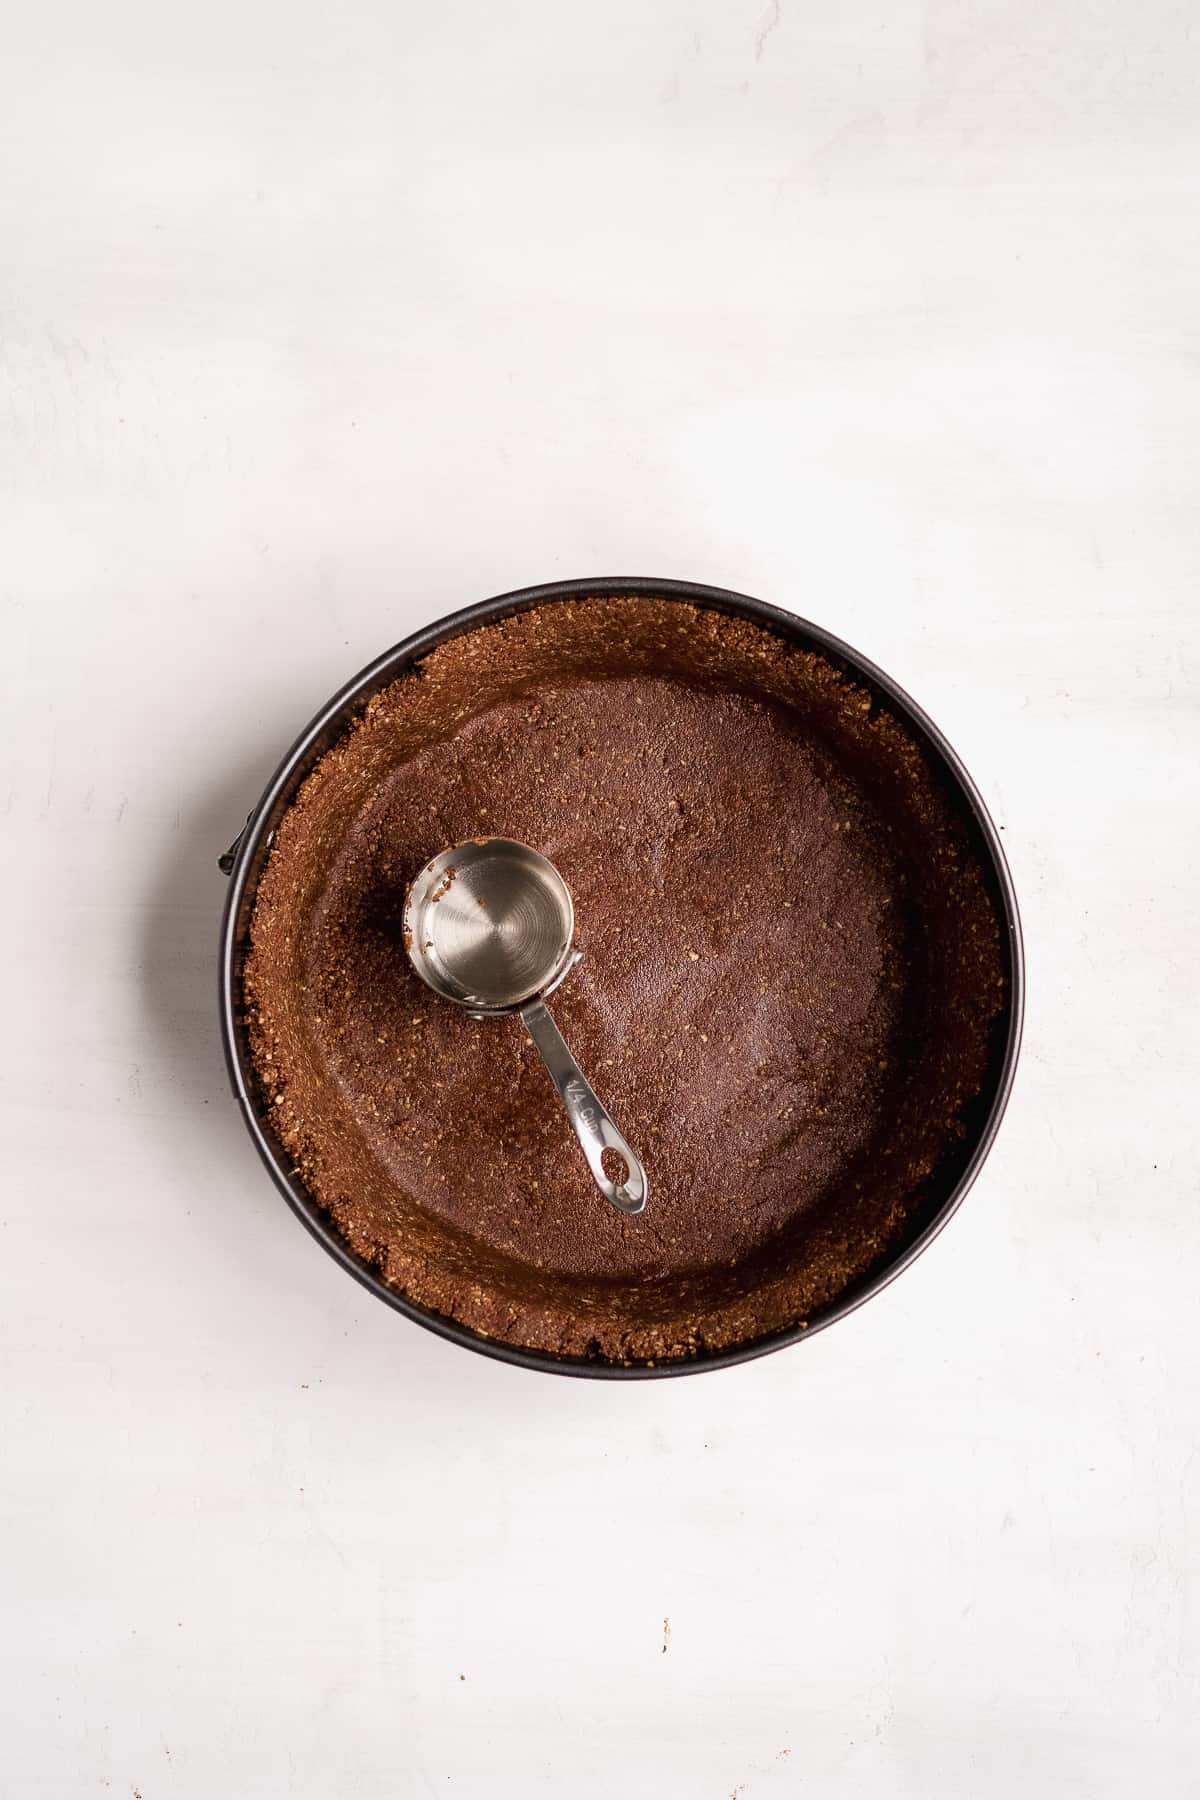
Place a circular piece of parchment paper on the bottom of a 9-inch spring form pan. You can also use regular parchment paper and tuck it into the bottom. Transfer the crust to the pan and press gently with the back of a measuring cup or spoon. Make sure there is a good thickness to the bottom before pressing the crust up the sides. This recipe is enough for a good base and sides of the cheesecake.
Place the crust aside while you prepare the filling.
Step 4 : Melt the chocolate
Melt your chocolate on the stove. The best way to do this is by adding the chocolate to a pot and holding it over another pot of simmering water. Stir the chocolate until it reaches a thin, silky smooth consistency. Set the chocolate aside to cool a bit while you prepare the rest of the cheesecake filling.
Step 5 : Prepare the rest of the cheesecake filling

Next, beat the cream cheese in a large bowl with a hand mixer or with a stand mixer. The key to this step is to keep it low and slow so you don't get air into the mixture. Beat the cream cheese until it's creamy with no clumps.
Then add the coconut milk, coconut sugar, and vanilla and continue to mix slowly until well mixed. Add the cacao powder and espresso while the mixer is still running to mix.
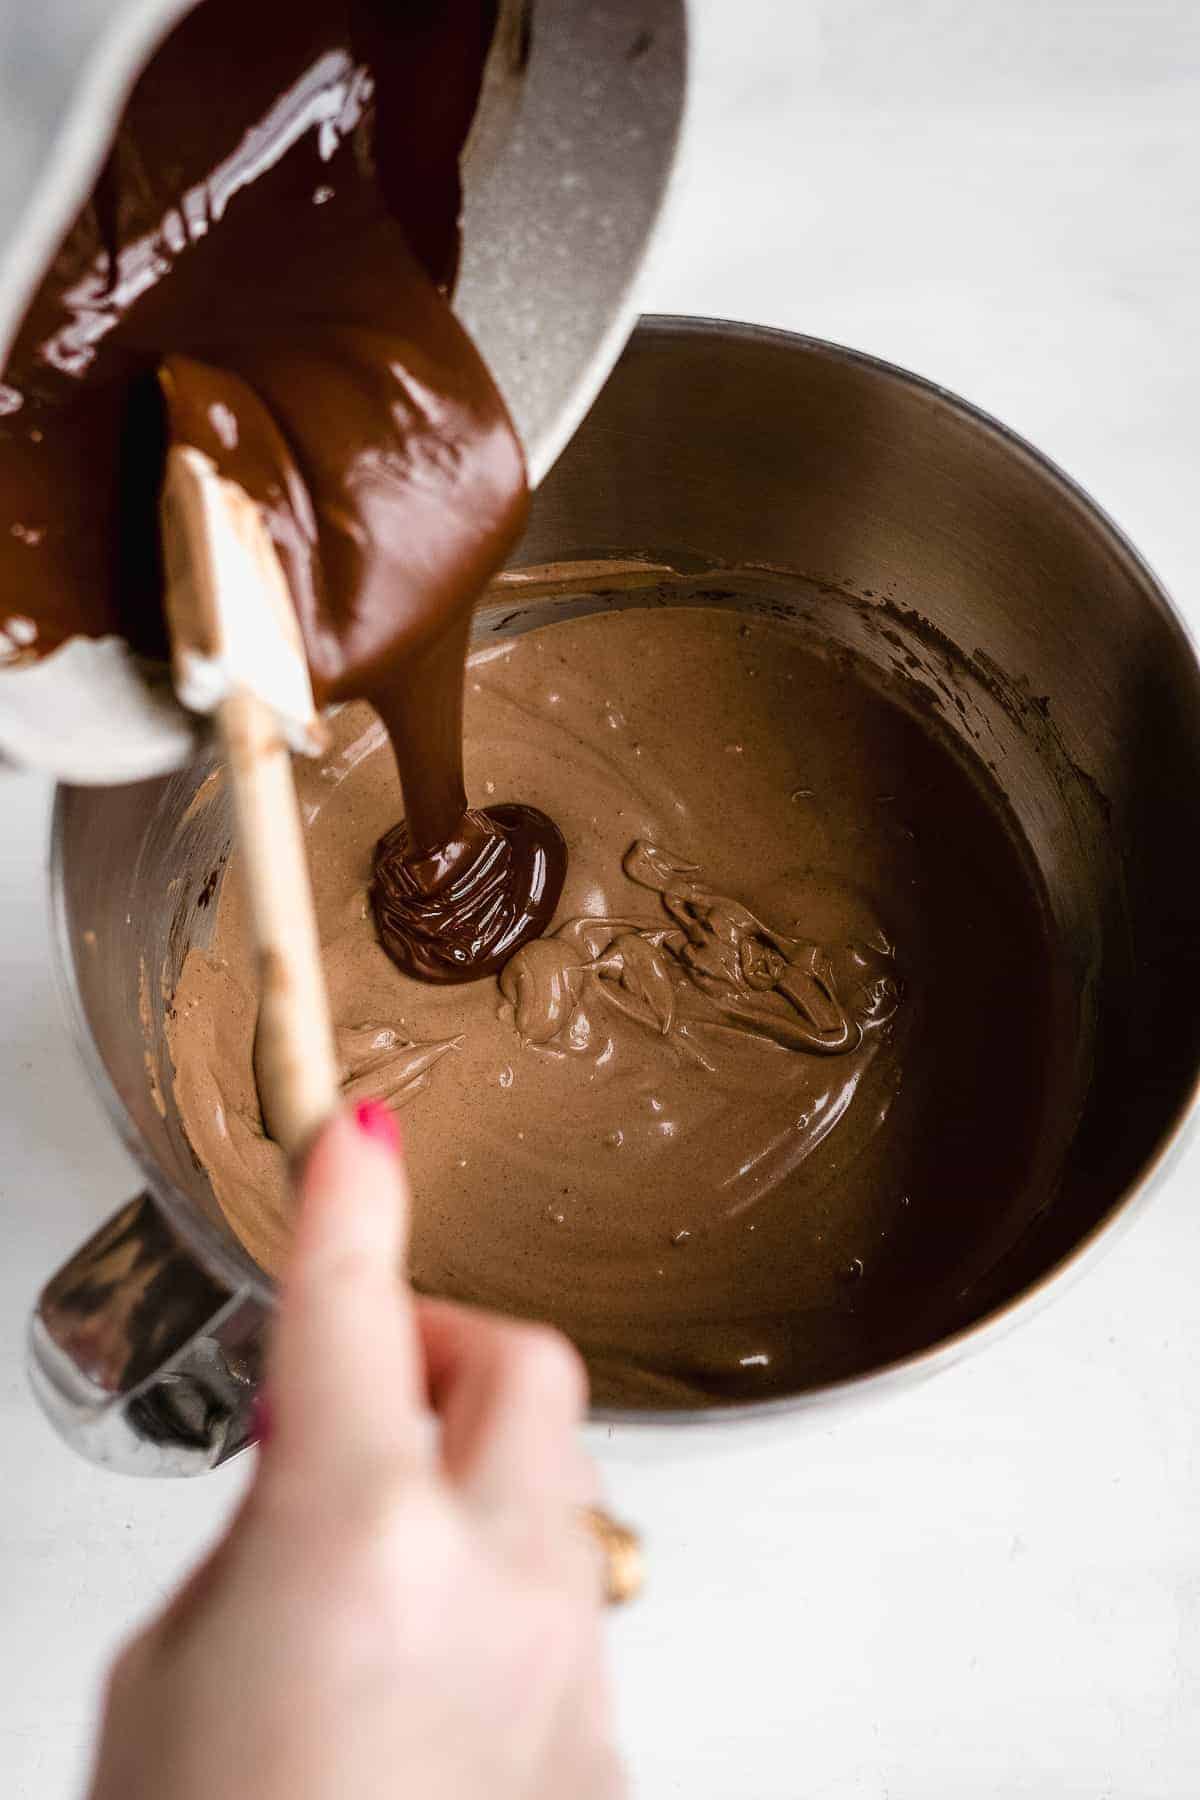
Finally, pour in the melted chocolate and fold into the mixture. Use a rubber spatula and scrape down the sides as you mix. Pour the mixture into the prepared crust and level off the top with an uneven spatula.
Step 6 : Bake the cheesecake and allow it to cool
Bake the cheesecake in the oven for about an hour. Gently nudge the pan with an oven mitt to check if it's done. If it jiggles a tad like jello, then it's done. If it moves a lot, similar to a glass of milk, then it needs more time.
Once it's done, turn the oven OFF but don't take the cheesecake out of the oven. This allows the cheesecake to come back to room temperature slowly as thus prevents cracking.
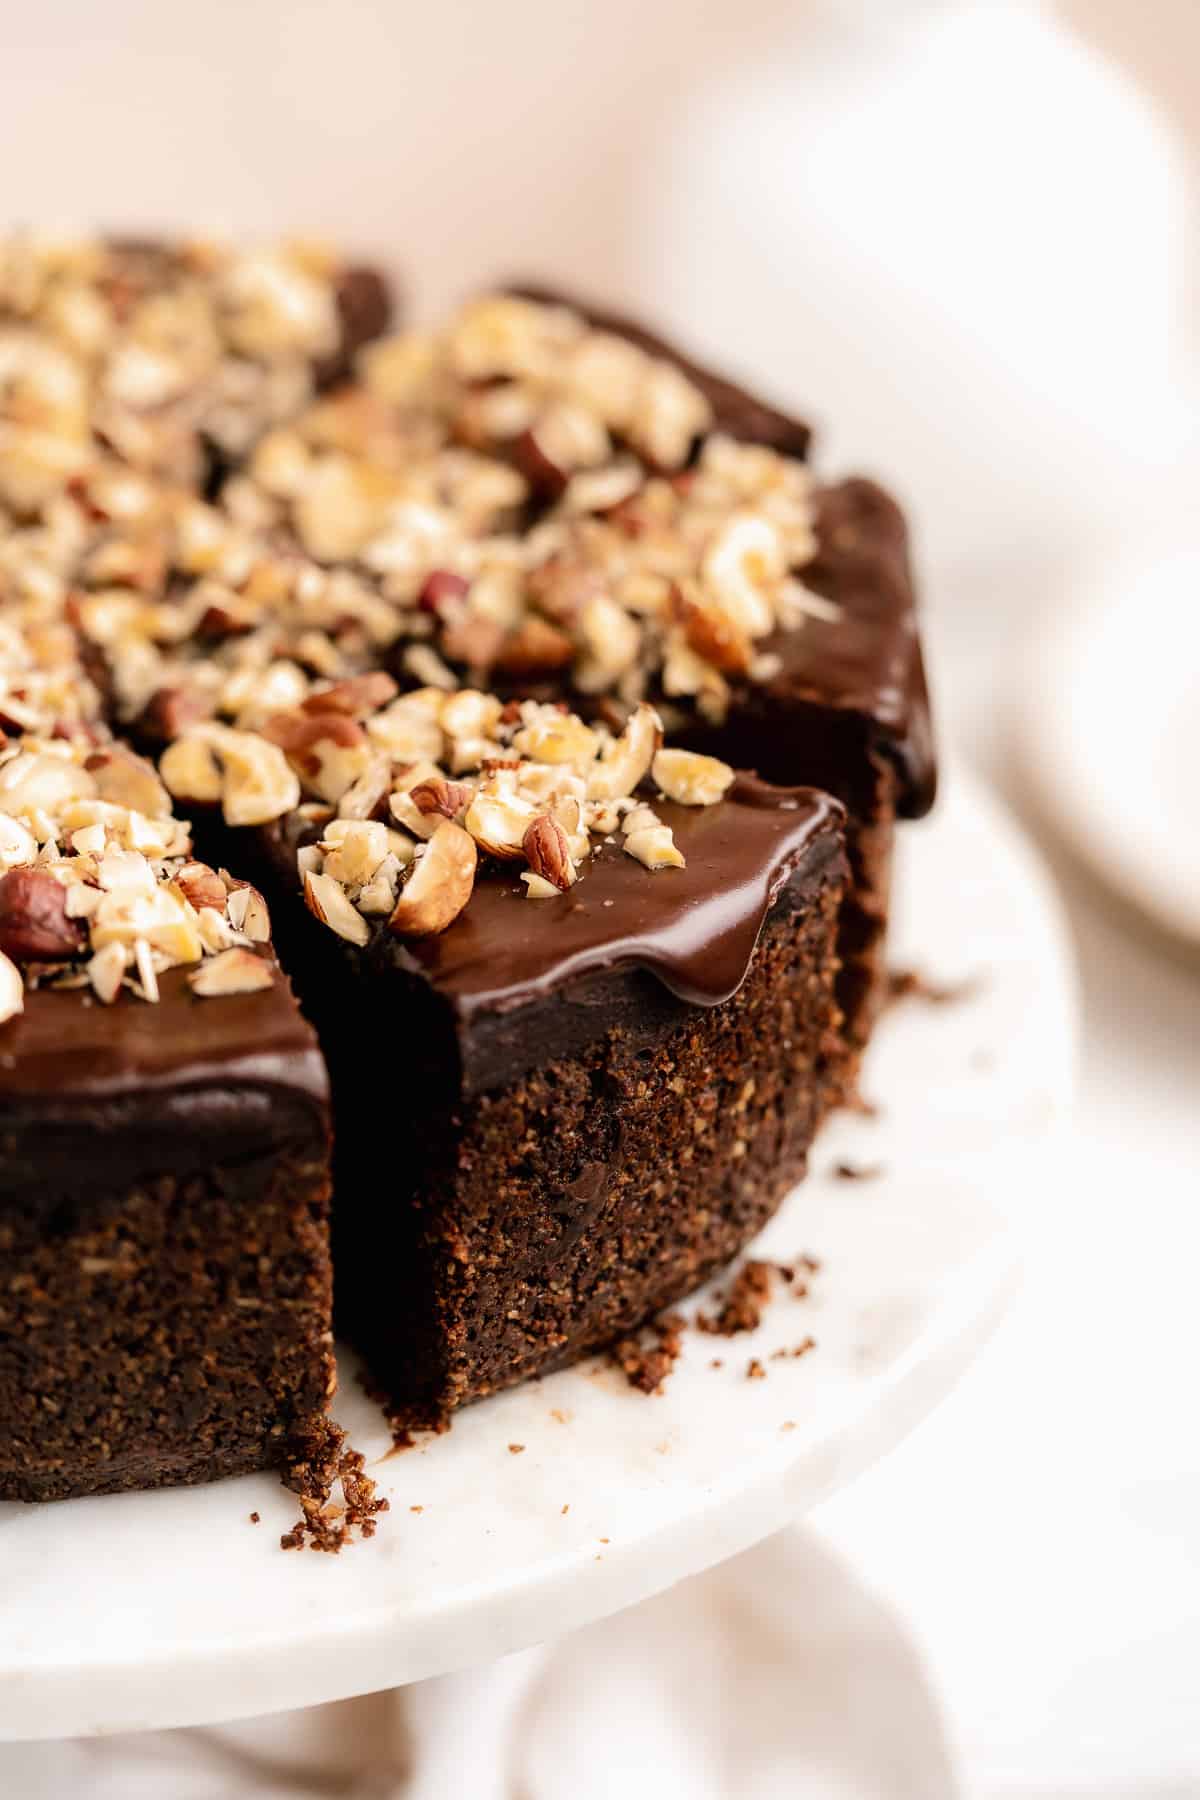
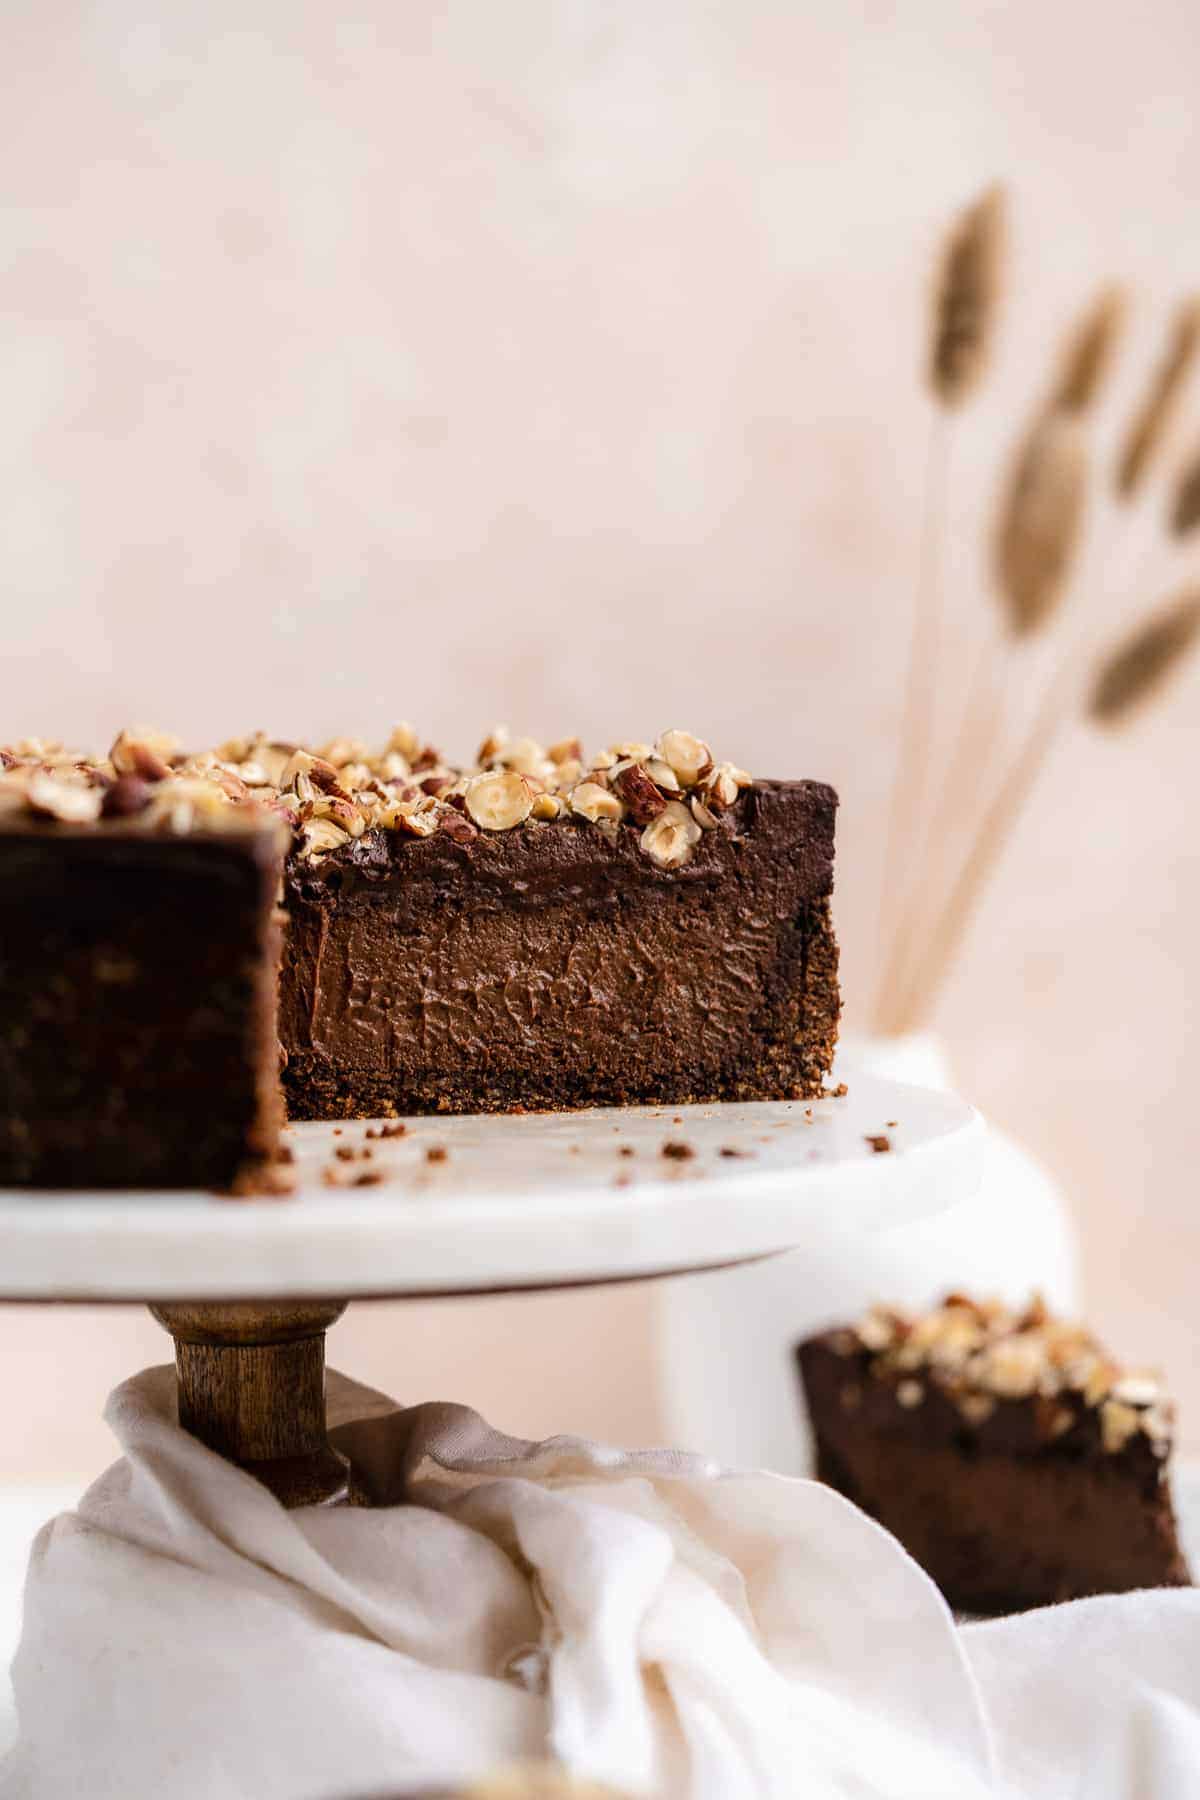
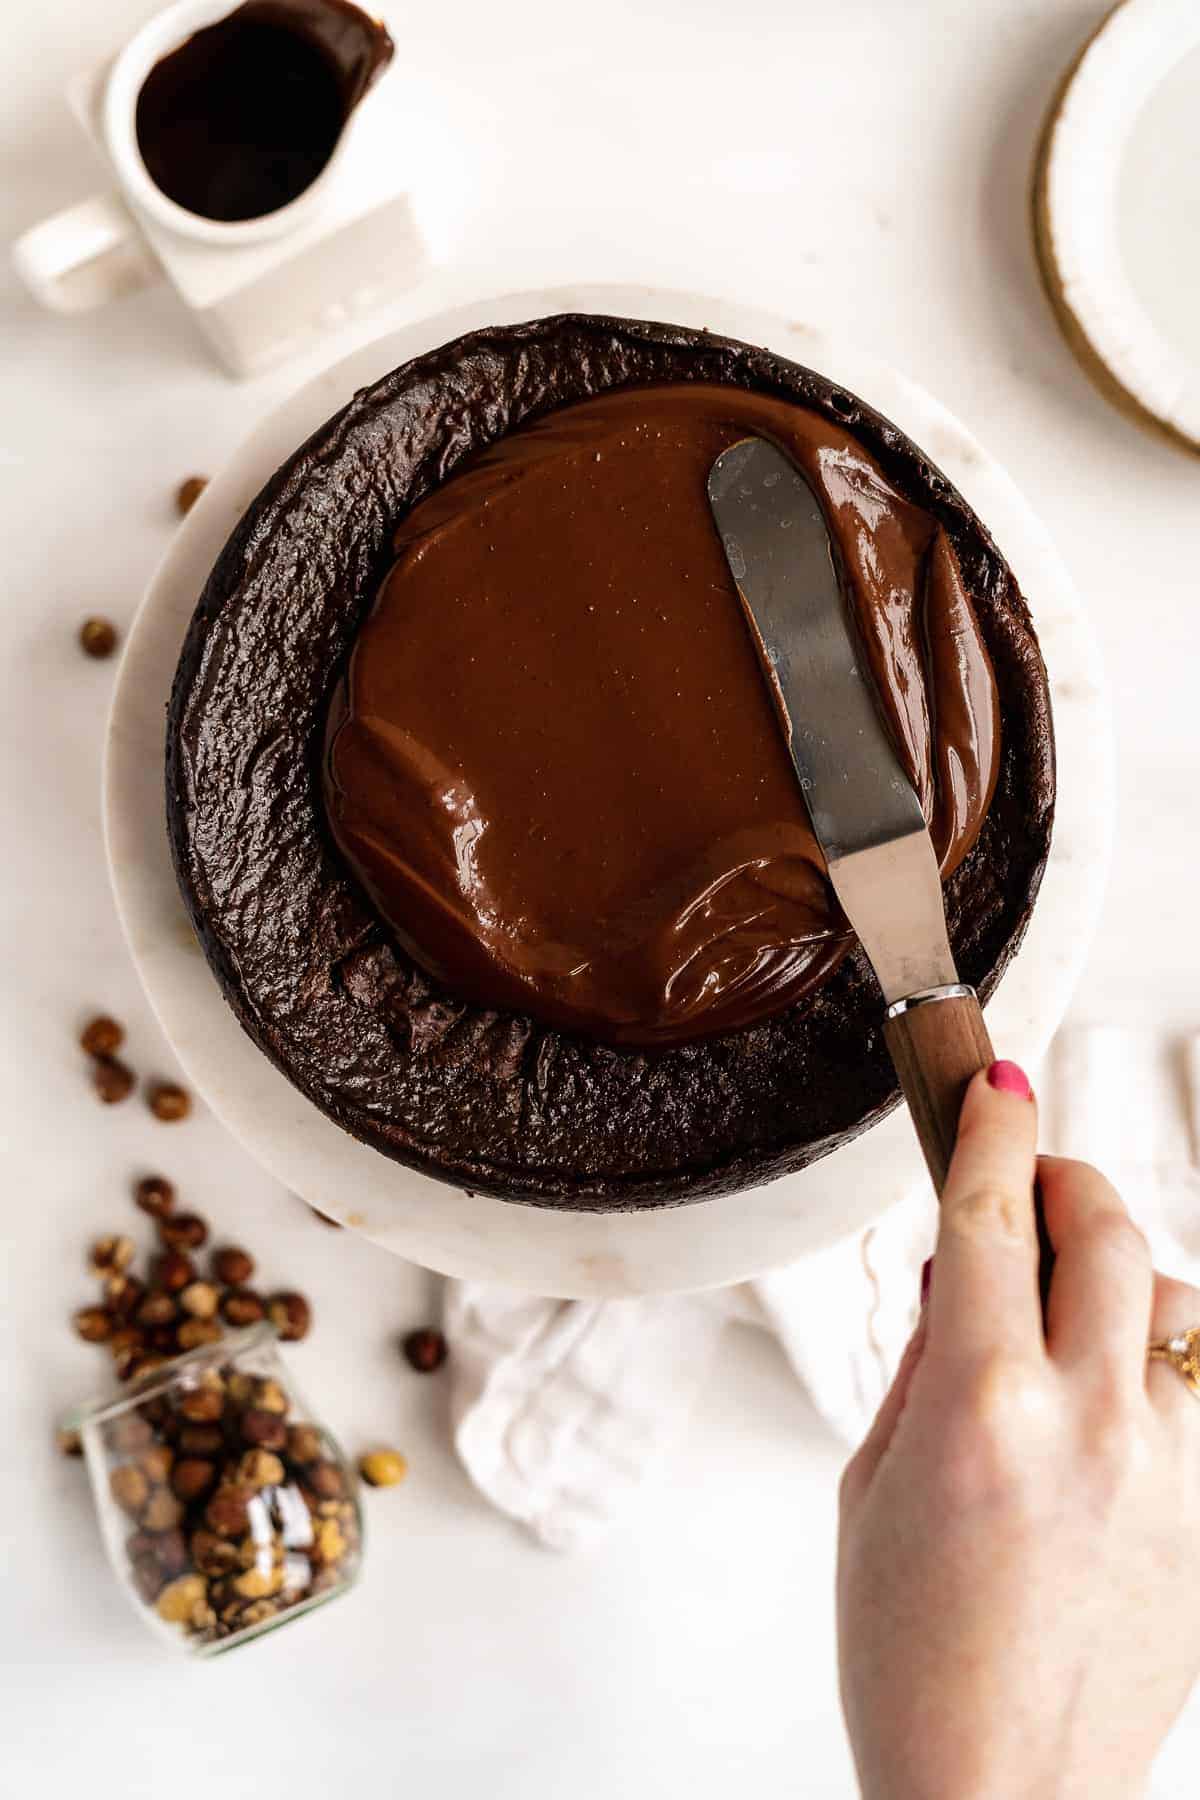
The top layer of the cheesecake may look a little wrinkled due to the chocolate. This is okay! As the cheesecake cools down, it shrinks a little and pulls the top layer in toward the center. Because there is real chocolate in the mix, it may look a tad wrinkled. We top it with a chocolate ganache in the next step though so don't worry!
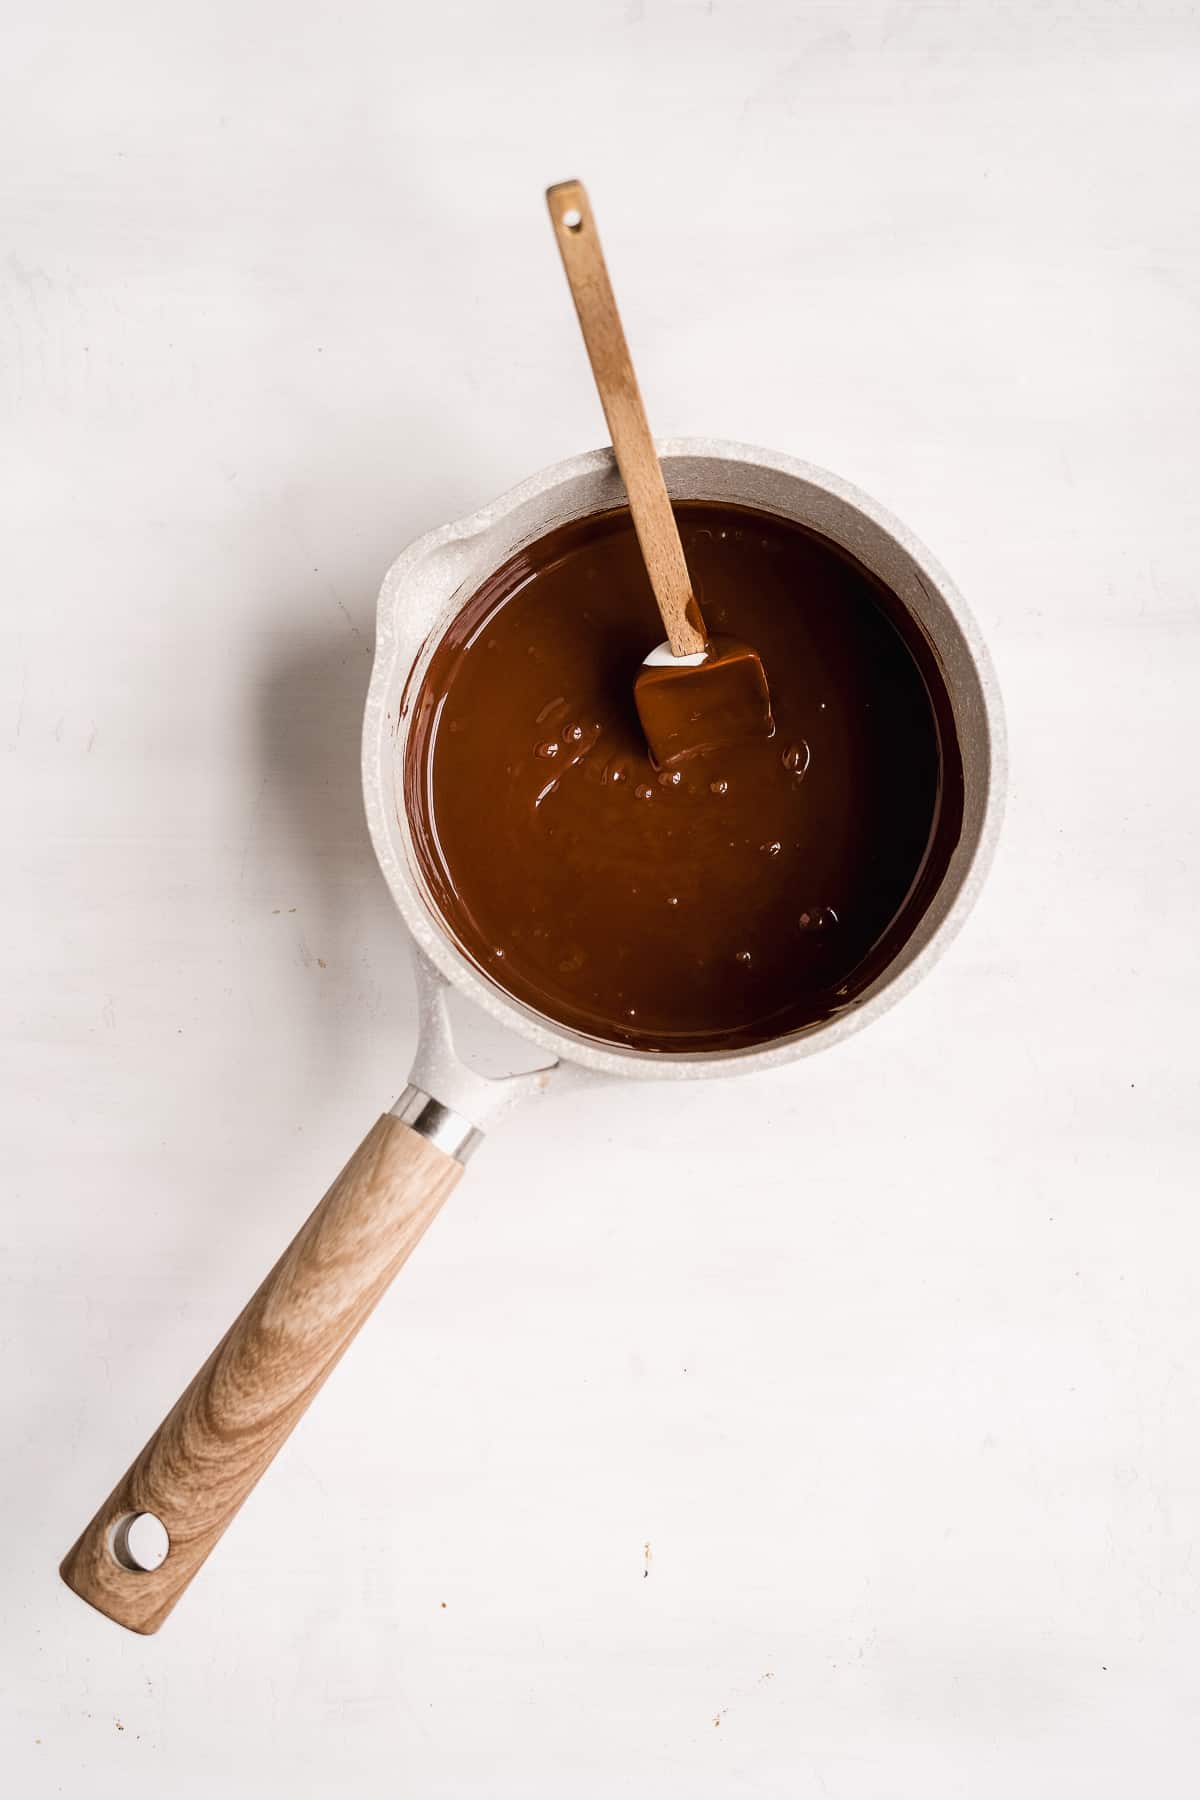
Step 7 : Prepare the chocolate ganache coating
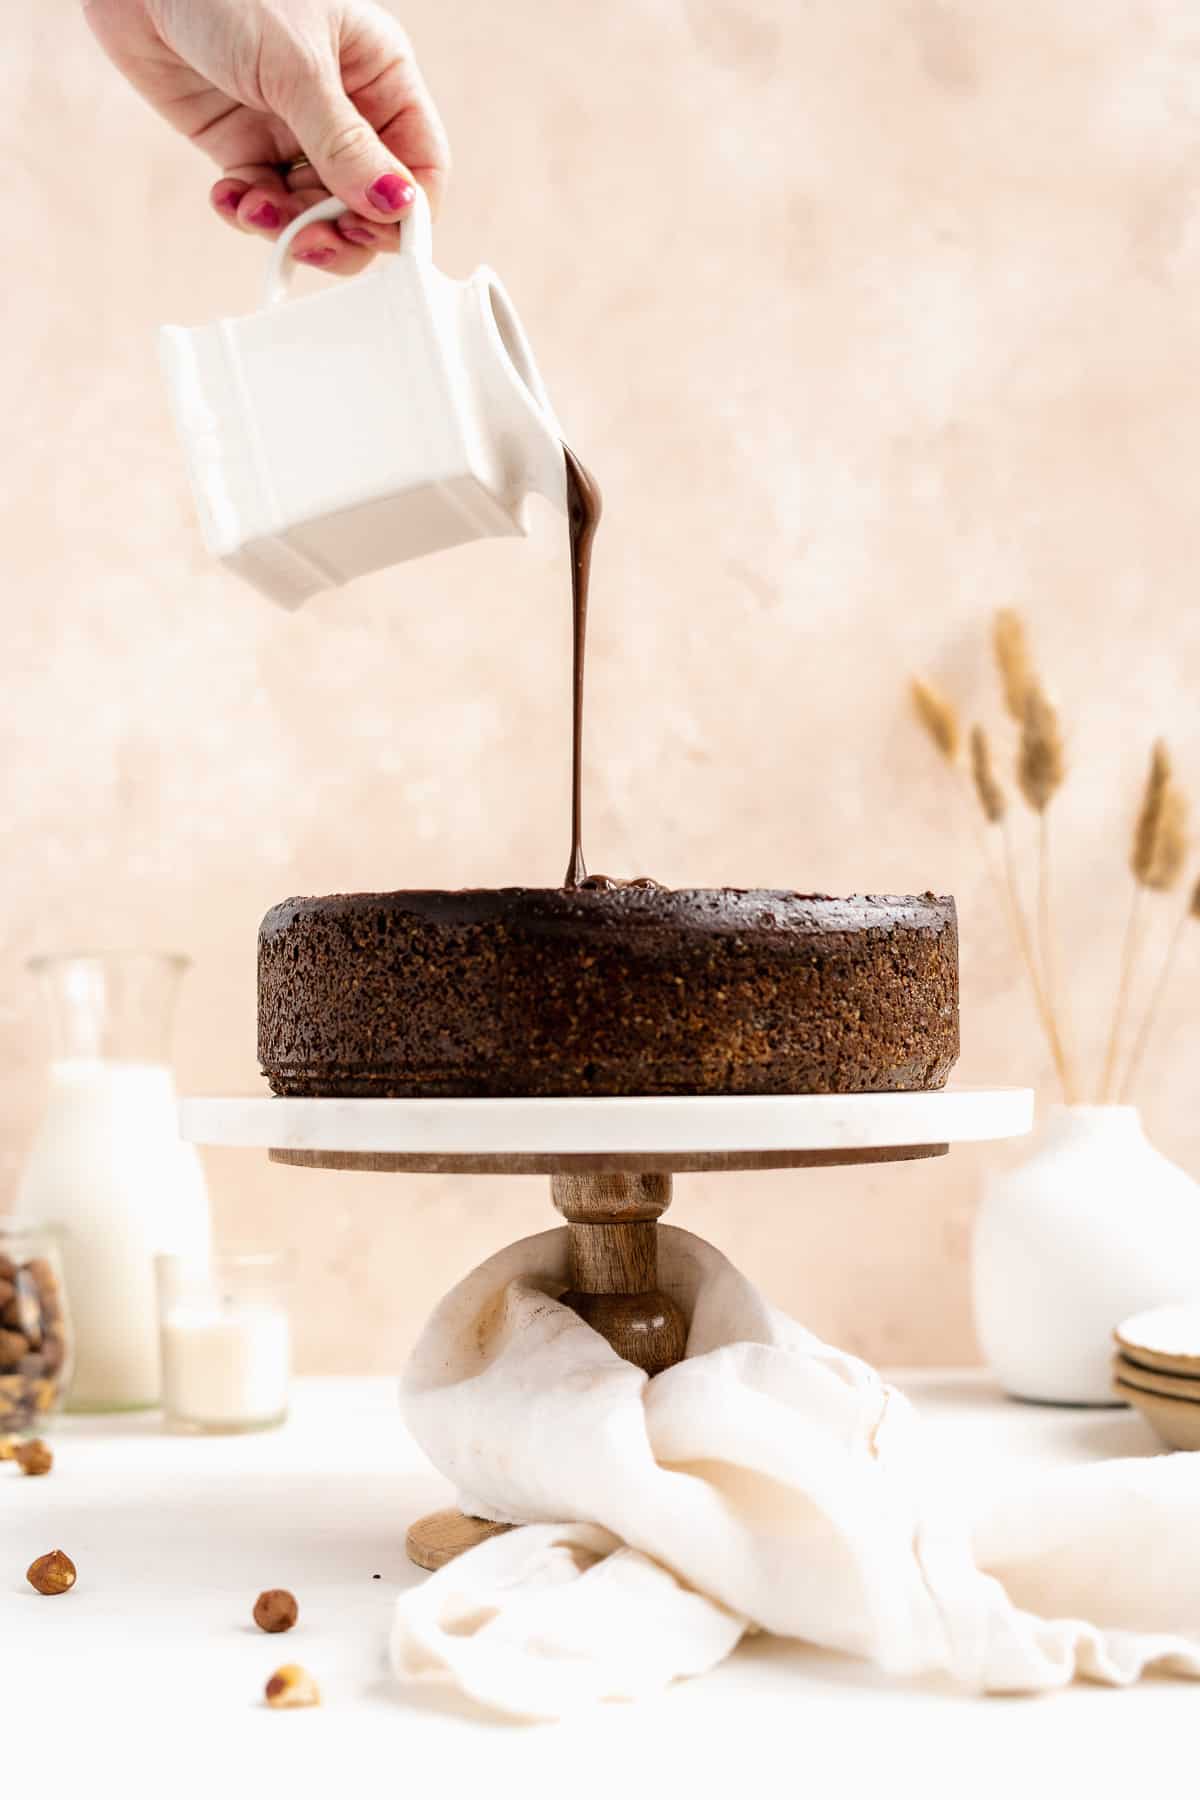
To top it all off, prepare the chocolate ganache. Simply melt the chocolate and coconut milk in a skillet on the stove oven low heat. Stir continuously until the chocolate is melted and the mixture is thick and silky.
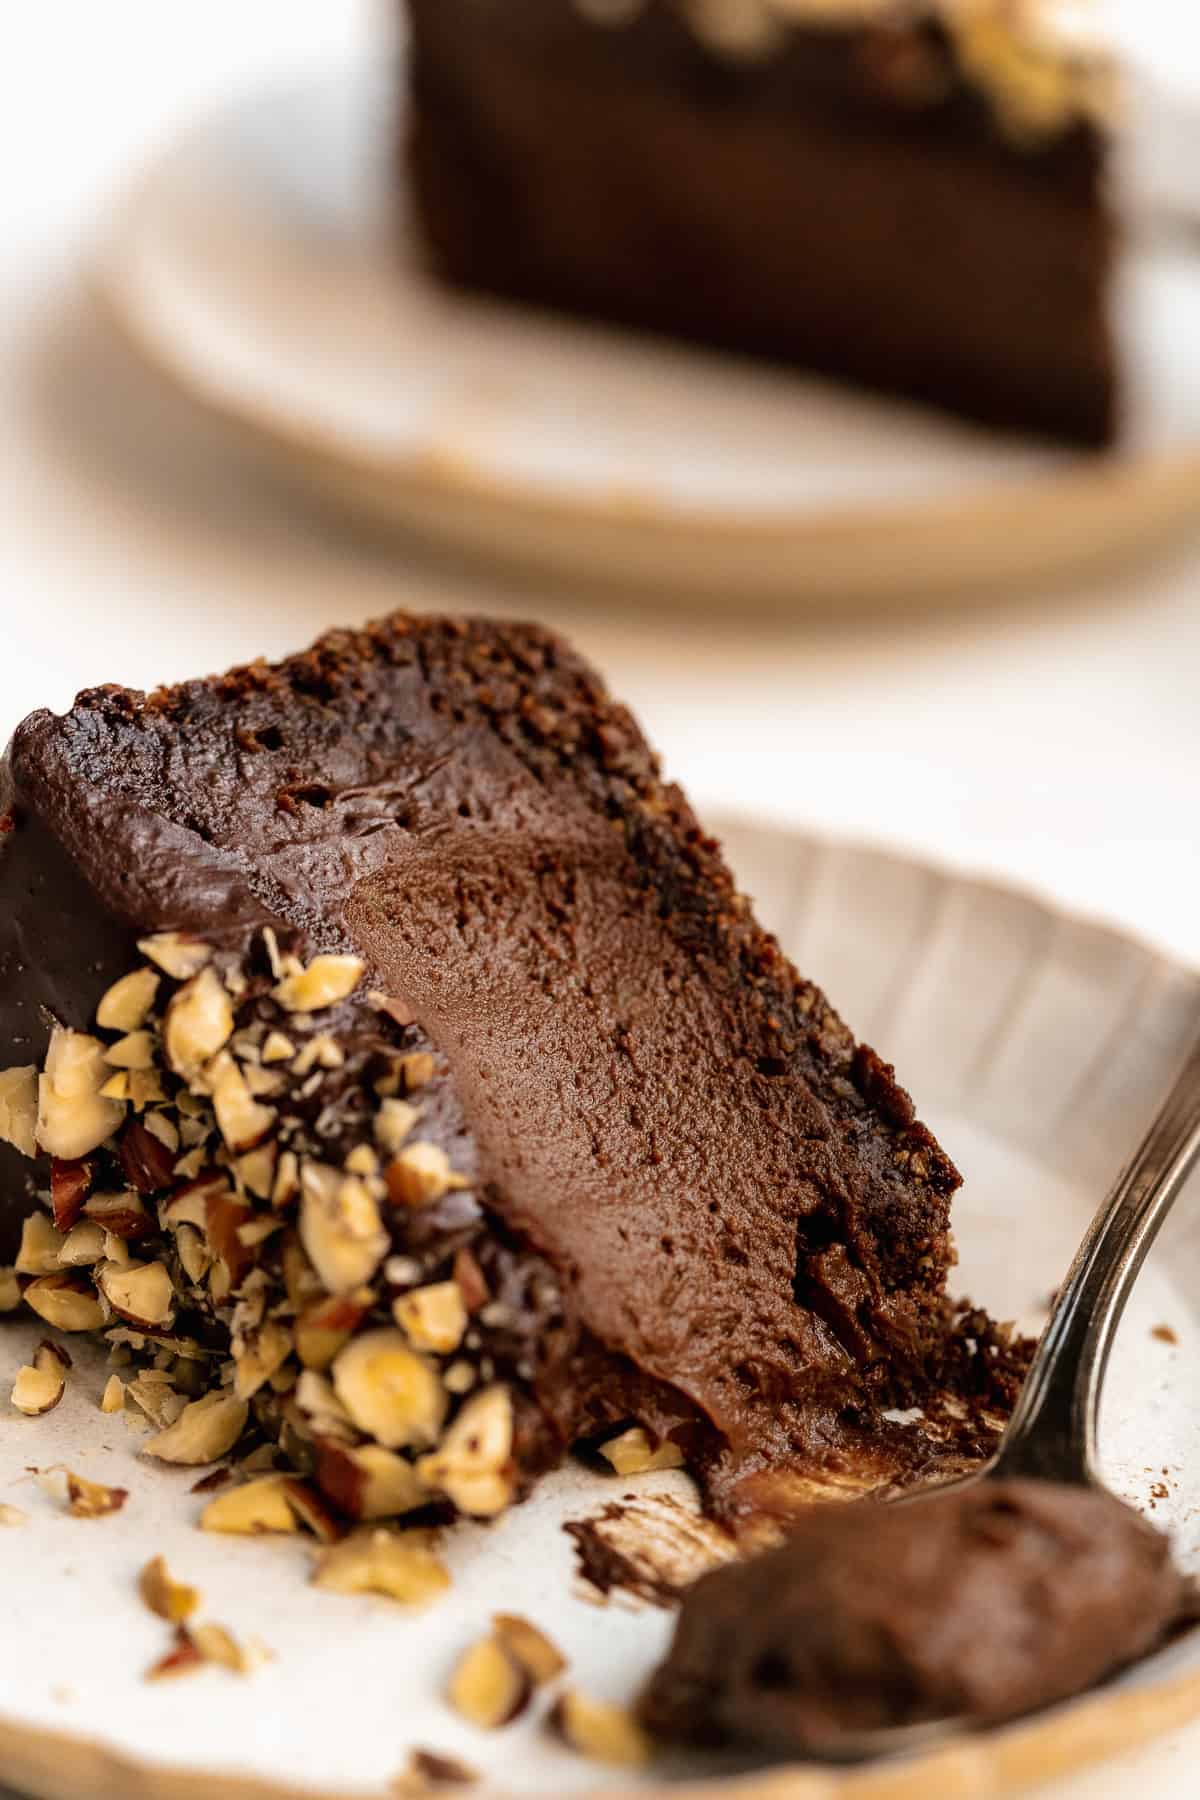
Pour the ganache over top of the cooled cheesecake. Use an uneven spatula to smooth out the top. It's okay if some runs off the sides of the cake. This actually creates a super cool effect! While the ganache is still wet, top with some extra chopped hazelnuts. Then place the cheesecake in the fridge so the ganache layer can set. Once set, you're ready to slice and serve!
Vegan Chocolate Cheesecake FAQs
This cheesecake is best stored in an airtight container in the fridge. I typically go ahead and slice it into pieces to make it easier to store. If you have a cake tin, that will work too. Just remember this cake needs to be kept cool so it needs to fit in the fridge.
The secret to a perfectly sliced piece of cheesecake is a warm metal knife. Simply run your knife under the sink with warm warm water and then begin to slice. Wipe off the knife after each slice and repeat.
I tried multiple brands for this recipe. Kite Hill is one of my favorite vegan cream cheese brands and works really well in this recipe. Violife and Toffuti are also great in this cheesecake.
I have not tried a different type of flour in the crust. If you'd like to experiment, I actually think almond flour would be a great substitute.
No, unfortunately this cheesecake requires full-fat coconut milk. This is due to the cream at the top of the can. Light cream cheese doesn't have the same about of cream and thus the fat content is different.
Check out these other delicious treats while you're here!
Recipe

Chocolate Toasted Hazelnut Cheesecake
Ingredients
For the Crust
- 1 ½ cup hazelnuts
- ⅓ cup coconut oil - plus 1 Tbsp, melted
- ½ cup coconut sugar
- 3 tablespoon maple syrup
- 1 teaspoon vanilla
- 2 tablespoon cacao powder
- 1 cup oat flour
For the Filling
- 10- oz dark chocolate - chips or baking bar
- 24 oz dairy-free cream cheese - room temperature (I used Kite Hill but Violife and Tofutti are great options as well)
- 1 cup full-fat coconut milk - room temperature
- ½ cup coconut sugar
- 1 teaspoon vanilla
- 1 tablespoon cacao powder
- 1 teaspoon espresso powder - optional but it will deepen the chocolate flavor
For the Ganache and Toppings
- 1 cup full-fat coconut milk
- 1 cup dark chocolate chips
- ⅔ cup chopped hazelnuts - to top
Instructions
For the Filling
- Preheat oven to 400 F. Line a baking sheet with parchment paper and add the hazelnuts. Melt 1 tablespoon of the coconut oil and toss over the hazelnuts. Move the hazelnuts around the pan to coat with the oil. Bake in the oven for 12 - 14 minutes until they turn a golden brown/darker color. Watch them carefully at the end as they will burn easily.1 ½ cup hazelnuts, ⅓ cup coconut oil
- Place the roasted hazelnuts in a food processor and pulse until you reach a "chunk sand" consistency. You should still see small chunks of the hazelnuts in the mix.
- Add the remaining coconut oil, coconut sugar, maple syrup, vanilla, cacao powder, and oat flour and continue to pulse until the mixture is thick and a little sticky. You should be able to push it up against the walls of the processor and it stays put.½ cup coconut sugar, 3 tablespoon maple syrup, 1 teaspoon vanilla, 2 tablespoon cacao powder, 1 cup oat flour
- Line a 9-inch spring form pan with parchment paper and wrap the bottom half with aluminum foil. Pour in the crust mixture. Gently press it down into the pan with the back of a measuring cup or spoon. Get a good thick bottom and then start to press it up against the sides of the pan. Set aside while you prepare the filling
For the Filling
- At this point, you'll want to begin the water bath process. Drop the oven temperature down to 325 F and place a large baking dish on the bottom rack of the oven. Set a pot on the stove with 6 cups of water and bring it to a boil. Once it boils, slide the bottom oven rack out and pour in the boiling water. Quickly close the oven door so you don't let too much heat out.
- Melt the chocolate in a pot on the stove. Stir continuously until you reach a thin, smooth consistency. Set aside to cool while you prepare the rest of the filling.10- oz dark chocolate
- Next, beat the cream cheese in the bowl of a stand mixer or with a hand mixer. Keep the speed low and do this step slowly to reduce the amount of air in the mixture. Continue to mix until it's creamy with no lumps.24 oz dairy-free cream cheese
- Add the coconut milk, coconut sugar, and vanilla and continue to mix slowly to incorporate. Add the cacao powder and espresso powder and mix again.1 cup full-fat coconut milk, ½ cup coconut sugar, 1 teaspoon vanilla, 1 tablespoon cacao powder, 1 teaspoon espresso powder
- Turn the mixer off and pour in the melted chocolate. Fold in the chocolate using a rubber spatula.
- Pour the mixture into the prepared crust and level off the top with an uneven spatula. Bake in the oven for 1 hour. Gently nudge the pan in the oven after the hour. If if jiggles kind of like jello, then it's done. If it moves a lot like a glass of milk then it needs some more time. Once done, turn the oven off and keep the cheesecake in the oven for about an hour. This is done to allow the cheesecake to come back to room temperature slowly and reduces the likelihood of cracks.
For the Ganache
- Heat the coconut milk and chocolate in a pot on the stove over low heat. Stir until the chocolate is melted and the consistency is smooth.1 cup full-fat coconut milk, 1 cup dark chocolate chips
- Pour the ganache over the cooled cheesecake. Use an uneven spatula to spread it over the top. While the ganache is still wet, sprinkle chopped hazelnuts over the top.⅔ cup chopped hazelnuts
- Place the cheesecake in the fridge for at least 10 minutes to allow the ganache to set.
- Once set, slice the cheesecake into pieces and serve!
I echo the previous comment. I didn't know what a water bath was. I followed these directions and put the pan one rack above the bath of water. This could explain why it seems the cake wasn't firming up at all until 80 minutes in the oven and now seems to be less than fully set sitting overnight.
Hi Aaron! Sorry to hear you had some issues with the water bath. It's detailed in direction #1 of the "filling part" of the recipe card as well as above in the text. I'll add a note section as this seems to be a tricky part of the recipe.
For the setting of the cheesecake, what size pan did you use? 80 minutes in the oven should be enough time for it to bake. Did you turn the oven off after that and leave the cheesecake in the oven to gradually come to room temperature? That's an important step as you can't just pull a cheesecake out of a hot oven - it will sink and won't set up.
Wow, I am already salivating and wish I had this cheesecake right now! I used to love cheesecakes but I've never found a gluten-free and vegan recipe before. I'll try this recipe. Thank you for sharing.
This recipe is delicious, the best part is the crust! Definitely a little time consuming and dirties a lot of dishes, but worth the effort! I used regular dairy cream cheese and it was delicious. The only reason I wouldn't rate this recipe 5 stars, is the instructions could be improved. For the crust, step 3, I think this is where the remaining 1/3 cup of coconut oil should be mixed in, but it's not mentioned anywhere. It's a really important ingredient, as you won't get it to stick together without it. Also, the instructions around the water bath were tricky to understand. It doesn't say you should place the spring form pan into the water bath (so it's confusing to someone who may be unfamiliar with this method). It also doesn't say anything about wrapping the bottom of the spring form pan in aluminum foil to prevent water from leaking into the spring form pan, which is a good rule of thumb.