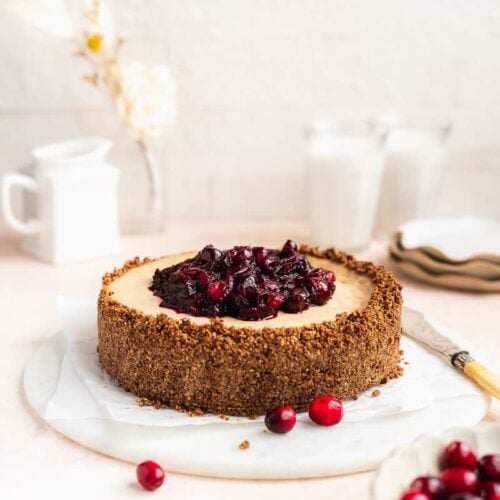
Mini Non Dairy Pumpkin Pie
Put a fun twist on the classic holiday pie with these cute mini dairy free pumpkin pies! They have an easy golden brown crust and creamy almond milk pumpkin filling made without evaporated milk. Each one is topped with whipped coconut cream!
This Mini Dairy free Pumpkin Pies recipe is sponsored by King Arthur. As always, all thoughts are my own. Thank you so much for supporting brands that make The Fit Peach possible!

Ahh, the classic pumpkin pie! It's been a very controversial pie in our family for years. We're a family of chocolate lovers so taking up space on our holiday dessert spread with something pumpkin seems highly out of character.
But these mini pumpkin pies have convinced even the hardest chocolate pie lover they they deserve a spot at the table. Each one is creamy and dreamy with an incredibly easy homemade pie crust and dollop of whipped coconut cream. They're made with almond milk, no evaporated milk here, and wholesome fresh ingredients.
Jump to:
Why You'll Love this Dairy Free Pumpkin Pie
- Easy gluten free pie crust
- Almond milk pumpkin filling
- No evaporated milk
- Topped with dairy free whipped coconut cream
- Perfect for a holiday party
- Kid friendly
Non Dairy Pumpkin Pie Ingredients

- Gluten free flour - King Arthur's Measure for Measure Gluten Free Flour is perfect for making pie dough. It's a blend of a few different types of gluten free flours and has a great taste.
- Vegan butter - Use cold butter that is chopped into ½ inch pieces. Substitute with grass-fed butter if not dairy free.
- Pumpkin puree - Make sure to use pumpkin puree and not pumpkin pie filling.
- Coconut sugar - Used to sweeten the pumpkin filling. Substitute with granulated sugar or light brown sugar if needed.
- Molasses - This elevates the deep pumpkin flavor in the filling. You can omit it if desired.
How to make Pumpkin Pie without evaporated milk
These mini pumpkin pies are super simple to make. You will need a food processor or mixer to make the dough, a mixing bowl for the filling, a circular or scalloped cookie cutter, and a muffin tin.
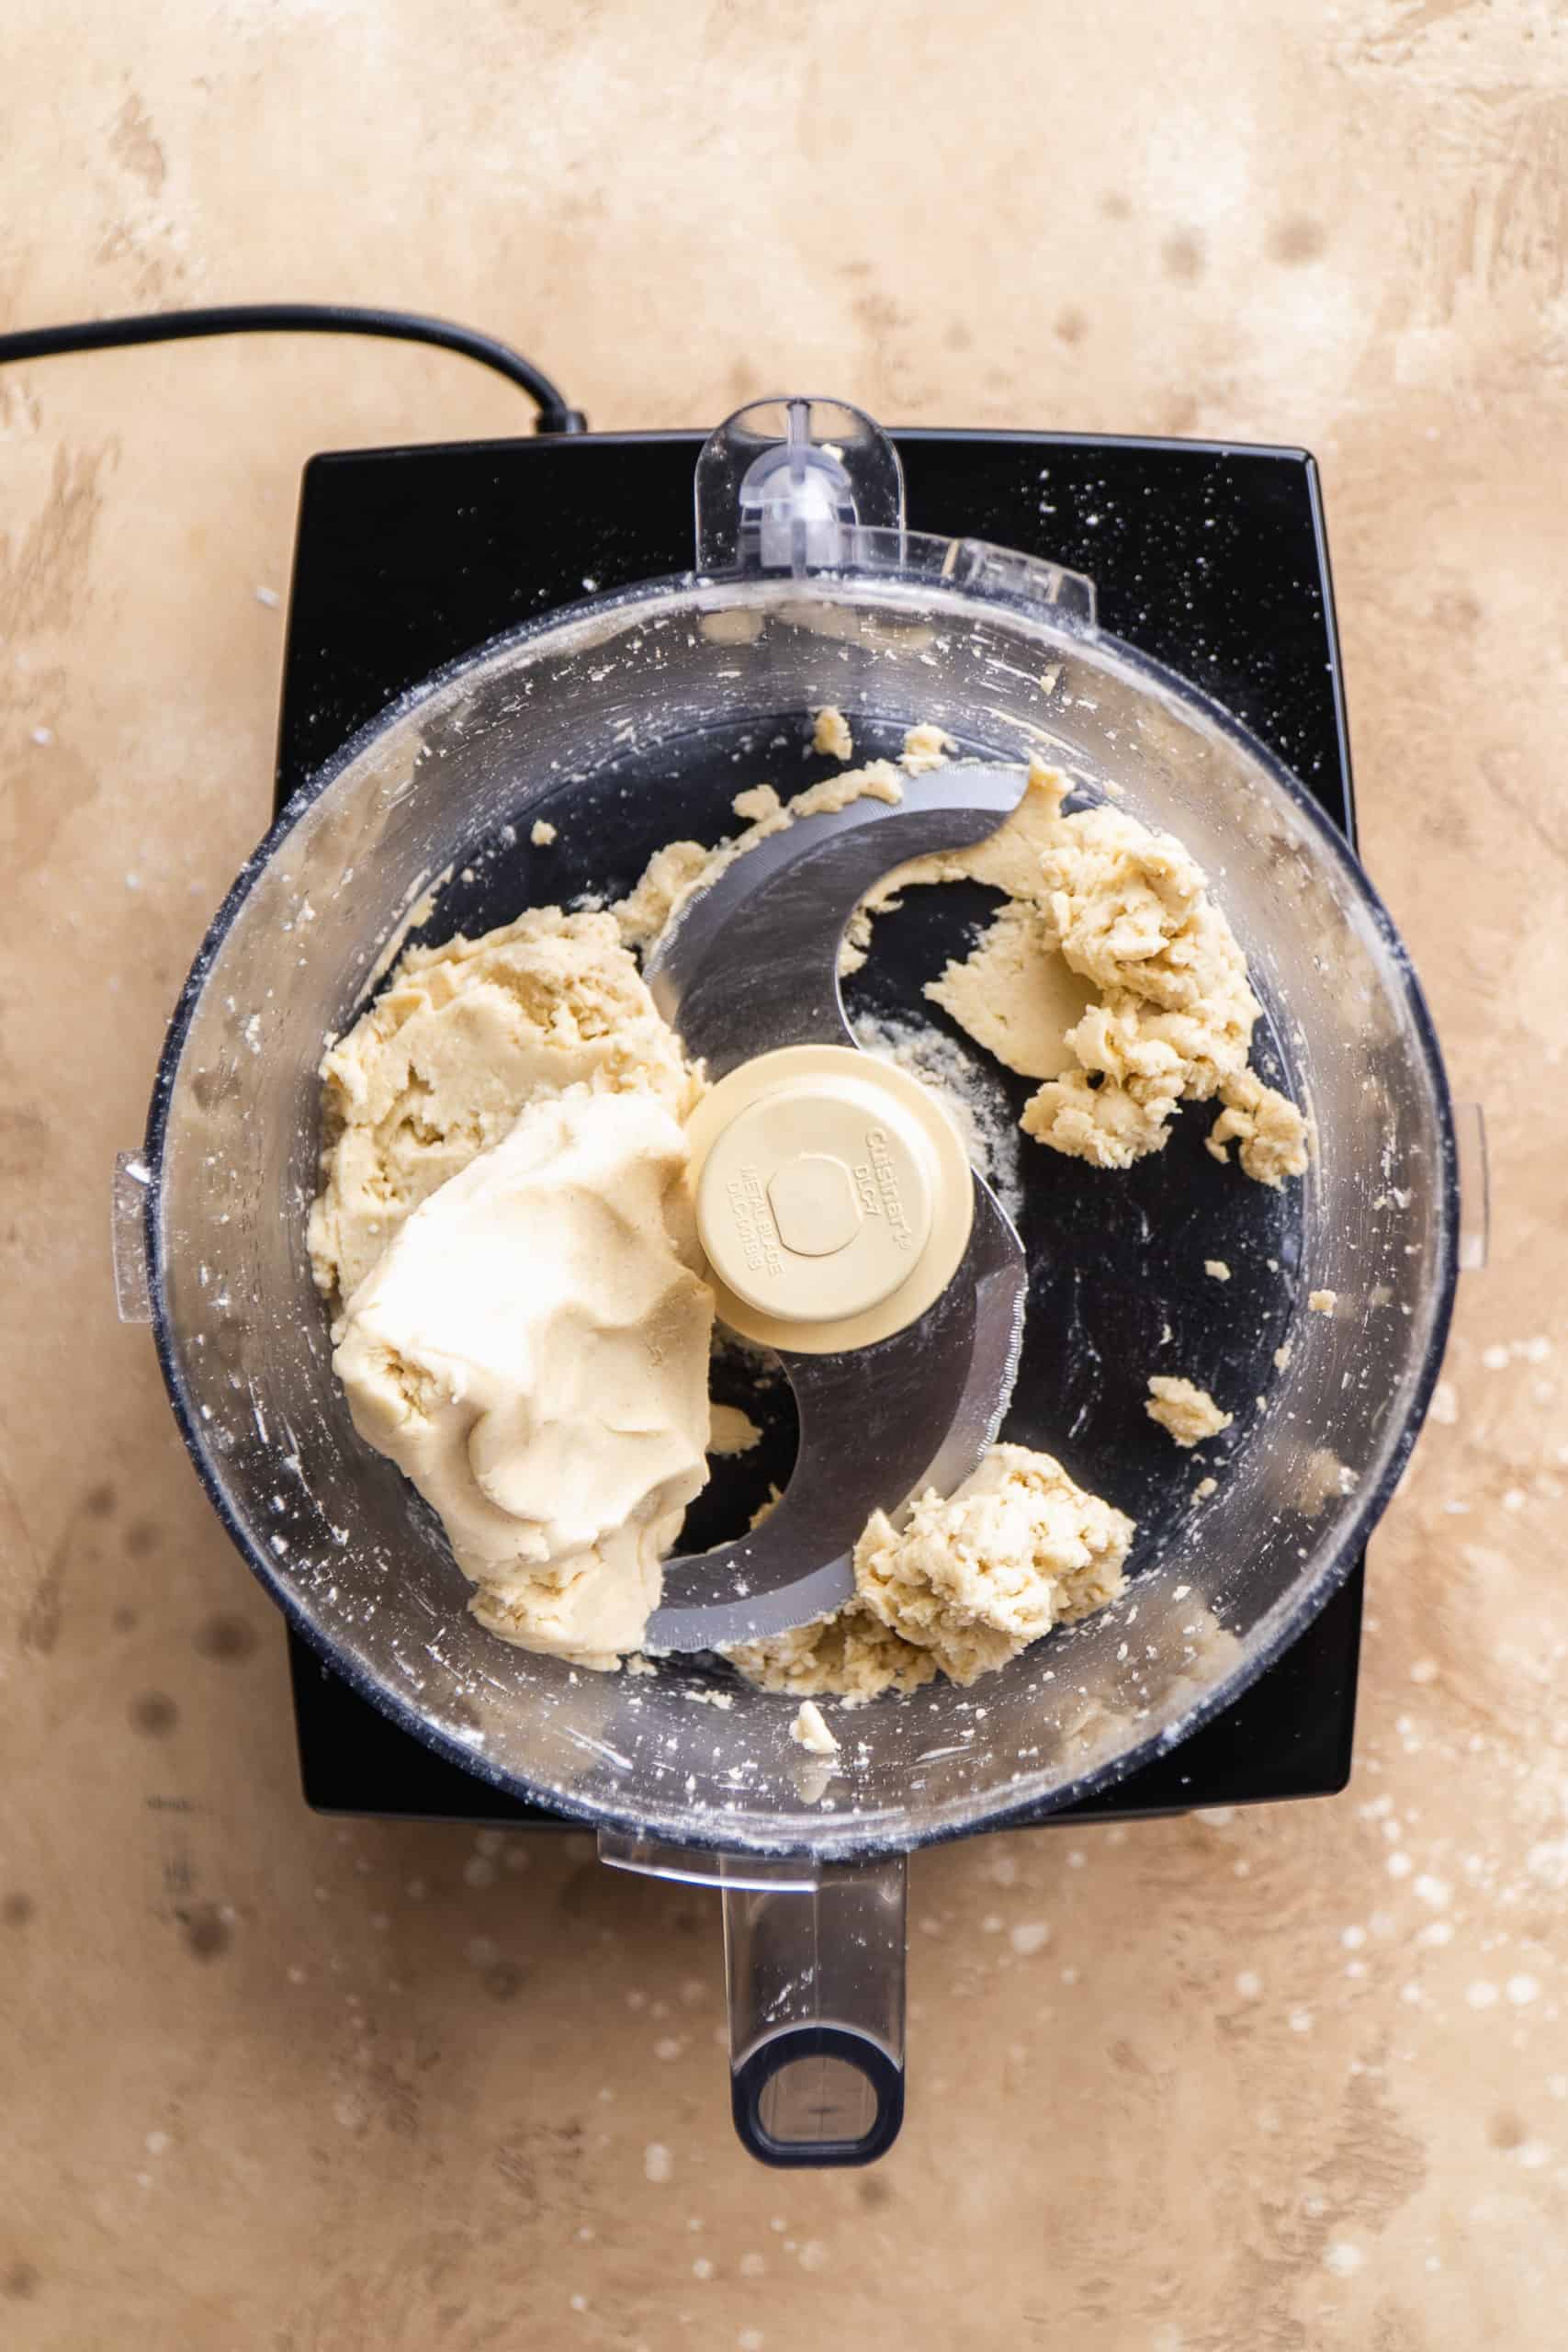
Step 1 : Make the pie dough
To make the dough, place the gluten free flour and cold butter chunks in a food processor. Pulse a few times to break up the butter. Don't over mix. You want little bits of butter to remain in the mixture (about pea and bean sized pieces).


Once the butter is broken up, turn the processor on and pour in the maple syrup and cold water. A ball of dough should form fairly quickly. Again, don't over mix. Only keep the processor on until the dough begins to form. It will be sticky and shaggy still which is okay.
Wrap the dough up in plastic wrap and chill it in the fridge while you make the filling (for at least 20 minutes).

Step 2 : Make the pumpkin pie filing
In a mixing bowl or with a stand mixer, whisk together the pumpkin filling ingredients until well incorporated. You can do this with a hand mixer, with the paddle attachment on a stand mixer, or with a stiff whisk.
There will be some small pumpkin clumps in the batter which is okay.

Step 3 : Assemble the crusts
Take the dough out of the fridge and roll it out on a piece of parchment paper to about ½ inch in thickness. Use a 4 inch circular cookie cutter or a scalloped cookie cutter to cut shapes from the dough.

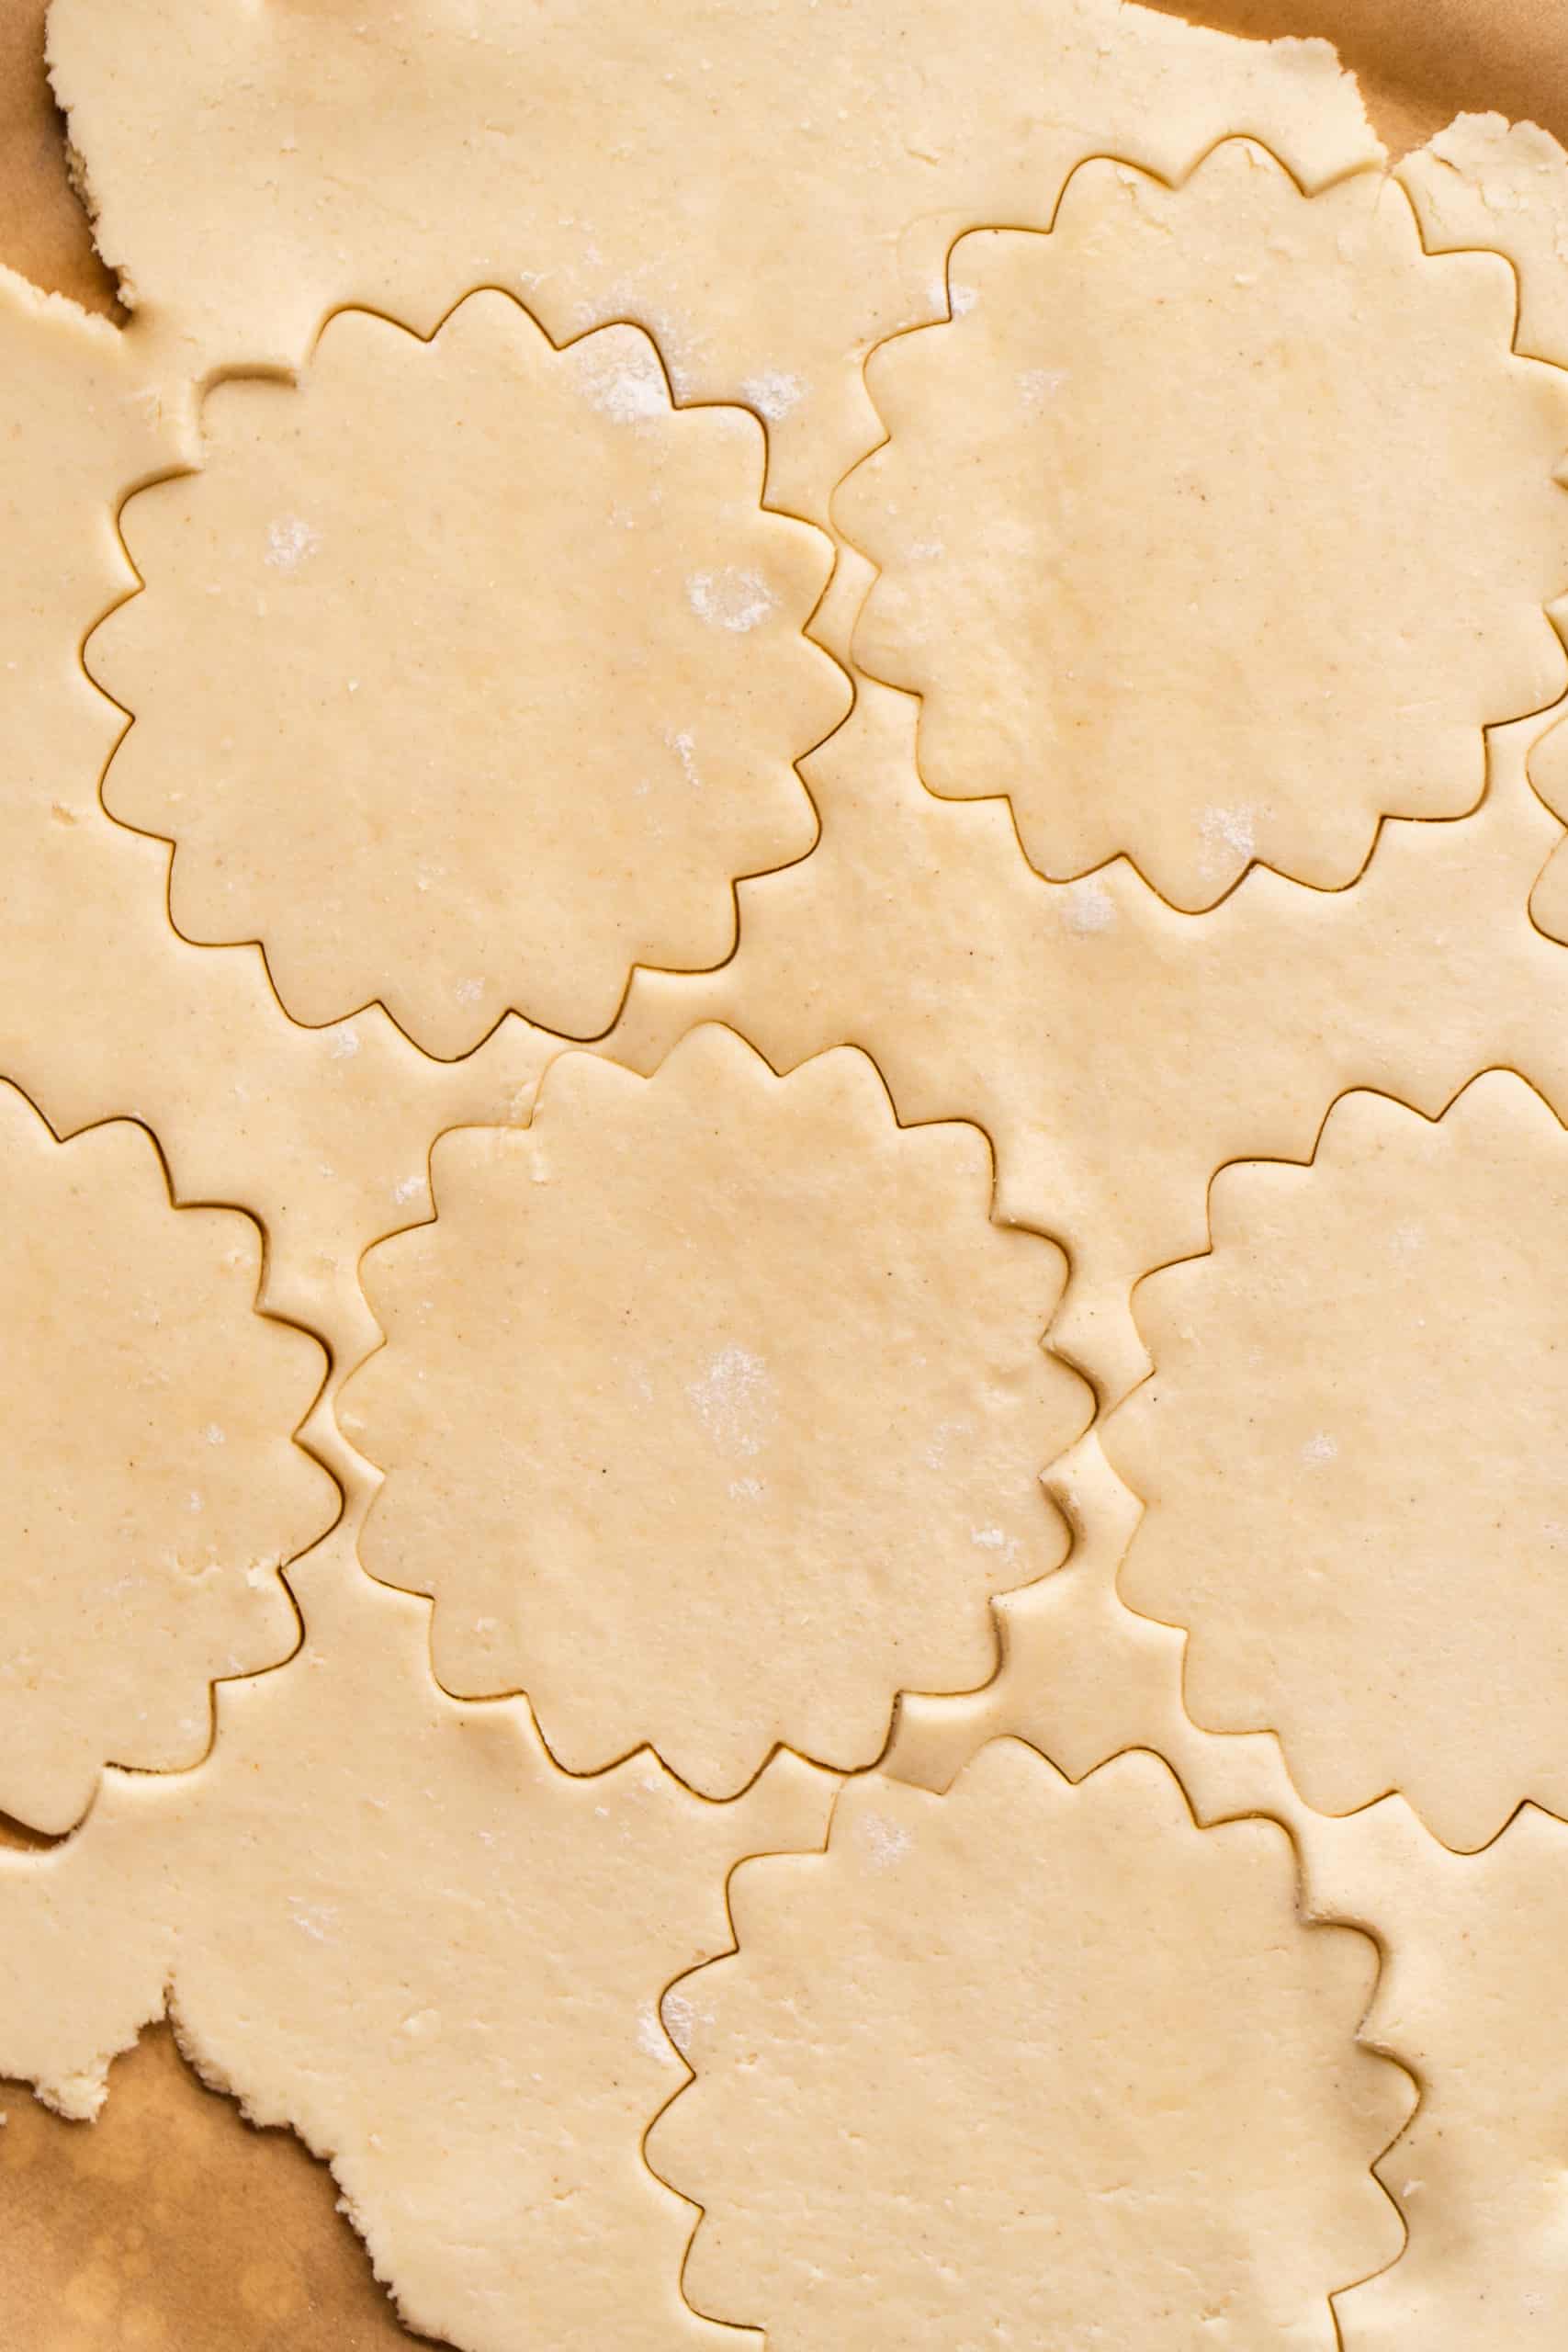
Grease a muffin tin with oil before gently pressing each shape into the cavities. If you use a scalloped shape, the dough will fit effortlessly in the muffin tin. If you use a simple circular shape, you will need to crimp the edges a little so it fills up the space.

Step 4 : Add the filling
Use a 2 inch cookie scoop or a large spoon to scoop the filling into the crusts. I like to use a cookie scoop so I know each mini pie will be the same size and thus require the same baking time.
Drop the pan on the counter a few times to remove any air bubbles and help even out the filling. Then bake in the oven until the crust is golden brown.


Step 5 : Top with coconut whipped cream
Allow the pies to set for at least 30 minutes before topping with whipped coconut cream. You can whip coconut cream by hand with a hand mixer or, my new favorite, use a whipped cream dispenser (more on that below).

Coconut whipped cream
Yes, it is a thing and it's magical. I have used it on my vegan banana cream pie, peanut butter cookie dough pie, and strawberry shortcake biscuits.
To make it you need chilled coconut milk so the cream on top is cold. You then beat it in a mixing bowl with some vanilla and sweetener like maple syrup or honey. The result is a sweet and airy whipped cream you can use to top on basically anything.
There are a few drawbacks though: First, you dirty up a bowl and mixer. and second, it can be a little finicky to get the texture just right. There are all sorts of workarounds and tips like chilling the mixing bowl for 20 minutes before making it and throwing the beaters in the freezer beforehand too. But I have stumbled upon something even better...
A whipped cream dispenser. You use it the same way you would normal whipped cream! Simply add chilled coconut milk and a little vanilla to the base and shake a few times. Then attach the nitrogen cartridge. You will hear a hissing noise at the nitrogen flows into the base. Shake a few more times then dispense onto the top of your mini pumpkin pies!
If you don't use up all the coconut cream, store the dispenser in the fridge and use it over the next few weeks. Just give it a few hard shakes and dispense as usual.
How to make Dairy Free Pumpkin Pie ahead of time
You can make the dough ahead of time and store it in the fridge until ready to use. It will keep for 3 days when chilled and wrapped up.
You can also cut out the crust shapes and place them in the muffin tin. Cover the muffin tin tightly with plastic wrap to keep it air tight. Then prepare the filling and bake accordingly.

How to store this Dairy Free Pumpkin Pie Recipe
Store these mini almond milk pumpkin pies in the fridge until ready to enjoy. Keep them in an airtight container with a lid.
You can go ahead and top with whipped coconut cream if you want or wait and do that when serving.

Non Dairy Pumpkin Pie FAQs
We use almond milk in place of evaporated milk in this recipe. Coconut sugar and molasses are added to the filling mixture to provide the sweetness typically found in evaporated milk.
In traditional pumpkin pie, the milk is used to thicken the filling. We use almond milk in this recipe which elevates the creaminess of the filling. The filling, once baked, is soft and set.
Yes, any dairy free milk will work in this recipe.
This recipe makes 12 mini dairy free pumpkin pies which are perfect for a small gathering. You can easily double or triple the recipe to make 24 or 36 mini pies. Click the 2X or 3X button in the recipe card to multiple the ingredient measurements.
Yes, store the pumpkin pies in an airtight container in the fridge for up to a week. Each chilled or let them thaw at room temperature for half an hour before digging in.
For more holiday cheer, check out my:


PS : If you make this recipe, be sure to leave a star review and comment below! Also be sure to follow along with me on Instagram and Pinterest to stay up to date on all tasty recipes here at The Fit Peach!
Recipe

Mini Pumpkin Pie Recipe (no evaporated milk)
Ingredients
For the dough
- 1 cup King Arthur Measure for Measure Gluten free Flour
- 6 tablespoon vegan butter - cold and cut into ½ inch pieces (sub grass fed butter if needed)
- 2 tablespoon maple syrup
- 3 tablespoon cold water
For the filling
- 1 cup pumpkin puree
- 3 tablespoon coconut sugar
- 1 egg yolk
- 1 teaspoon molasses
- ¼ cup almond milk
- 1 teaspoon pumpkin spice
For the whipped cream
- 13 oz coconut milk - full-fat, chilled overnight
- 1 teaspoon vanilla
Instructions
- In a food processor, pulse the King Arthur Measure for Measure Gluten free Flour and the cold butter pieces a few times until the butter is broken up slightly. There should still be little clumps of butter in the mixture.
- Add the maple syrup and cold water to the processor while it's running. Mix until a large ball of dough forms.
- Wrap up the dough in plastic wrap and place in the fridge to chill for 20 minutes while you prepare the filling.
- For the filling, beat the pumpkin puree, coconut sugar, egg yolk, molasses, almond milk, and pumpkin spice in a bowl until creamy. You can use a hand or stand mixer for this or a stiff whisk. Set aside.
- Preheat oven to 375 F. Take the dough out of the fridge and roll out on a piece of parchment paper to ½ inch in thickness. Use a 4 inch circular or scalloped cookie cutter to cut shapes out of the dough. Coat a muffin tin with oil and carefully press each shape into the cavities.
- Scoop 3 tablespoon of the pumpkin pie filling into each crust. Drop the muffin tin on the counter a few times to remove any air bubbles and even out the filling.
- Bake the pan in the oven for 20 - 25 minutes until the crust is golden brown. Let cool before topping with whipped coconut cream.
- When ready to serve, prepare the coconut whipped cream by beating the chilled coconut cream with the vanilla until thick and creamy. You can also use a whipped cream dispenser for this. Dollop each mini pumpkin pie with the cream and enjoy!

Why not just use the whole egg?
Hi Ansley! I’d love to make these today!
Just a question: I can’t see the exact measurement for the molasses on the ingredients chart.
I only see “tsp molasses”
How many tsp should I add?
Thank you in advance! 🙂
Hi Alessia! Sorry about that - it's 1 tsp. It should be in the recipe card now. Hope you love them!