


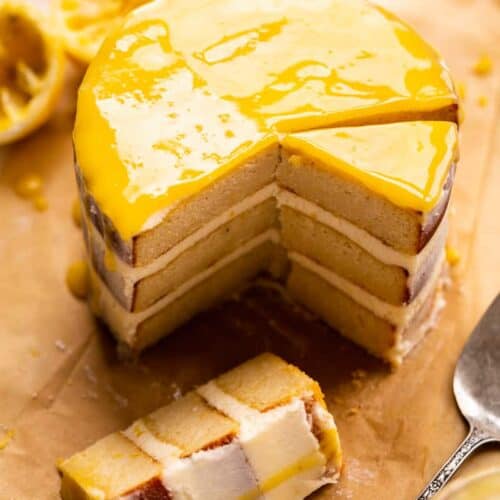
Gluten Free Red Velvet Cake Recipe
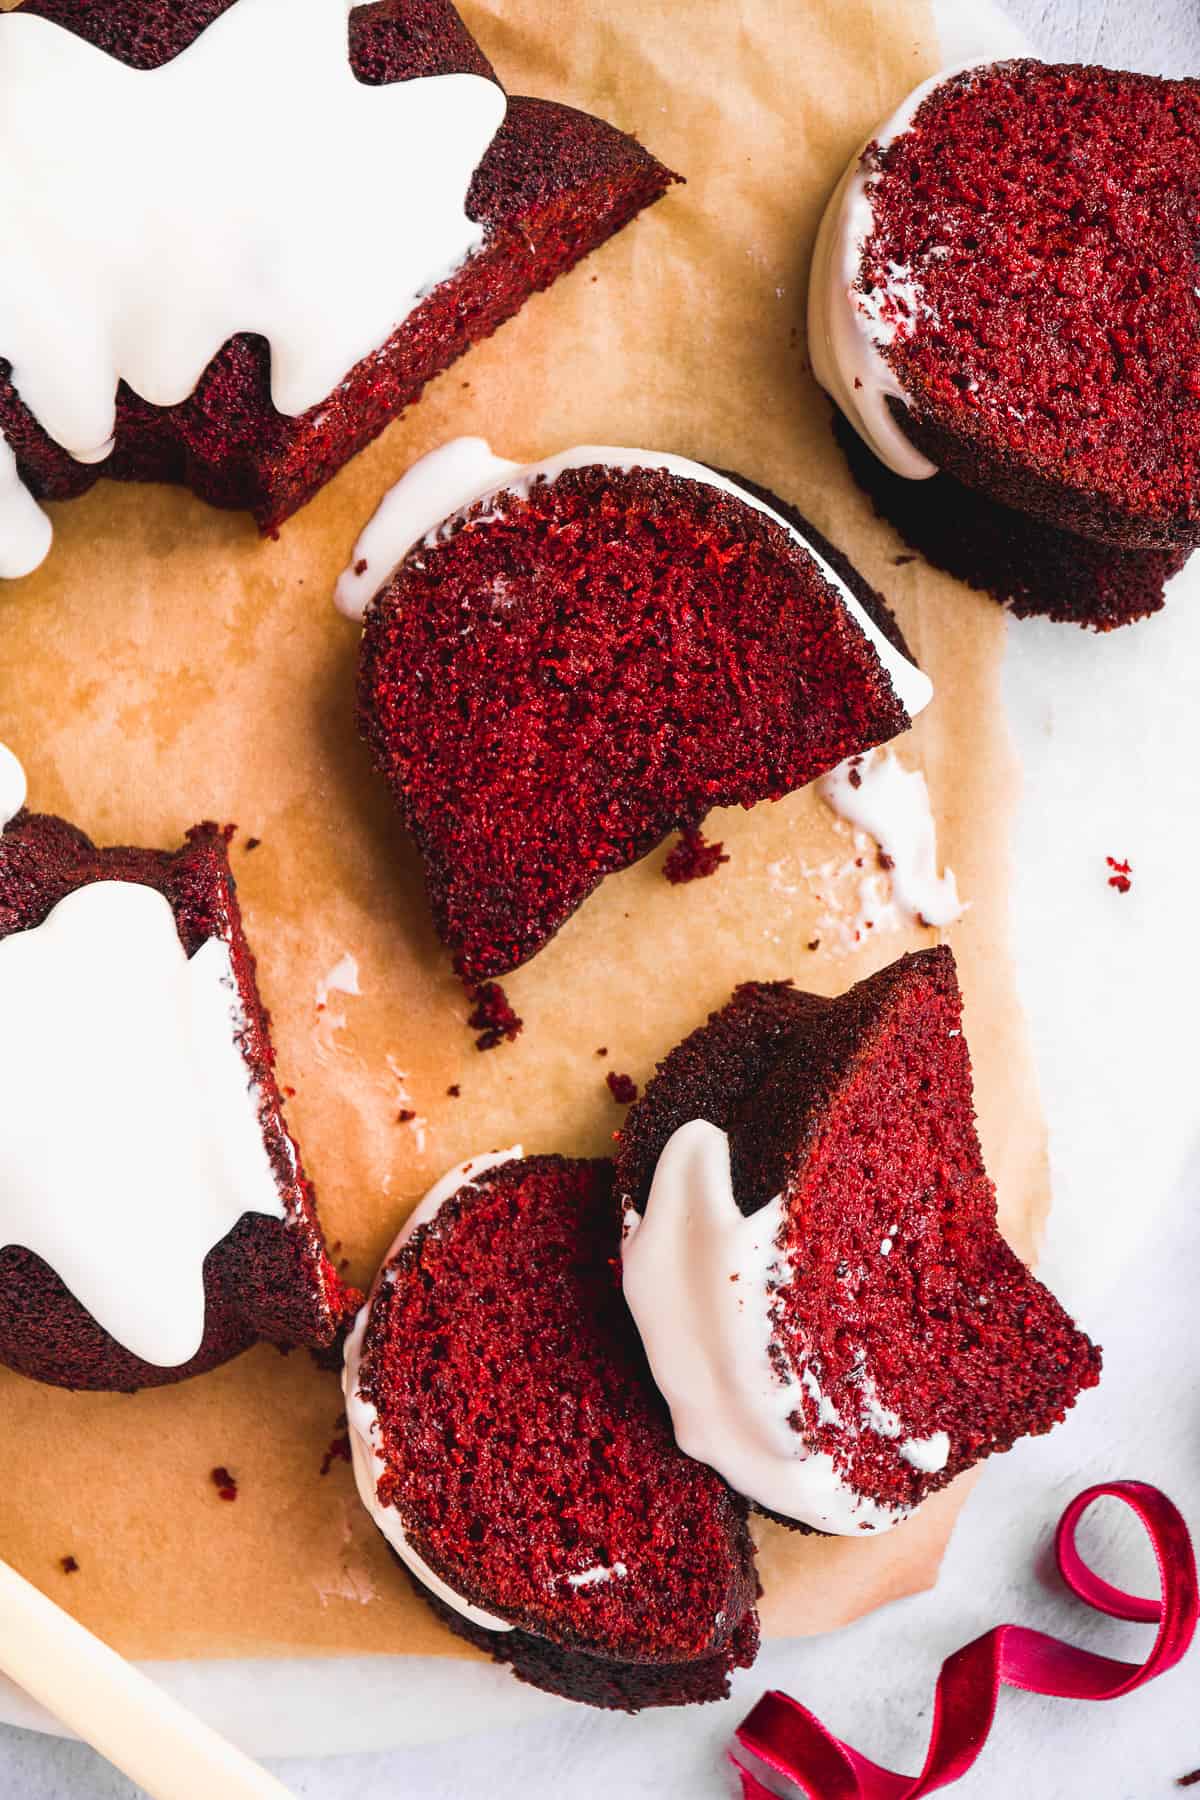
Nothing says celebration like a soft and moist red velvet bundt cake! It's naturally made gluten free and dairy free and perfectly paired with a sweet cream cheese icing. With hints of chocolate flavor and it's signature bright red color, this bundt cake is perfect for Christmas too!
This bundt cake is all things festive and vibrant. It's easy to make and perfect for gatherings of all kinds!
If you love red velvet, you'll also love my gluten free red velvet cupcakes!
Jump to:
Why We Love This Red Velvet Bundt Cake Recipe
- Naturally gluten free and dairy free
- Paleo friendly option
- Topped in an easy dairy free cream cheese icing
- Makes the perfect holiday cake
- Prepared in one bowl
Red Velvet Bundt Cake Ingredients
For the bundt cake

- Almond flour - This is the gluten free flour used in this bundt cake recipe. It provides a soft and moist texture.
- Tapioca flour - Helps to cut the density from the almond flour. If needed, substitute with arrowroot starch.
- Coconut sugar - Used to sweeten the cake. Substitute with light brown sugar or granulated sugar if needed.
- Coconut milk - Make sure to use full-fat. This is what gives the cake moisture.
- Apple cider vinegar - Combined with the coconut milk, this acts as a "vegan buttermilk". You won't even taste it!
- Cacao powder - Provides a chocolaty flavor to the red velvet cake. Feel free to use unsweetened cocoa if needed.
- Red food dye - Red velvet cake requires quite a bit of food dye to give it that bright red color. I prefer to use a gel food coloring as it doesn't mess with the consistency of the batter. If you want to use a natural and plant based food dye, this one is great. To make this paleo friendly, I recommend making your own red food dye.
For the icing
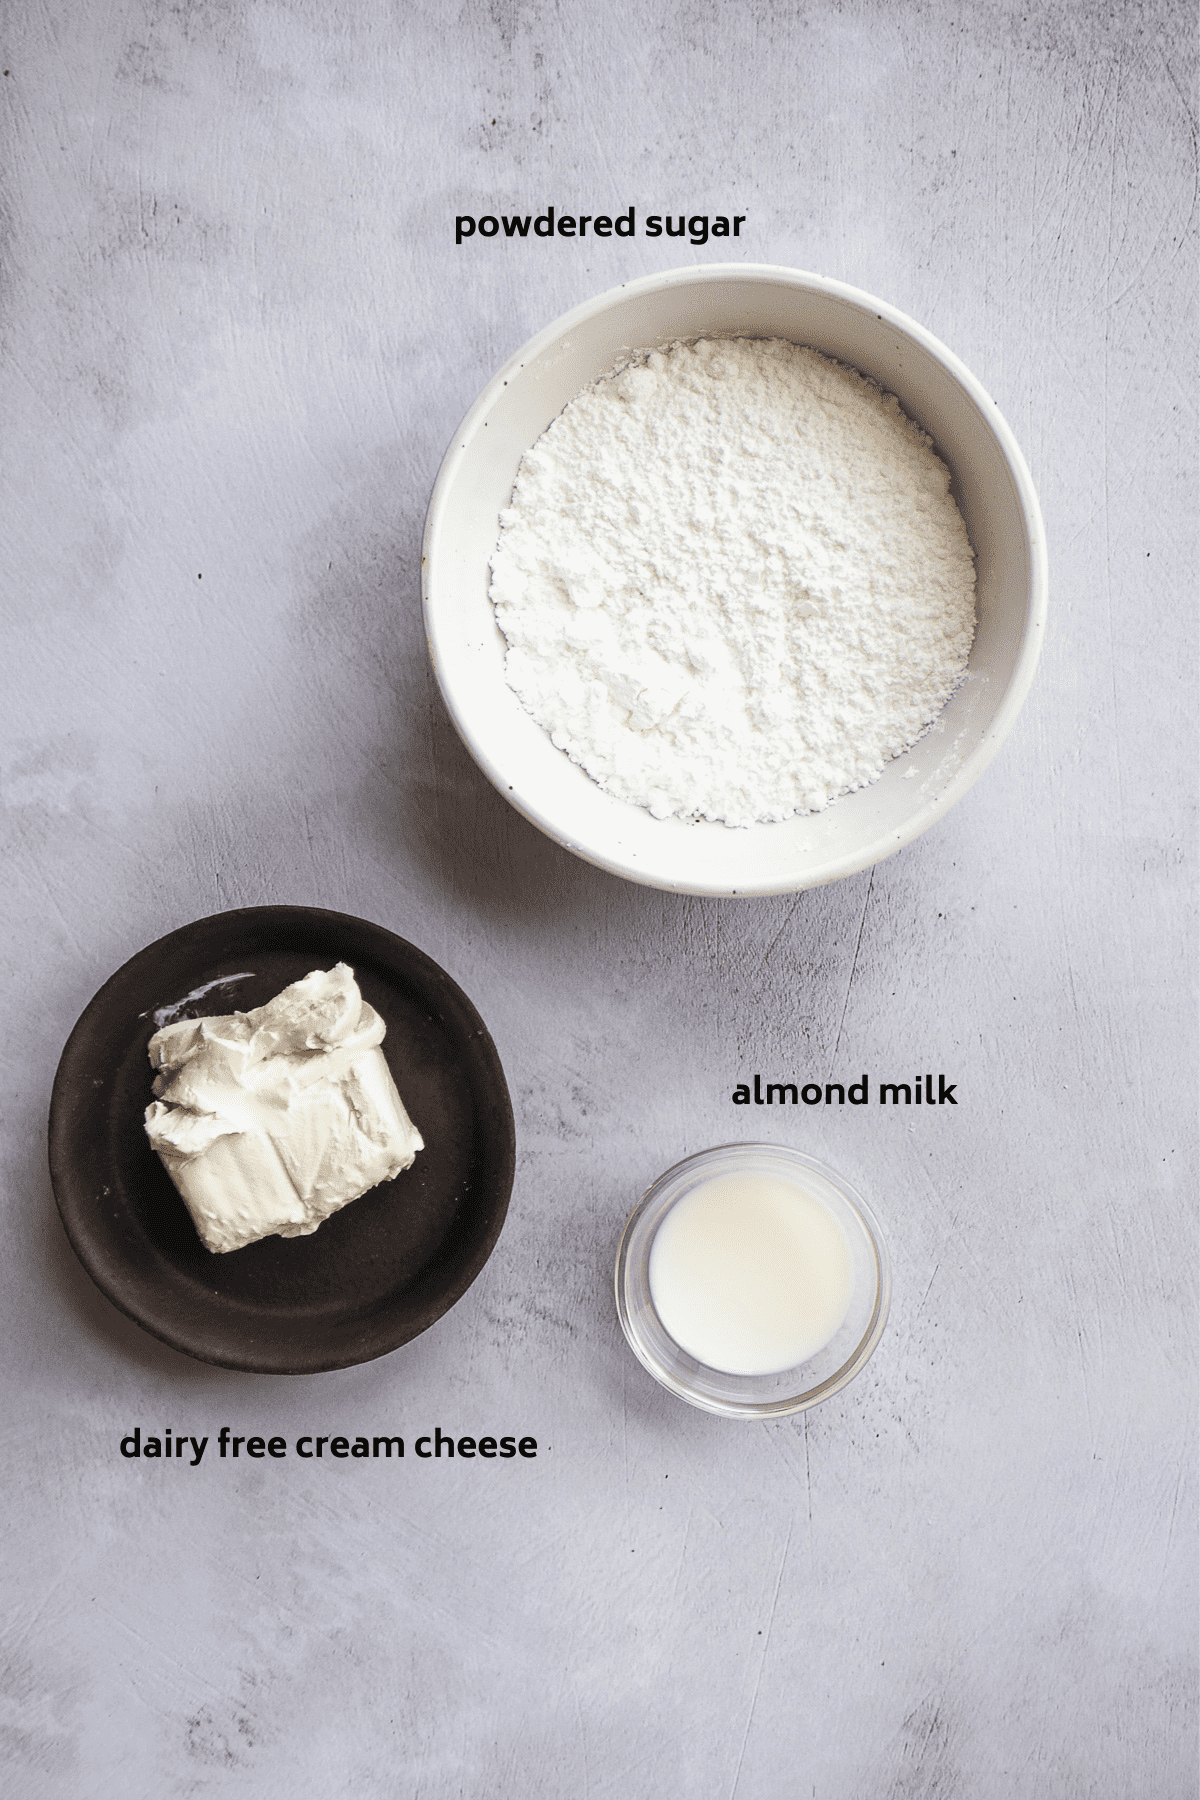
- Powdered sugar - This sweetens the icing. You can also use powdered monk fruit but I would only use half as much as it's much sweeter. If you want a less sweet icing, you can also reduce the amount of powdered sugar used.
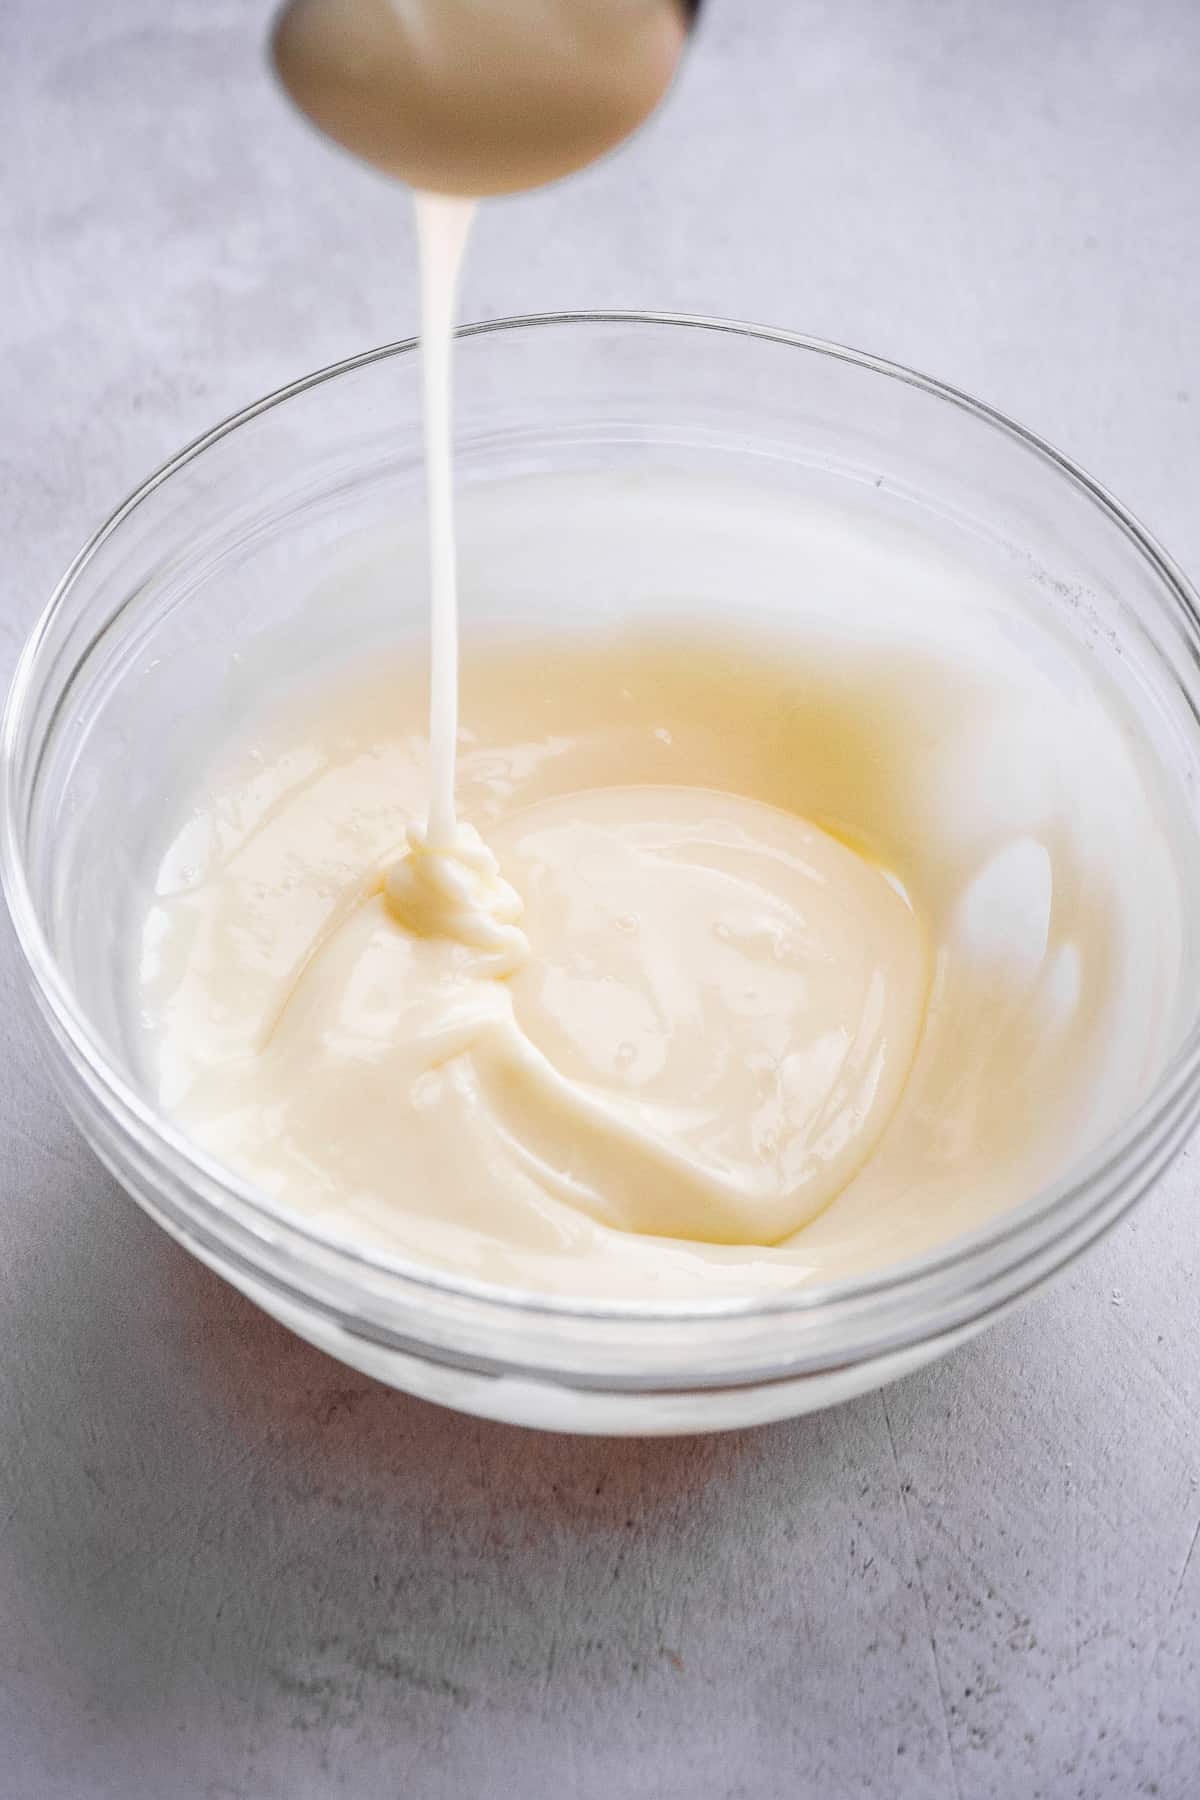
- Dairy free cream cheese - Make sure to set out the cream cheese so it's room temperature before making the icing. This prevents any bumps in the icing and makes it easier to mix. If you're not concerned about making this dairy free, regular or reduced fat cream cheese will work too.
- Almond milk - Any milk or even water will work.

How to Make a Gluten Free Red Velvet Cake
You can make this red velvet bundt cake in just one bowl. You will need a large mixing bowl and a hand mixer or stiff whisk or a stand mixer. I used
Step 1 : Mix the wet ingredients
Beat together the coconut milk, apple cider vinegar, eggs, coconut oil, vanilla, and coconut sugar. Mix well until creamy and no lumps remain.

Step 2 : Add the dry ingredients and food dye
Slowly add the almond flour, tapioca flour, baking soda, baking powder, and sea salt to the bowl while mixing. Once the flour is incorporated, add the red food dye.
Full disclosure, you will use a lot of food dye. Because this is cake has hints of chocolate, it's already a darker color so you need a good amount of red food coloring to make sure it stays that bright red color after it's baked.

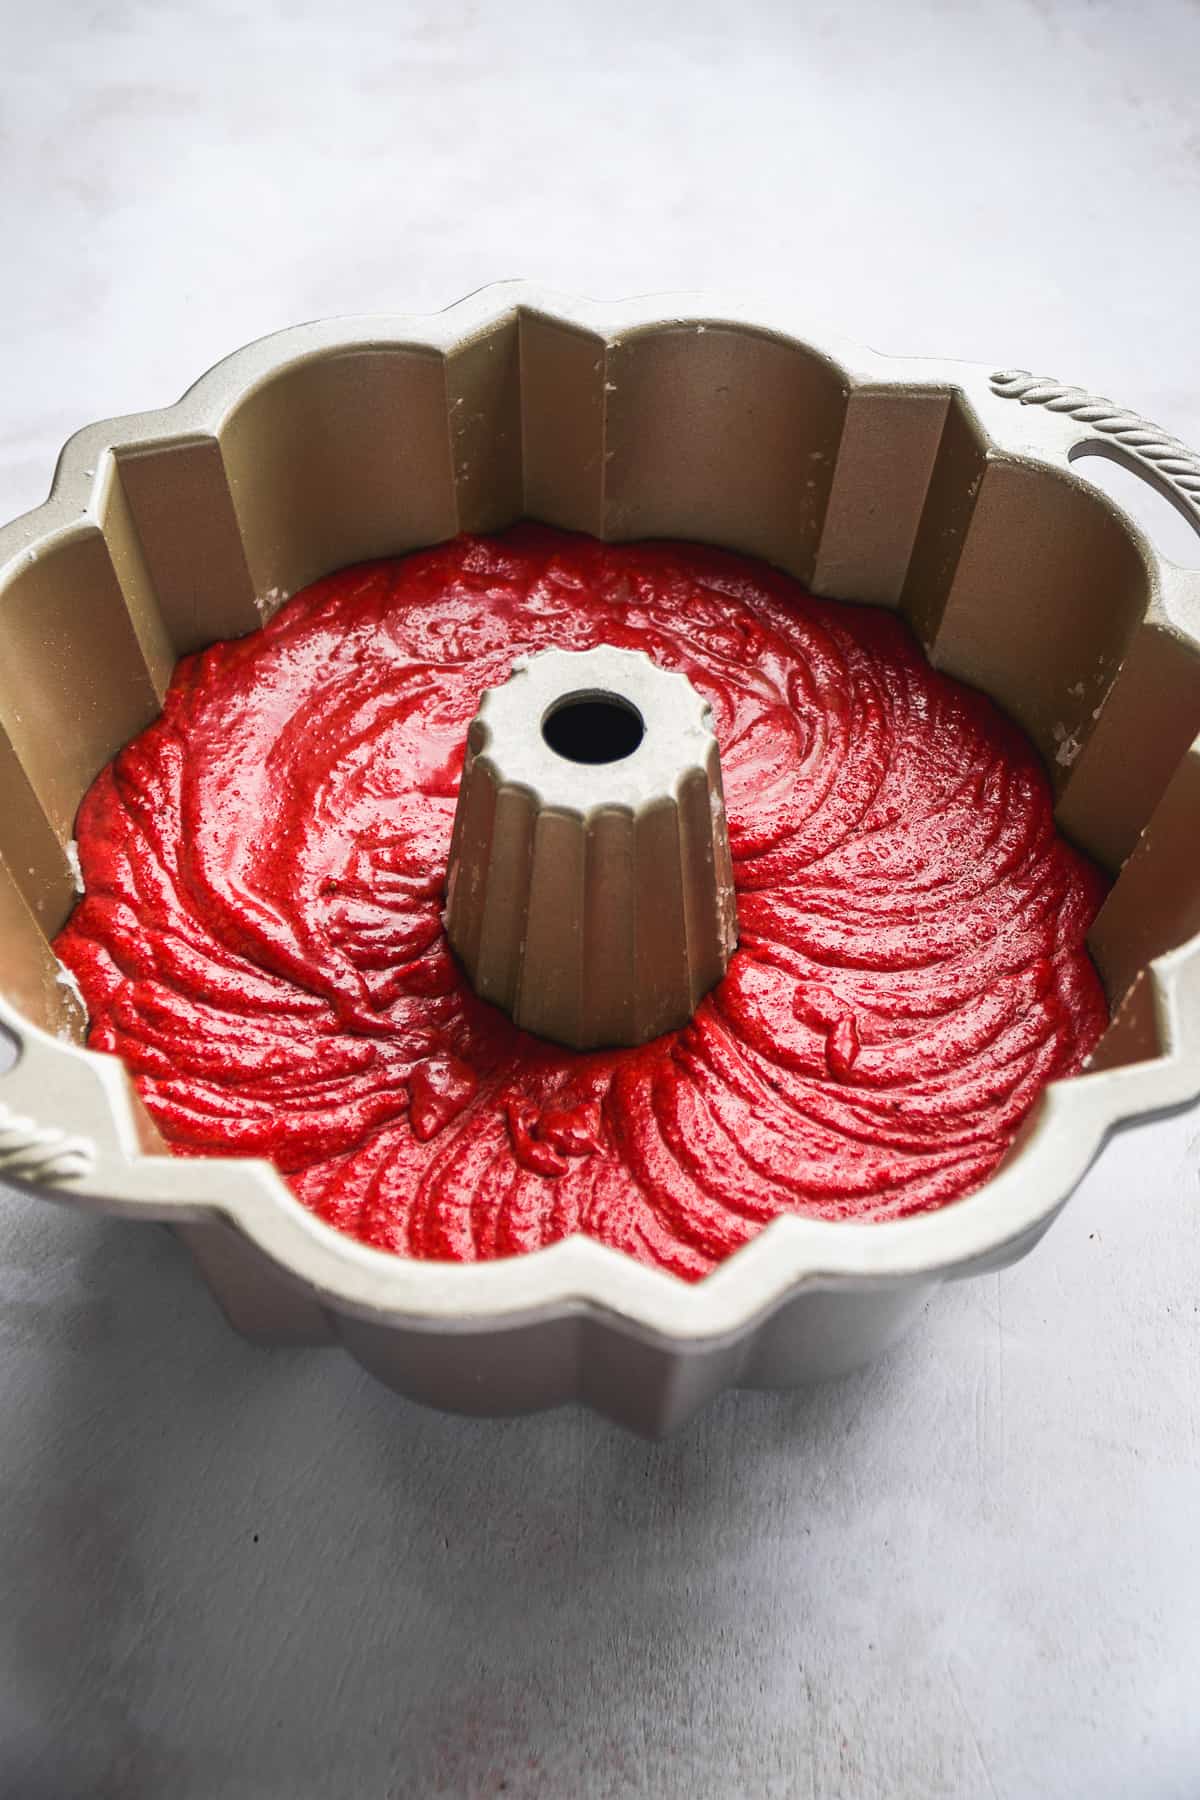
Step 3 : Pour into a bundt pan
First and foremost, it's important to grease your bundt pan really well. There are all sorts of tips and tricks out there about how to properly grease your pan so your bundt comes out clean - like using butter and then chilling it in the fridge or dusting it with flour before you pour in the batter...
While I'm sure those tips work, I find the easiest way to ensure your bundt comes out clean is to manually grease the pan with coconut oil. I like to use a ziplock bag but you can also use a paper towel or cloth so your hands don't get messy.
Use a generous amount of coconut oil and spread it all over the inside of the pan, paying special attention to the middle part and around the sharp edges.
I use coconut oil because it's thin enough to easily rub into the pan unlike butter which can be almost too solid. I also don't love the spray - I find it just doesn't get a good enough coating.
Once your bundt pan is well greased, pour in the red velvet batter. Tap the pan a few times on the counter to level off the top before baking.
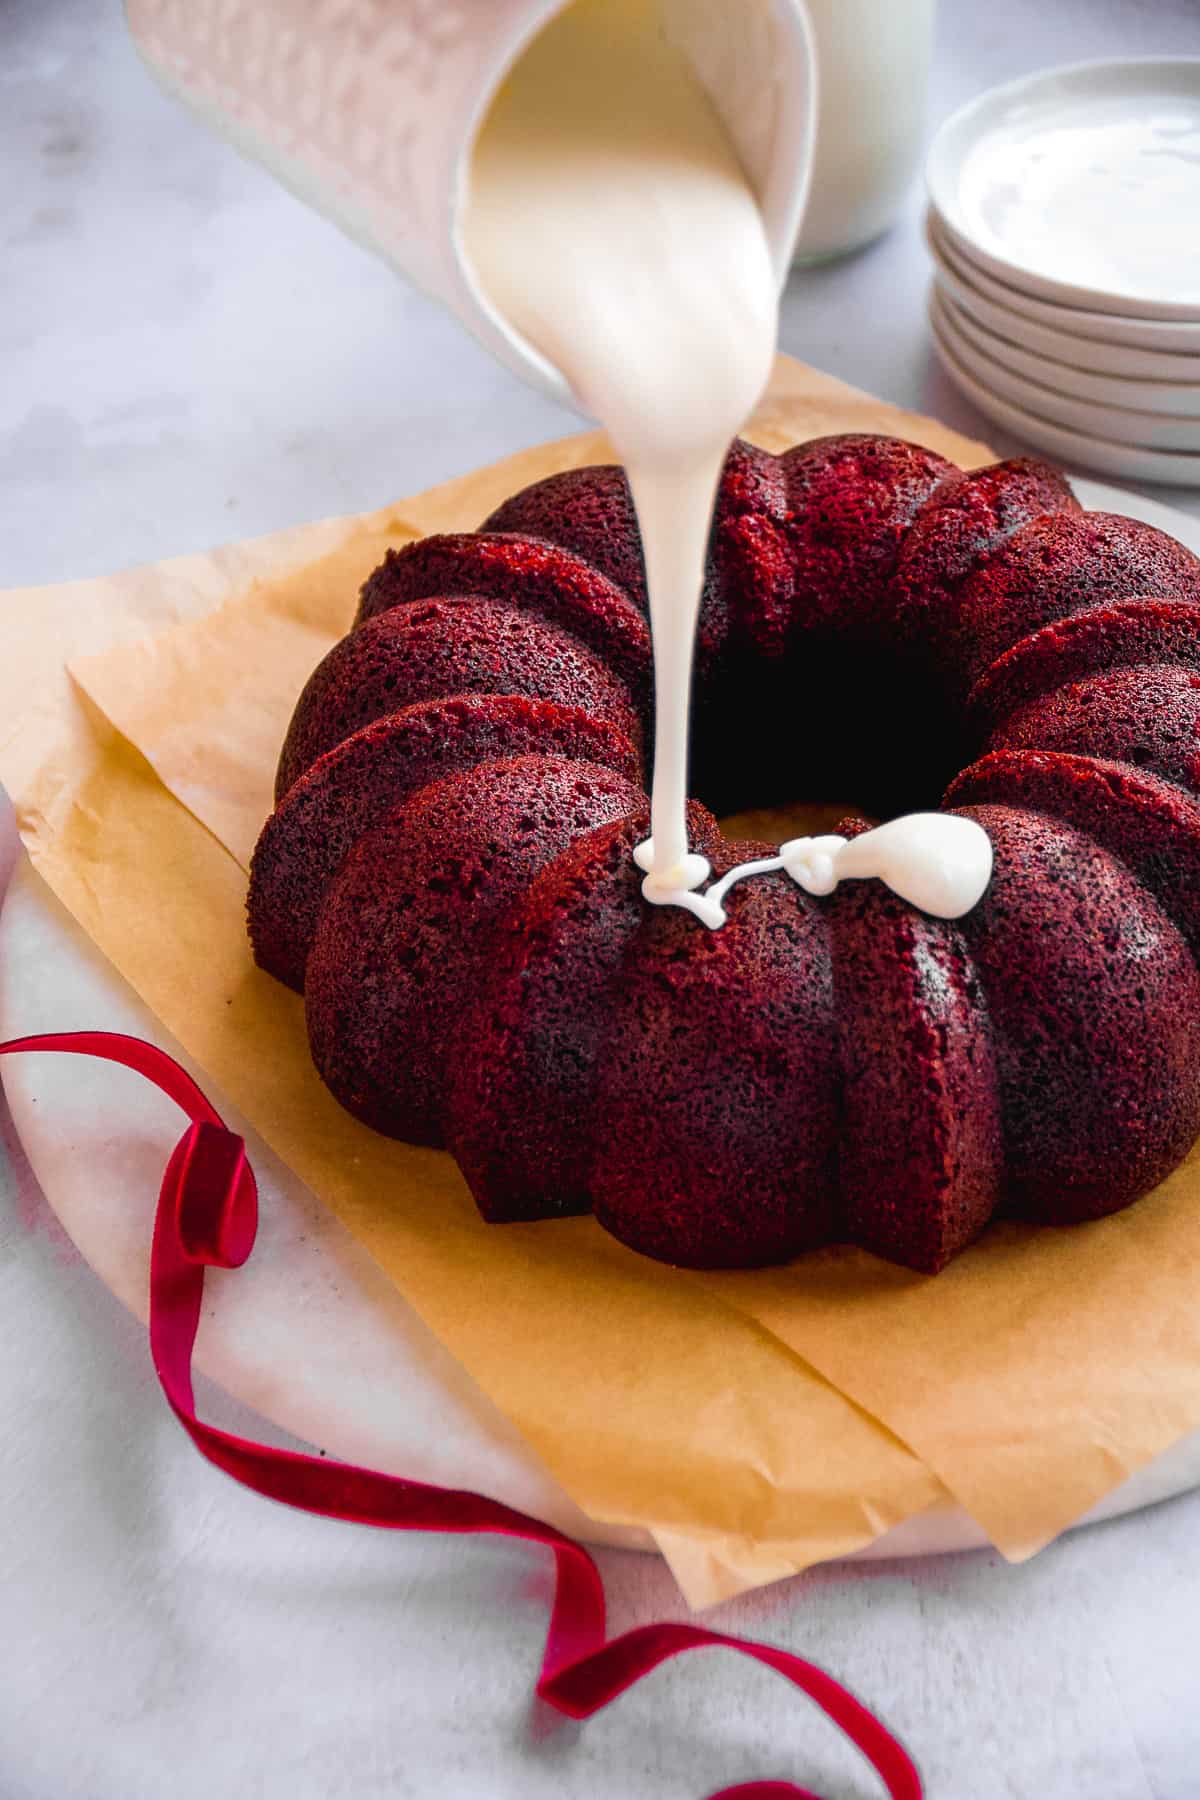
Step 4 : Drizzle with icing
Mix the icing ingredients in a mixing bowl or with spoon or hand mixer until no clumps remain.
Pour over top of the cooled bundt cake and allow the icing to run down the sides. The icing will solidify a bit after about 20 minutes.
How to grease your bundt pan
This step can make or break a bundt cake, especially when the cake is as soft and tender as this red velvet one. You want the cake to develop an outter layer that is still moist and soft but won't stick to the pan.
The key is to grease the pan really well manually with your hands. I like to stick my hand inside a sandwich bag so I don't get too messy.
My go-to greaser is always coconut oil. It's the perfect consistency where it's soft enough to fit into the hard to reach areas of the pan but solid enough where it won't melt and pool at the bottom of the pan.
Spread a fairly thick layer of coconut oil inside the pan, especially around the center part and the small edges. Once it's well covered in oil, pour in the batter.
A few other greasing options are softened butter (just don't soften it too much), palm oil, or even ghee. If you find that the oil is melted when you put it on the pan, stick the oil in the fridge for a few minutes to firm up before greasing the pan.

Removing the cake
This is probably the trickiest part of the entire recipe - getting the bundt cake out of the pan. Make sure to allow the cake to cool completely before removing. If it's still warm, it's easy for the cake to stick to the pan and the cake will be softer and harder to work with your hands.
Once it's cool, run a thin knife around the edges of the bundt pan and along the center piece (make sure to do this to the center, it's easy to forget).
When ready to remove the cake, place a serving platter, flat plate, or a cake stand upside down on top of the bundt pan. Firmly grab both the platter with the palms of your hands and the top of the bundt pan with your fingers and flip it upside down so the bundt pan is now sitting on top of the platter.
Gently wiggle the bundt pan to help release the cake. You should feel the weight of the cake drop from the pan when done properly. If you still feel the cake inside the pan and it's not budging, flip the cake around again and start again by running a knife around the edges.
Making Red Velvet Bundt Cake in Advance
If making ahead of time, leave the icing off the cake and store the cake in a cake tin. When ready to serve, pour the icing over top about 20 minutes before serving.
If you want to freeze the cake, wrap the cake tightly in plastic wrap without the icing. It will keep for 3 months in the freezer. Thaw the cake out on the counter or in the fridge overnight before serving. When ready to enjoy, prepare the icing and pour over top a few minutes before serving.
Red Velvet Bundt Cake Recipe Tips
- Something I like to do to ensure my bundt will come out of the pan clean is to shake the pan up and down after I have run a knife around the edges. I usually can feel the cake moving around inside the pan so I know it's not still attached to the pan anywhere. If I don't feel the cake sliding around, I will find out where the cake is catching and will manually help it out with a knife.
- Make sure the platter, plate, or cake stand you use when flipping the bundt cake over is the one you are serving it on. Once the bundt is right side up, it's hard to transfer it to a different platter.
- If you do plan on moving the bundt cake after it's out of the pan, place some parchment paper on top of the platter before flipping the cake so you can move it more easily.

Gluten Free Red Velvet Serving Suggestions
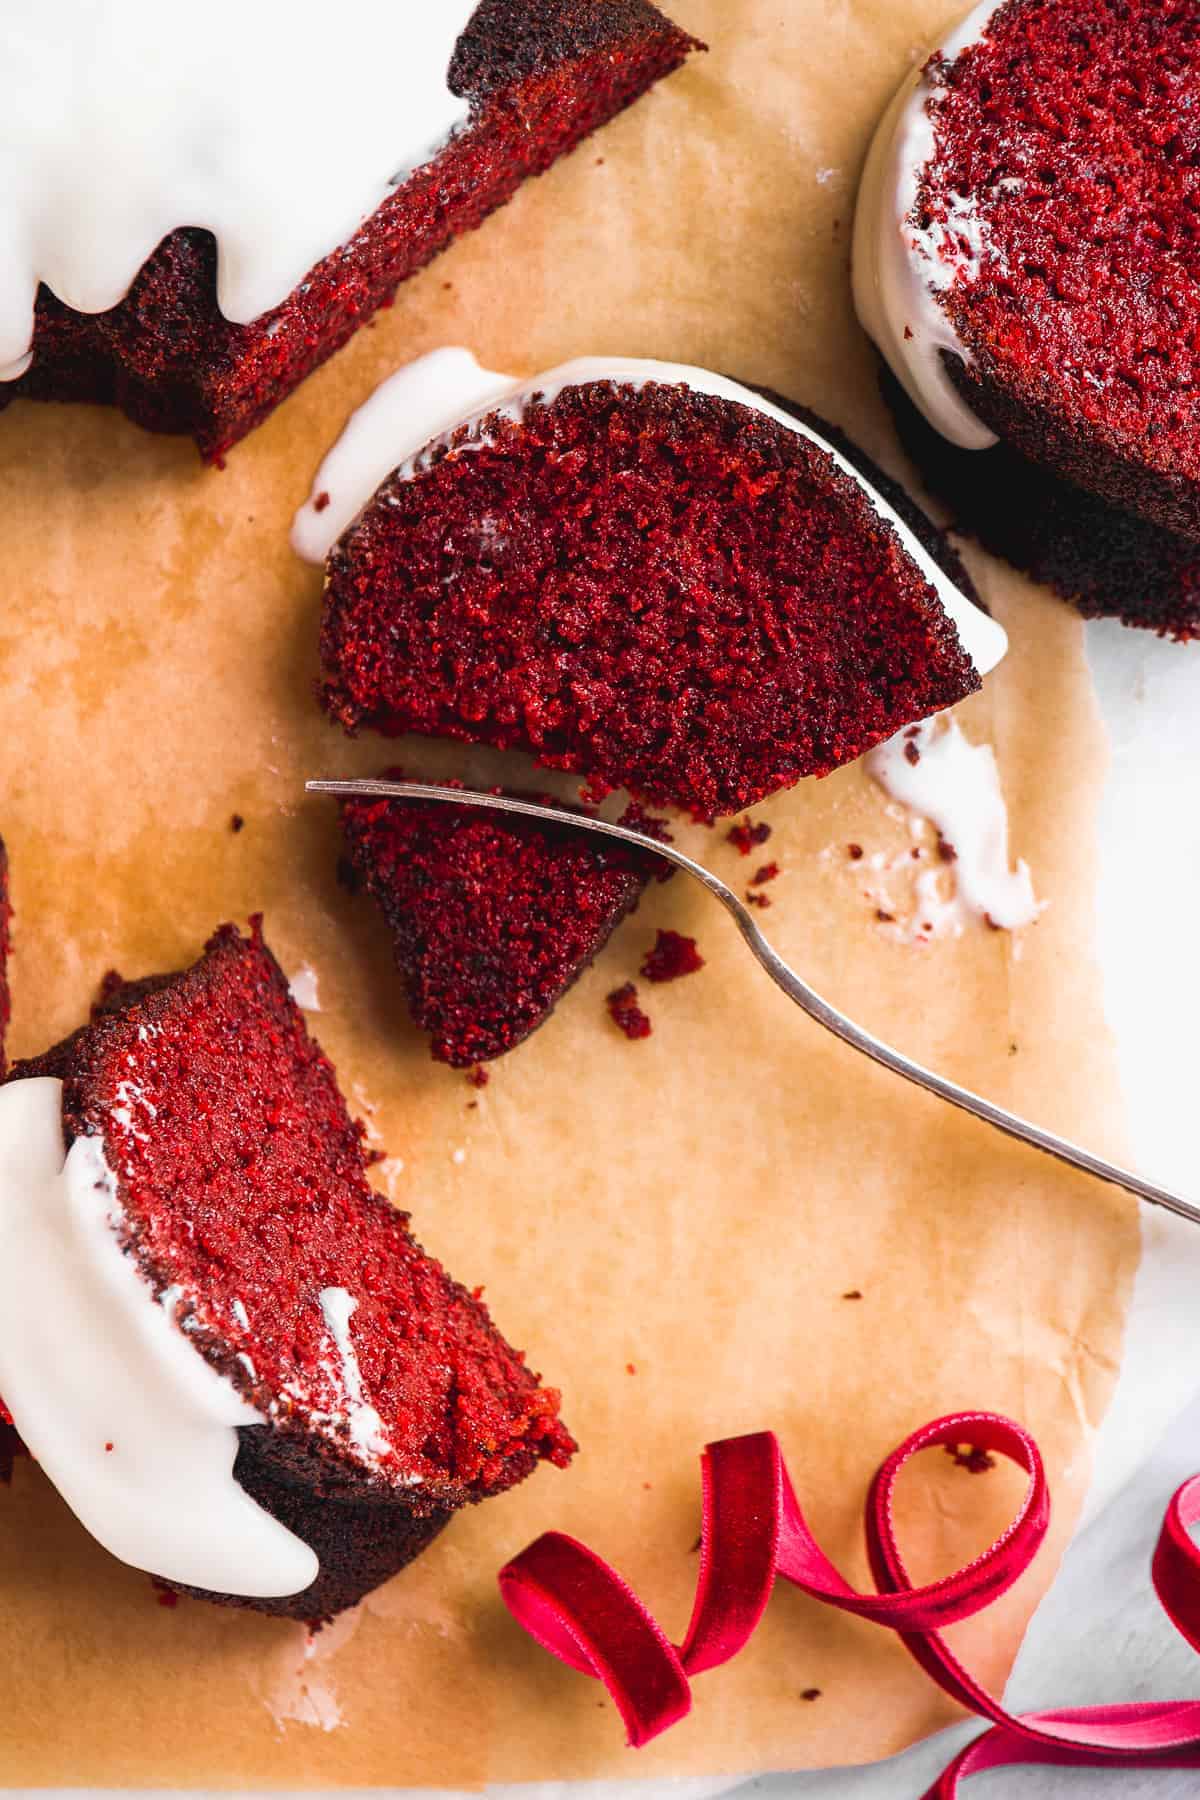
Wait until the icing has set on top of the cake to serve. This will prevent an icing mess and help to keep your slices of cake neat and clean cut.
Use a sharp knife to cut the red velvet bundt cake into pieces. Depending on the type of bundt pan you used, you can use the ridges of the cake to cut slices.
Storing Dairy Free Red Velvet Cake
Store this cake in an airtight cake tin where it will keep for up to 3 days out on the counter or a week in the fridge. The icing on top will be softer when left at room temperature and will be more solidified in the fridge. I recommend removing it from the ridge to allow it to come to room temperature for about 15 minutes before serving.
Gluten Free Red Velvet Cake Recipe FAQs
Red velvet is like a combination of subtle chocolate and vanilla combined. It has a soft chocolate flavor but also a sweet hint of vanilla.
Yes, the do now offer a few gluten free flavors. Because their ingredient list is still pretty lengthy though, I prefer to make my own bundt cakes.
Over mixing the cake batter can lead to a dense and heavy cake. Only mix the batter until the flours have just incorporated and there aren't any big lumps.
Yes, when made with the directed ingredients, this cake is dairy free.
For more cake recipes, check out my:


PS : If you make this recipe, be sure to leave a star review and comment below! Also be sure to follow along with me on Instagram and Pinterest to stay up to date on all tasty recipes here at The Fit Peach!
Recipe

Gluten Free Red Velvet
Ingredients
For the cake
- 13 oz coconut milk - full fat
- 2 tablespoon apple cider vinegar
- 3 eggs
- ⅓ cup coconut oil - melted and cooled
- ½ tablespoon vanilla
- 1 ½ cup coconut sugar
- 2 ½ cup almond flour
- ¾ cup tapioca flour
- 3 tablespoon cacao powder
- 3 teaspoon baking powder
- ½ teaspoon baking soda
- ½ teaspoon sea salt
- 2 teaspoon red food coloring
For the icing
- 3 oz dairy free cream cheese - softened
- ⅔ cup powdered sugar
- 1 tablespoon almond milk - sub any type of milk or water
Instructions
- Preheat oven to 350 F. In a bowl, beat together the coconut milk, apple cider vinegar, eggs, coconut oil, vanilla, and coconut sugar. You can use a stiff whisk for this, a hand mixer, or a stand mixer with the paddle attachment. Mix well until creamy.
- Slowly add the almond flour tapioca flour, baking powder, baking soda, and sea salt to the bowl while still mixing. Only mix until the flours are incorporated. Then add the food coloring and mix to distribute and the batter had turned a bright red color. Depending on the type of food coloring you use, you may need to add a little more coloring. Set the batter aside.
- Grease your bundt pan well with coconut oil. I like to use a sandwich bag for this and will stick my hand inside to prevent a big mess. Coat the inside of the bundt pan well with oil - paying extra attention to the center piece and the sharp edges around the sides. You want a nice coating of oil all over the pan.
- Pour the batter into the greased bundt pan. Tap the pan on the counter a few times to even off the top before baking in the oven for 1 hour until the edges of the cake start to pull away from the sides. Let the cake cool down completely before removing.
- While the cake is cooling in the pan, prepare the cream cheese icing by mixing the softened cream cheese, powdered sugar, and almond milk in a small bowl with a spoon, whisk, or hand mixer. Mix until smooth and creamy. Set aside until ready to top the cake.
- To remove the cake, run a thin knife around the edges of the pan and around the center piece to make sure the cake isn't sticking anywhere. I also like to shake the pan gently up and down to make sure the cake has released - you should feel the weight of the cake moving around inside the pan.Place a serving platter, flat plate, or a cake stand upside down on top of the bundt pan. Firmly grasp both the platter with the palms of your hands and the bundt pan with your fingers and flip the cake over so it's now right side up on top of the platter. Gently tap the pan on the platter to release the cake. If you find the cake isn't releasing, flip it back around and run the knife around it to find out where it's sticking and repeat.
- Drizzle the cream cheese icing over the top of the cake and allow it to run down the sides. It will harder after about 15 minutes which will make it easier to slice and serve.
- When ready to enjoy, slice into pieces with a sharp knife and serve!