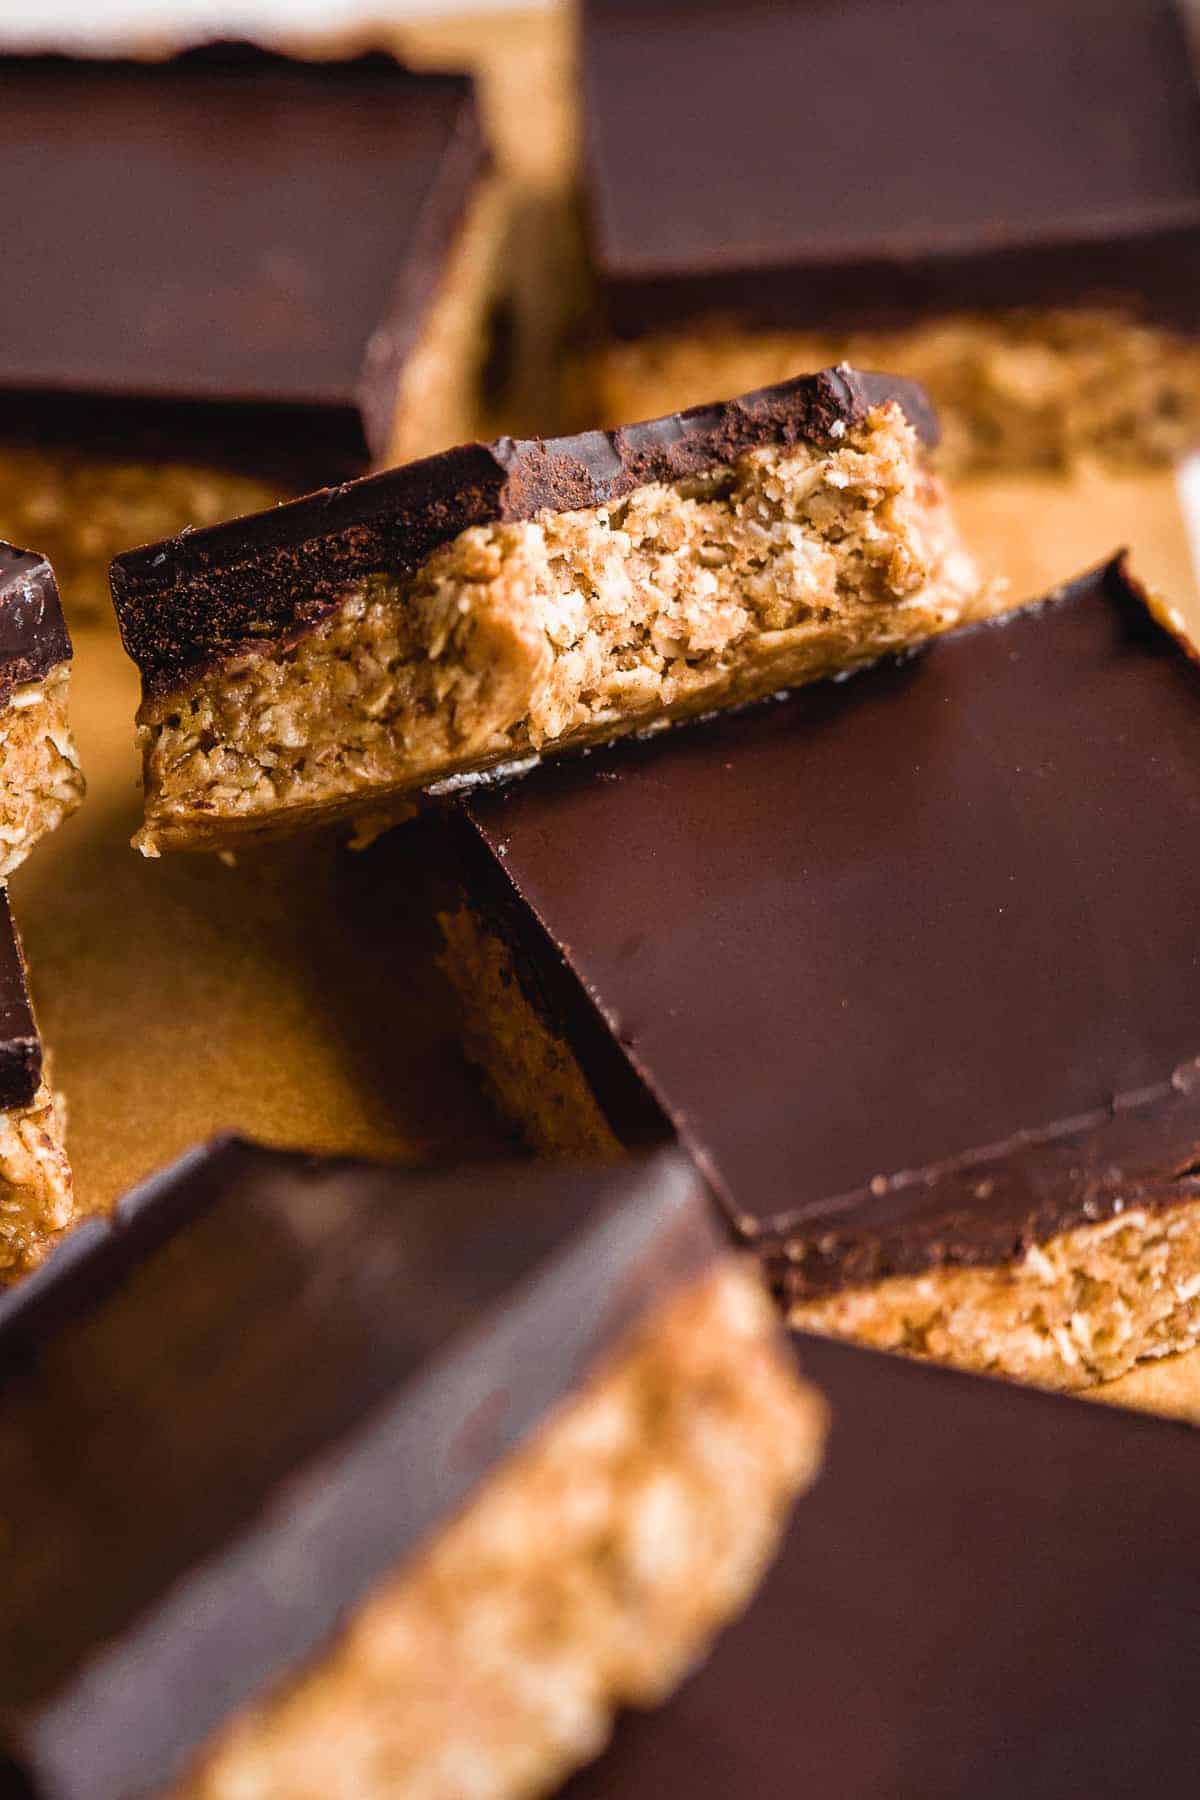
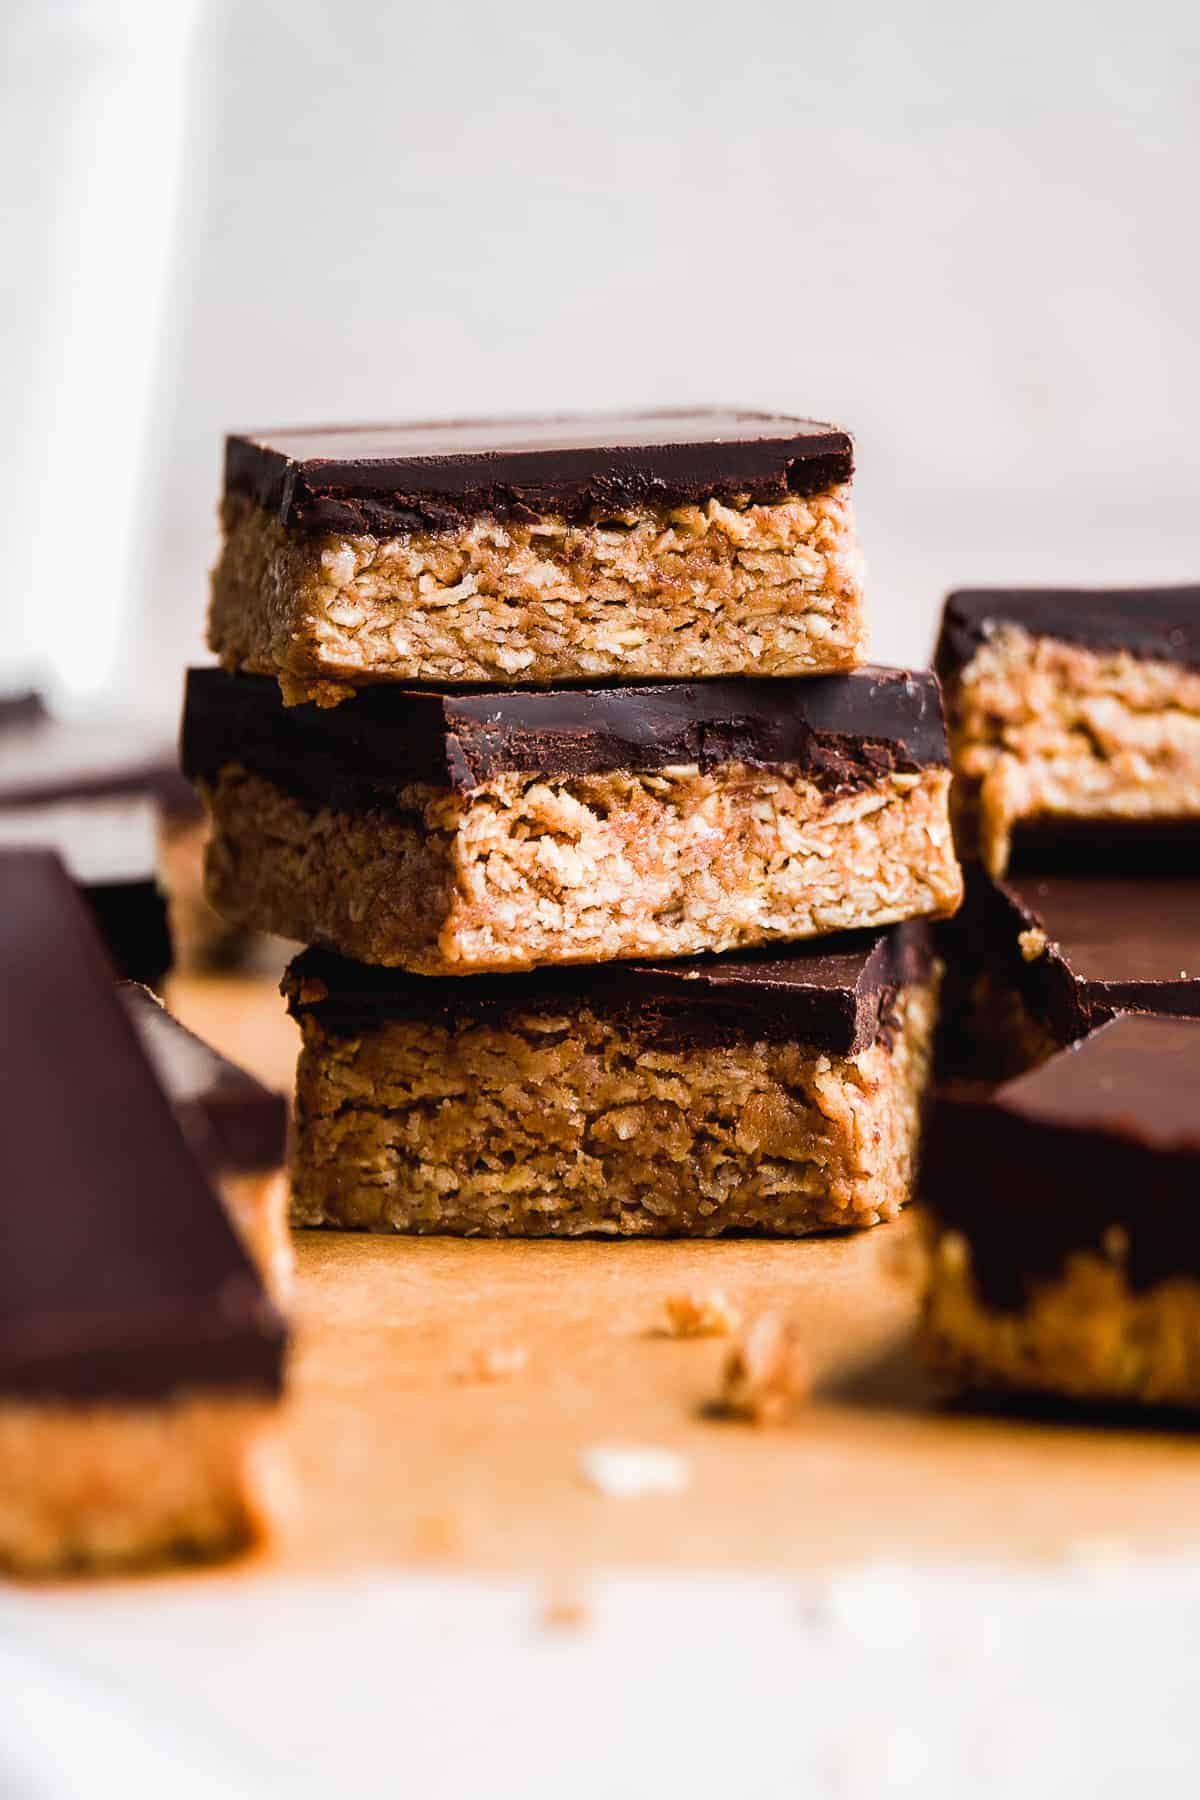
No-Bake Chocolate Oat Bars
These healthy no bake chocolate oat bars resemble a chocolate rice krispie treat, but better! Each one has a crispy, nutty oat base with a thick layer of dark chocolate on top. They take about 10 minutes to whip up with just 4 wholesome ingredients. Easily made gluten free and dairy free and even your kids will love them!
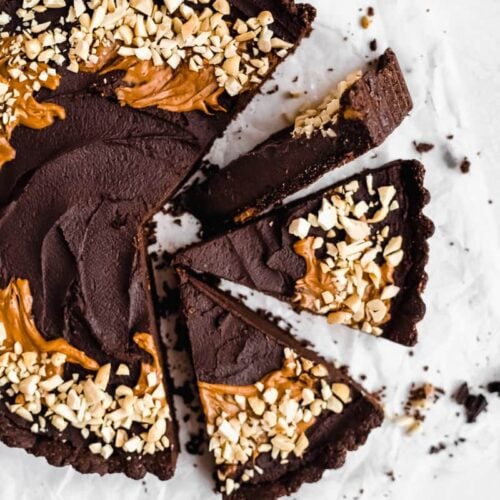
With nothing but 5 star reviews, these no bake peanut butter bars are simply a must! They have been known to disappear in most an room in about 15 minutes. My coworkers loved them in the office, my friends swoon over them at girl’s nights, and my family requests them every other week - they’re THAT good! Not to mention they only require 4 ingredients making them possibly the easiest sweet treat to whip up!
You'll also love my nut-free chocolate granola bars and gluten free peanut butter blossom cookies!
Jump to:
- Why you'll love these Easy No Baked Chocolate Oat Bars
- No-Bake Chocolate Oat Bars Ingredients
- How to make No Bake Chocolate Oat Bars
- How to cut No-Bake Chocolate Oat Bars
- No Bake Chocolate Oat Bars Recipe Tips
- How to store No-Bake Chocolate Oat Bars
- Chocolate Oat Bars No Bake FAQs
- More From The Fit Peach
- Recipe
- Reviews
Why you'll love these Easy No Baked Chocolate Oat Bars
- Made gluten-free and diary free with vegan options
- Crispy oat base with a thick layer of dark chocolate on top
- No bake
- Made with only 4 ingredients
- Take only 15 minutes to whip up
- Great for a healthier treat or snack
- Kid approved!
No-Bake Chocolate Oat Bars Ingredients
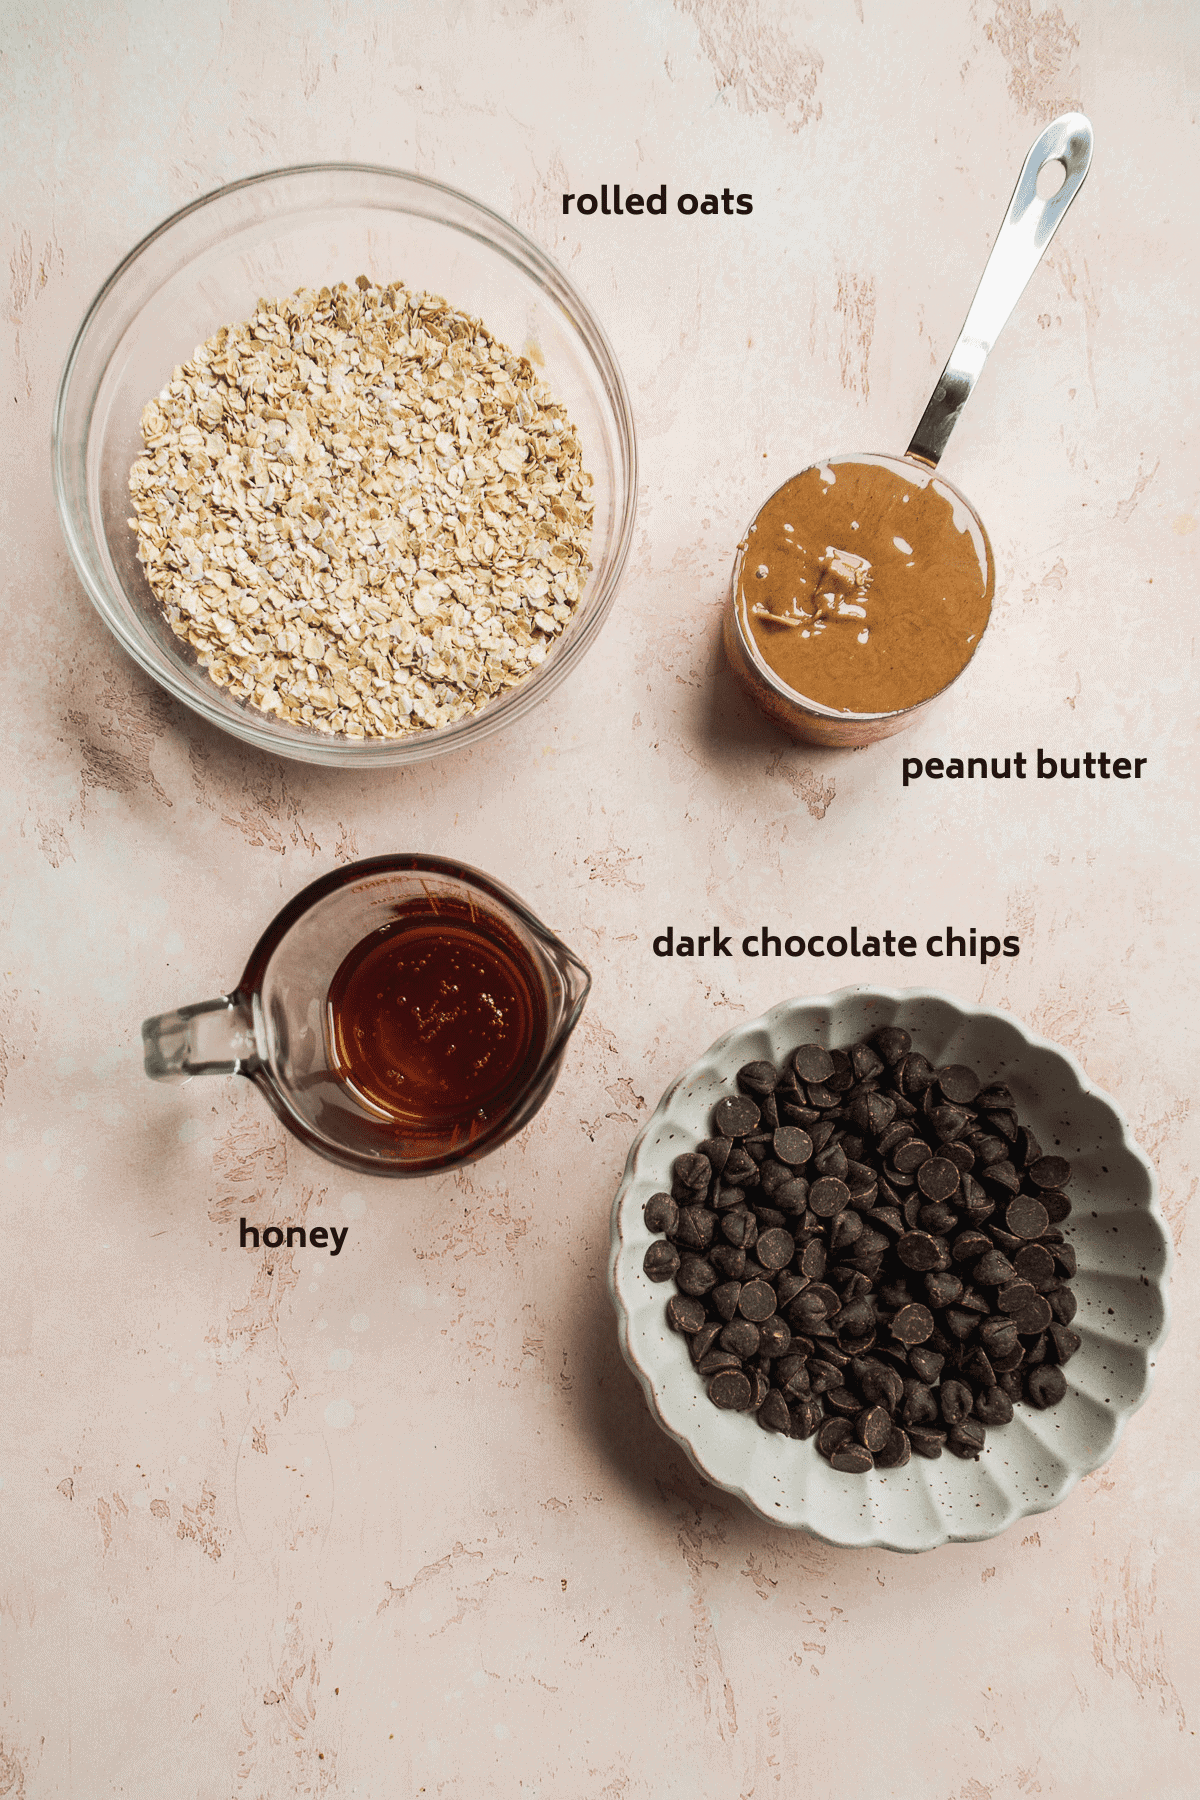
- Rolled oats - I used sprouted oats as they provide some additional nutritional value. However, any style rolled oats (rolled, sprouted, gluten free, whatever fits your fancy) will work with the recipe.
- Peanut butter - You can use any kind of nut butter, just make sure it's natural. I love switching up the peanut butter with cashew butter every now and then. Others I recommend are almond butter or sunflower seed butter to make it nut-free. If you're using salt-free peanut butter, you will want to add a pinch of salt to the oat mixture.
- Honey - Honey and oats just go together which is why I used it in this recipe. However, if you’re vegan or prefer an alternative sweetener, I highly recommend pure maple syrup, date syrup, or coconut nectar as a replacement.
- Chocolate chips - For the chocolate layer on top! I used dairy-free dark chocolate morsels. The Enjoy Life brand is one of my favorites but feel free to use whichever kind of chocolate you have on hand. Semi-sweet chocolate chips is also a great option!
How to make No Bake Chocolate Oat Bars
These no bake chocolate oat bars are super easy to make. This is a great recipe to make with kids! You will need a large mixing bowl, an 8 X 8 pan, and a pot to melt the chocolate.
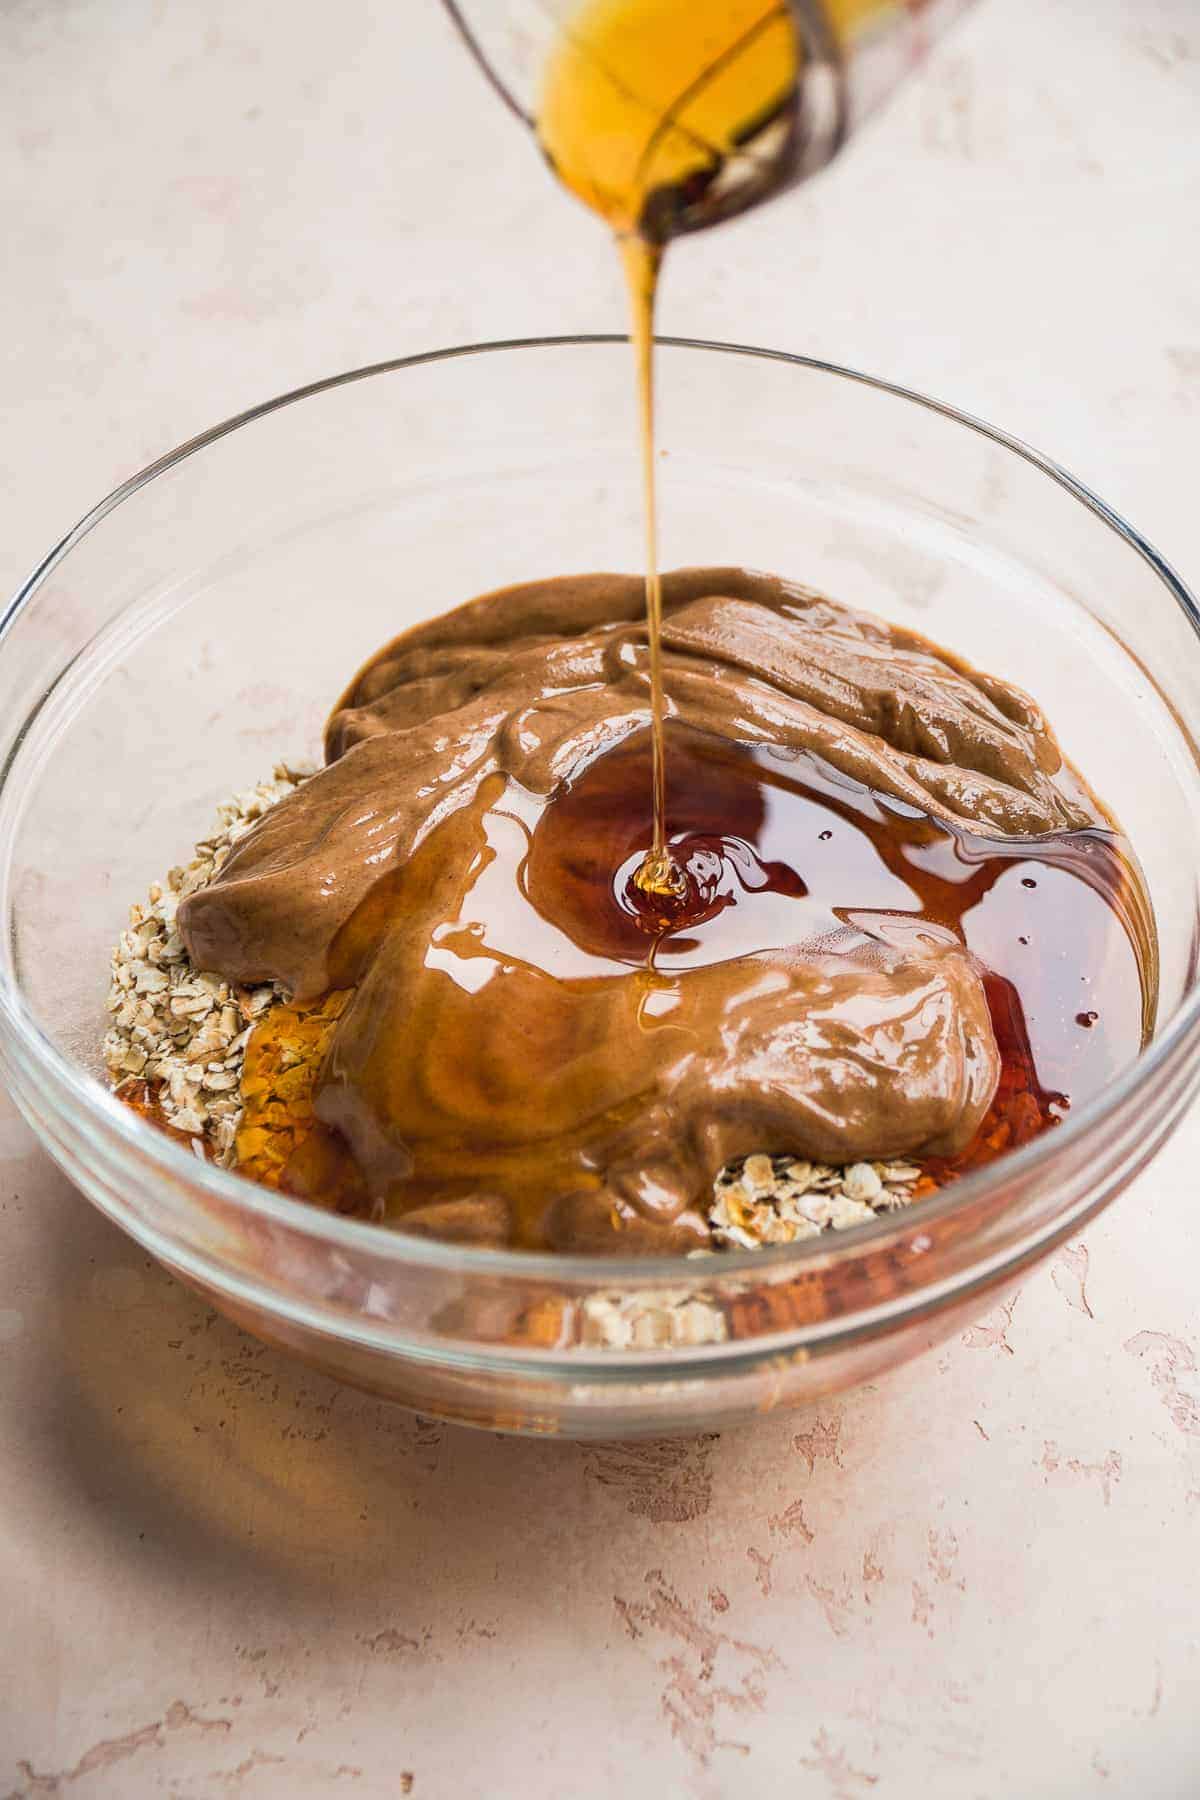
Step 1 : Prepare the oat mixture. In a bowl, add the rolled oats, peanut butter, and honey and mix well to distribute. The oats should be coated in the peanut butter. This is best done with a rubber spatula or a mixing spoon.
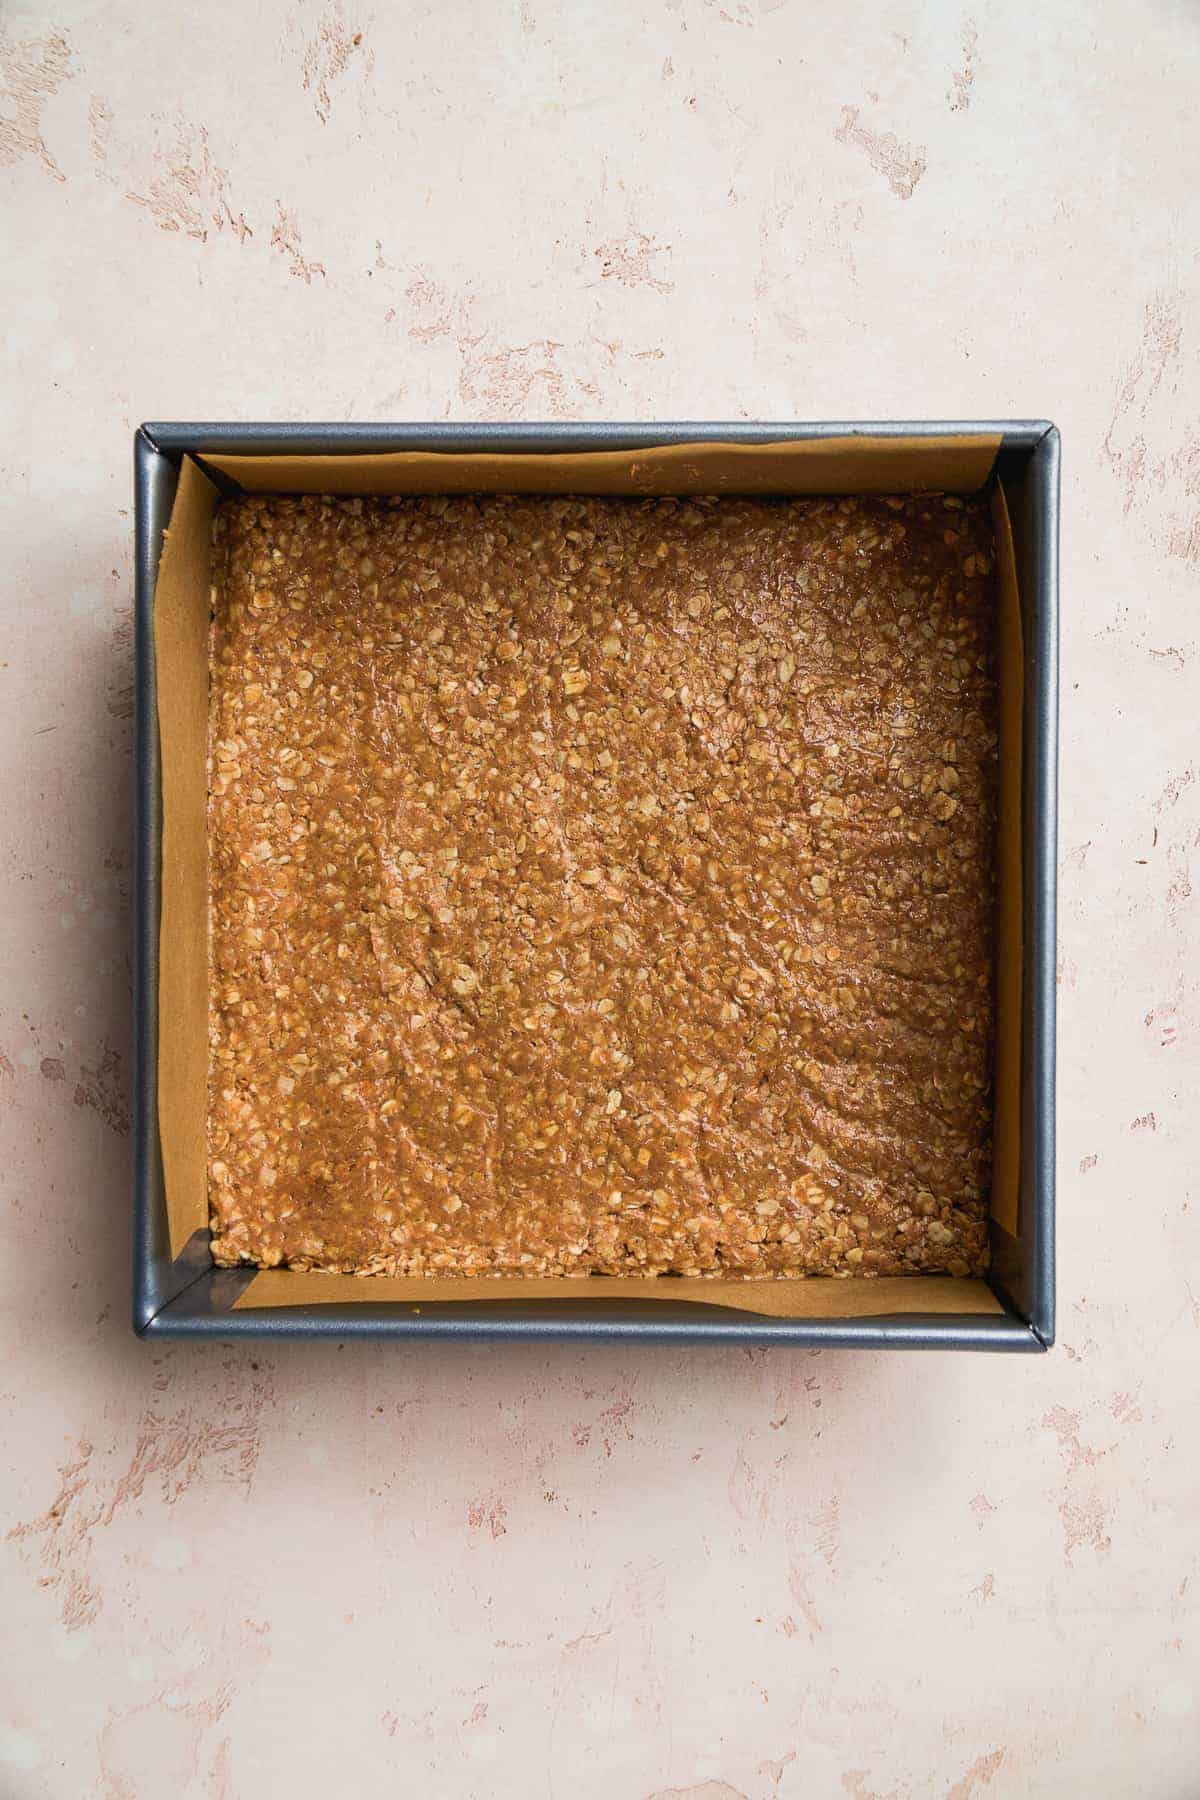
Step 2 : Press into a pan. First, place a piece of parchment paper in an 8 X 8 pan for easy clean up. This also makes it simple to remove the bars from the pan.
Press the oat peanut butter mixture into the prepared baking dish. Use your hands or the back of a spoon to press the mixture down tightly, especially into the corners.
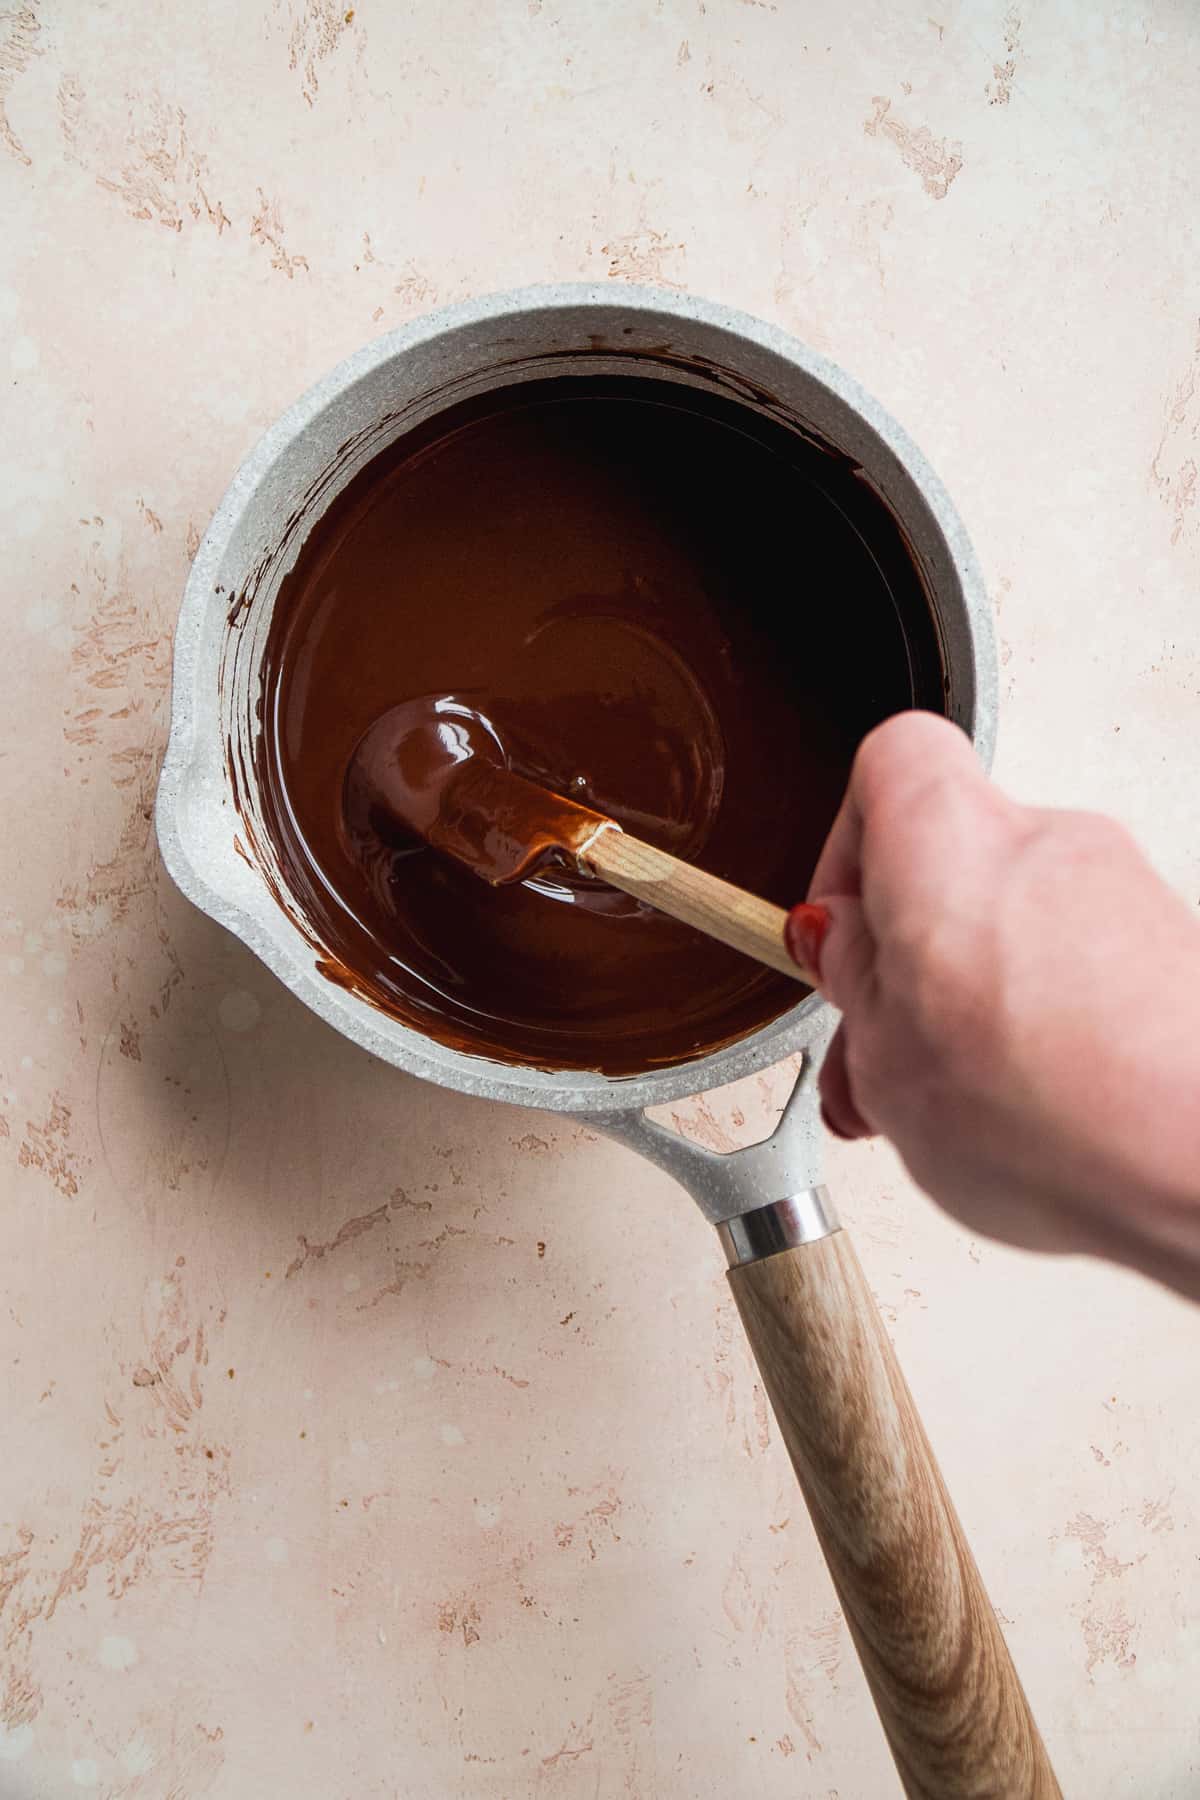
Step 3 : Melt chocolate chips. Place the dark chocolate in a pot or saucepan and melt on the stove over low heat. Stir continuously to prevent burning. You can also melt the chocolate in a bowl over a pot of simmering water. This helps to melt the chocolate easily without worrying about it burning.
You can also use a microwave-sage bowl and heat the chocolate in 10 second intervals until fully melted.
If the chocolate is looking a little too thick, add a tablespoon of coconut oil to help thin it out.
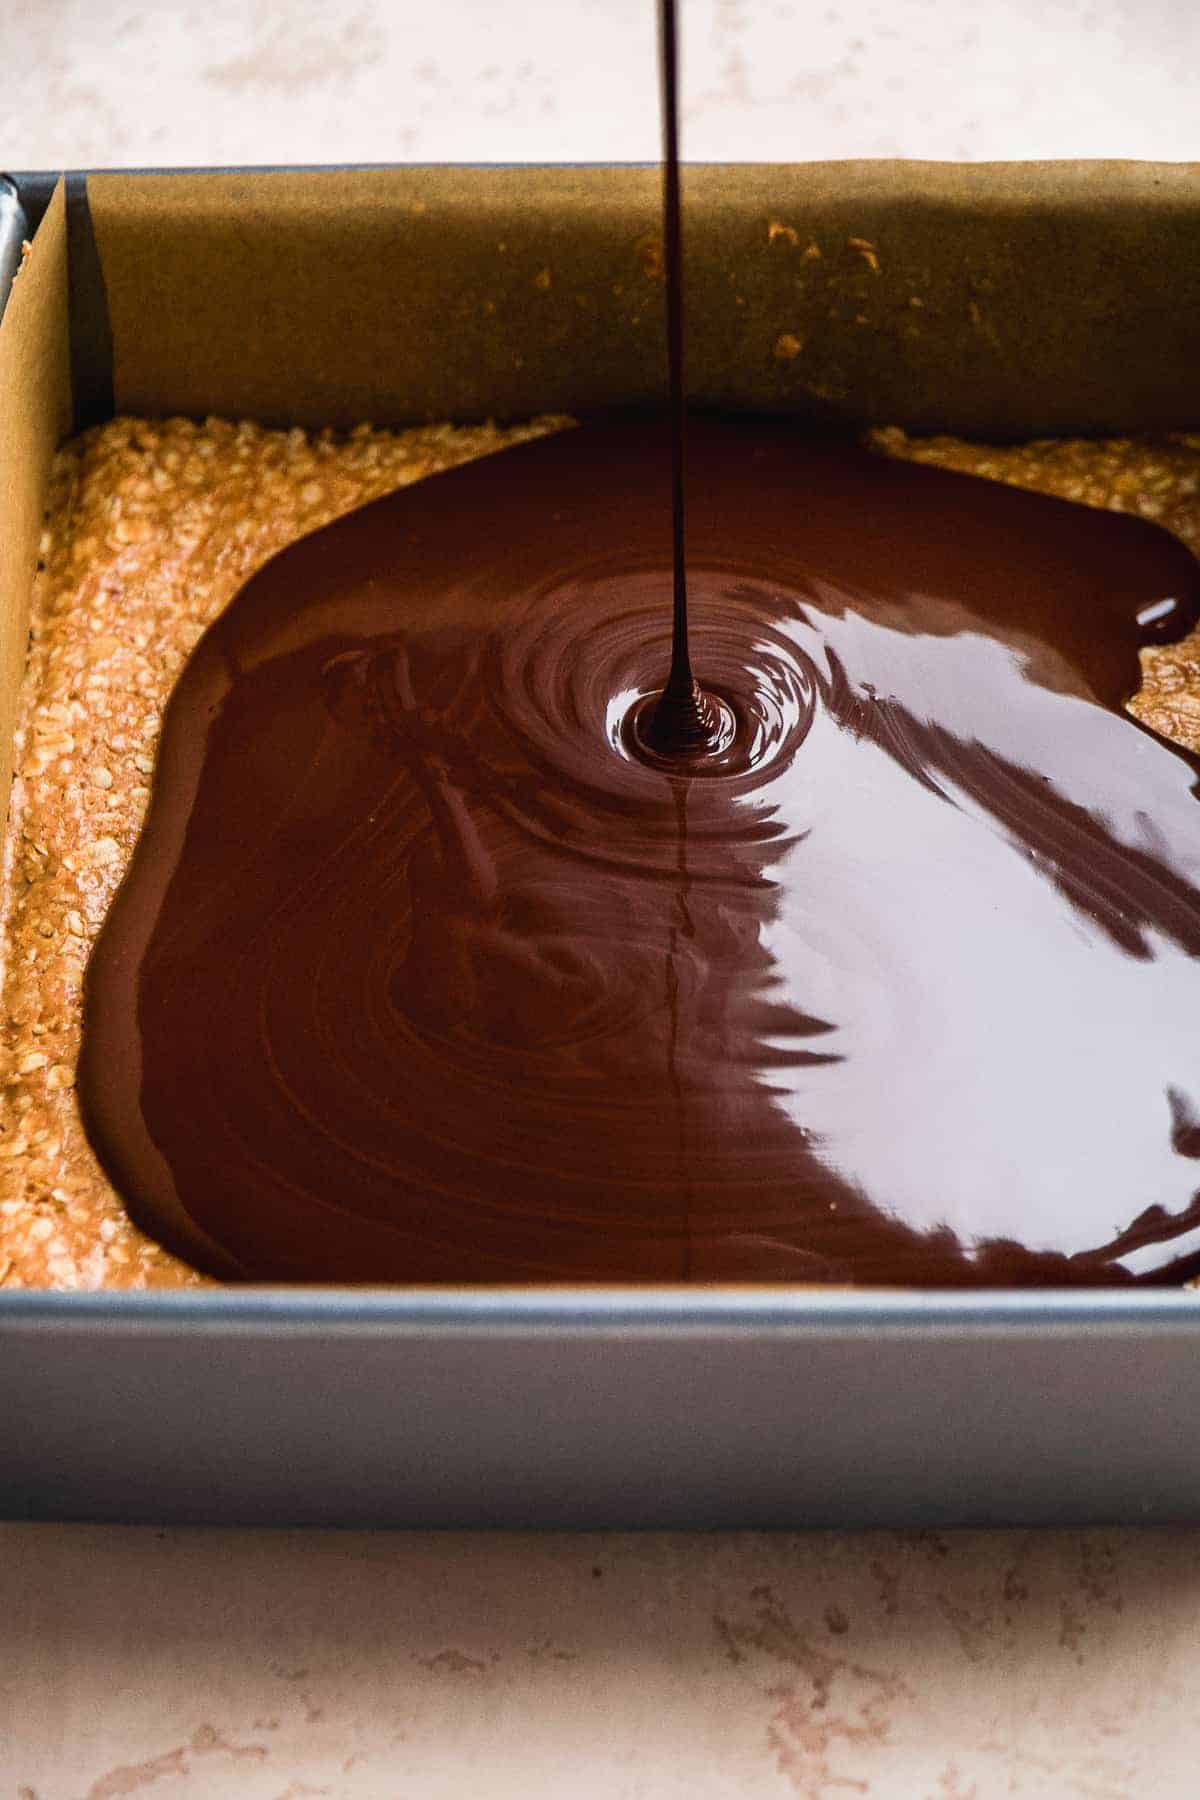
Pour the chocolate mixture over the oat layer and tilt the pan back and forth to move the chocolate around and even it out.
Place the pan in the fridge to chill for at least 30 minutes until the chocolate is set.
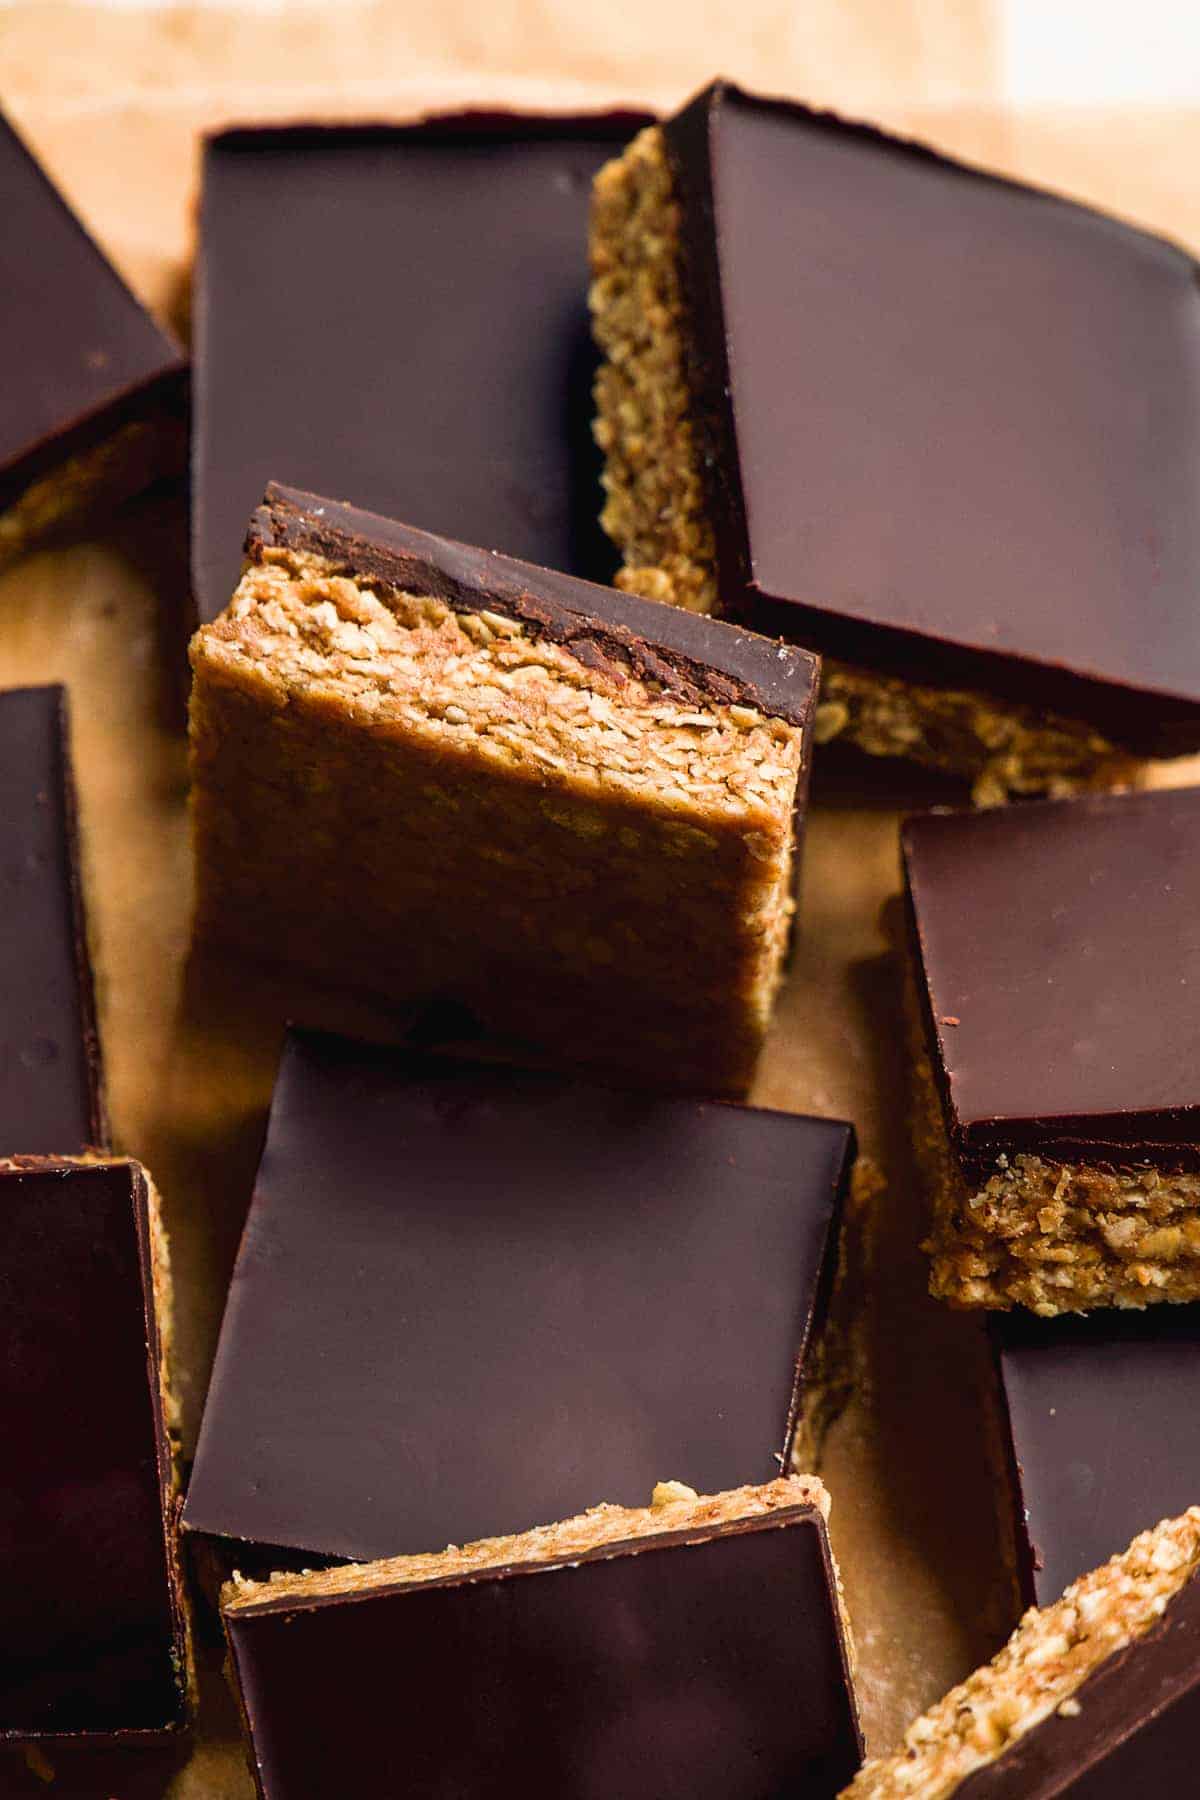
How to cut No-Bake Chocolate Oat Bars
It's best to cut these no bake chocolate oat bars while the chocolate is just set and not super hard. I found the idea time to set was 30 - 45 minutes in the fridge. It's okay if they chill for longer, just let the pan thaw for a few minutes to soften the chocolate a little before cutting.
Use a sharp metal knife to cut the bars. For clean and even cuts, wipe off the knife after each cut.
No Bake Chocolate Oat Bars Recipe Tips
- Make sure the oats are well coated in the peanut butter mixture. This is how the oats bind together. If the oats aren't coated well, you risk the oats layer crumbling into pieces.
- Press the oat mixture into the corners of the pan well.
- Melt the chocolate carefully as chocolate can easily burn if the heat is too high. I like to create a "double boiler" and place a skillet on top of a simmering pot of water to melt chocolate. The steam from the water will effortlessly melt the chocolate.
- Let the chocolate chill until it's just set. You want the chocolate layer to be slightly soft so it's easy to cut the bars with a knife. If the chocolate is too firm, it's way more difficult. I recommend slicing them into bars while the chocolate is just set and then placing them back in the fridge to cool completely.
How to store No-Bake Chocolate Oat Bars
Transfer the bars to an airtight container and make sure they are neatly stacked on top of each other for easy removal.
- Counter - These bars will keep at room temperature but I recommend not stacking them on to of each other. The chocolate will soften so it's best if the bars are spread out to prevent a chocolaty mess.
- Fridge - This is my preferred method of storing. You can stack them or spread them out if storing the fridge.
- Freezer - You can also freeze these bars in a freezer bag or container. Just let them thaw for a few minutes to soften the bar before biting into it. They will keep for 2 - 3 months in the freezer.
Chocolate Oat Bars No Bake FAQs
Yes, swap the peanut butter with sunflower seed butter to make these nut free. Also make sure you use a nut-free chocolate.
More From The Fit Peach
For more nut butter-forward treats, check out my:


PS : If you make this recipe, be sure to leave a star review and comment below! Also be sure to follow along with me on Instagram and Pinterest to stay up to date on all tasty recipes here at The Fit Peach!
Recipe

No Bake Chocolate Oat Bars Recipe
Ingredients
- 2 cups gluten free rolled oats
- 1 cup peanut butter - or nut butter of choice
- ⅓ cup honey - or sweetener of choice like maple syrup or date nectar
- 1 ½ cup dark chocolate chips - I used dairy free
Instructions
- In a mixing bowl, add the rolled oats, peanut butter, and honey and mix well with a rubber spatula or mixing spoon. Mix until the oats are well coated.2 cups gluten free rolled oats, 1 cup peanut butter, ⅓ cup honey
- Line an 8 X 8 pan with parchment paper and press the oat mixture into the pan. Use your hands or the back of a spoon to tightly pack it down, especially in the corners.
- Melt chocolate (I use the double-boiler method and place chocolate in a small pot and stack it on top of a larger pot with simmering water and stir until melted) until thin and smooth. Add a tablespoon of coconut oil if the chocolate looks too thick.1 ½ cup dark chocolate chips
- Pour chocolate over top of oats and place in fridge to set for about 30 minutes.
- Take bars out of the fridge just before the chocolate is set (about 30 mins) and cut into squares. You want the chocolate to be slightly soft so it's easy to cut. If the chocolate is hard, let the pan sit out on the counter for a few minutes to soften the chocolate before cutting.

Absolutely amazing!!!! So easy and so good. My new favorite recipe!
Loved it! My relatives made them and I almost ended up eating all of them! I made some myself, super easy and one of the best recipes ever 🙂
I'm so glad you all enjoyed it!
These were good sweet treat. I made them using crunchy peanut butter and maple syrup. Plus I add some pecans and mini chocolate chips to the oat base
I made these for my son & he absolutely loves them (I’ve had to hide them so he doesn’t eat them all in one go! 😂). I did a taste test before I let him have any & I have to say they are absolutely delicious 😋. Think I’ll be making these regularly.
Made these with pumpkin seed butter and turned out delicious! Super easy to make too
Yay! I'm so glad to hear you enjoyed the recipe!
https://www.horayda.com/reborabti sunflcarl joseline a30b5ac58e